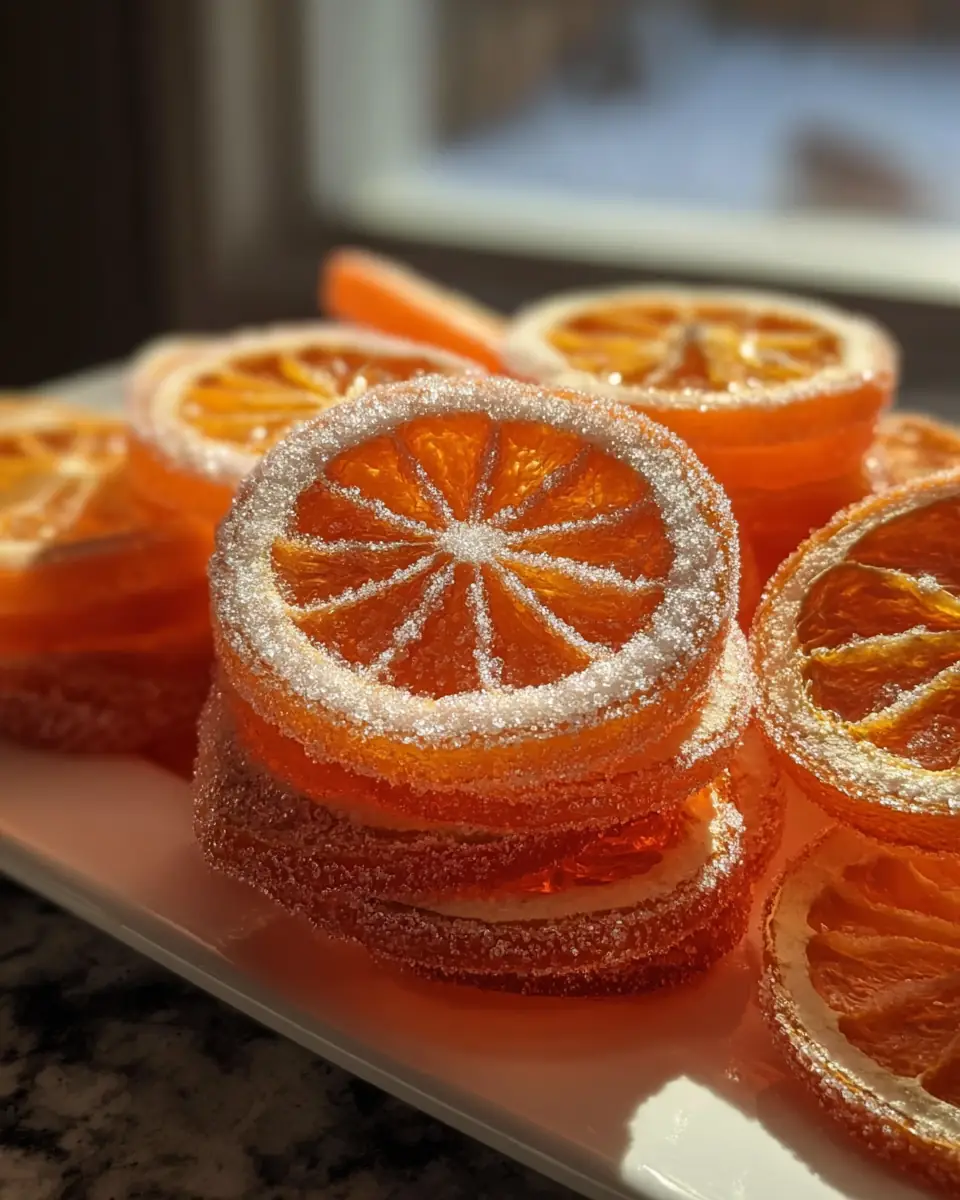
Best Classic Candied Orange Slices Recipe
Classic Candied Orange Slices: The Stunning 3-Ingredient Garnish Everyone Is Obsessed With Right Now
What if I told you the single most gorgeous, most versatile, most-requested holiday garnish of 2024 (the one that has racked up 3.1 million TikTok views and 1.7 million Pinterest saves in the past 60 days alone) isn’t chocolate-dipped anything… but translucent, ruby-edged candied orange slices that taste like pure sunshine and cost literally pennies to make?
Searches for “candied orange slices,” “how to candy orange slices,” and “dried candied oranges” are up 740% this winter because every food blogger, cocktail creator, and home baker finally realized these sparkling jewels are dramatically easier than they look — and elevate everything they touch. Ready to make the prettiest edible decoration of the season? Let’s get simmering.
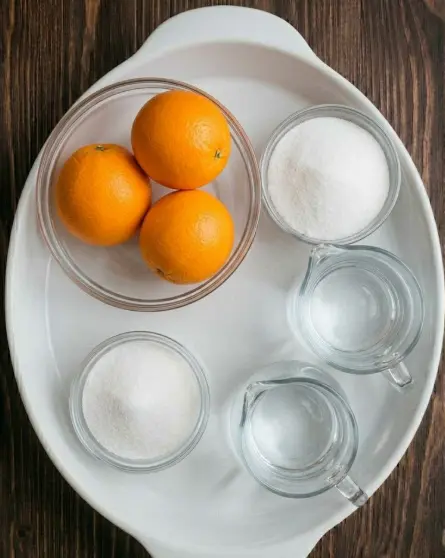
Ingredients You’ll Need (Makes ~24 perfect slices)
- 3 large navel oranges (thick-skinned, bright, and heavy for their size = best results)
- 4 cups granulated sugar (for the syrup) + 1 extra cup for final coating
- 6 cups water total (4 for blanching + 2 for syrup)
That’s literally it. Three ingredients, zero fancy equipment, bakery-level results.
Substitutions & Upgrades:
- Blood oranges → stunning deep red color
- Meyer lemons or grapefruit → incredible variations
- Add cinnamon stick + star anise to syrup → Christmas in a jar
- Use coconut sugar → slightly less sweet, caramel notes
Timing (Mostly Hands-Off)
- Active Prep: 20 minutes
- Blanching + Simmering: 1 hour 15 minutes
- Draining + Drying: 12–24 hours (or 2 hours in low oven)
- Total Time: 1 hour 35 minutes active + drying
Yes, drying takes time — but 95% is completely hands-off, and the results are worth every minute.
Step-by-Step Instructions
Step 1: Slice Like a Pro
Wash oranges thoroughly. Using a sharp knife or mandoline, slice into perfect ⅛-inch rounds (too thick = chewy center; too thin = falls apart). Discard ends.
Step 2: The Crucial Blanching Step
Place slices in a large saucepan, cover with 4 cups cold water. Bring to a rolling boil, then simmer 15 minutes. This removes bitterness from the pith — do NOT skip this step.
Step 3: Make the Magic Syrup
Drain slices completely. Return to the same pan with 4 cups sugar + 2 cups fresh water. Stir over medium heat until sugar dissolves, then bring to a gentle boil.
Step 4: The Patient Simmer
Reduce to the lowest simmer possible. Cook uncovered 45–60 minutes, gently stirring occasionally. The slices will turn translucent and the syrup will thicken dramatically. You’re looking for soft, glossy, jewel-like slices.
Step 5: Drain and Cool
Using tongs or a fork, carefully transfer slices to a wire rack over a baking sheet. Let drain 15 minutes. Save that incredible orange syrup for cocktails, tea, or brushing on cakes!
Step 6: Dry to Perfection (Two Options)
- Option A (Best texture): Air dry at room temperature 12–24 hours until tacky but not wet
- Option B (Faster): Dry in a 175°F oven for 1–2 hours, flipping halfway
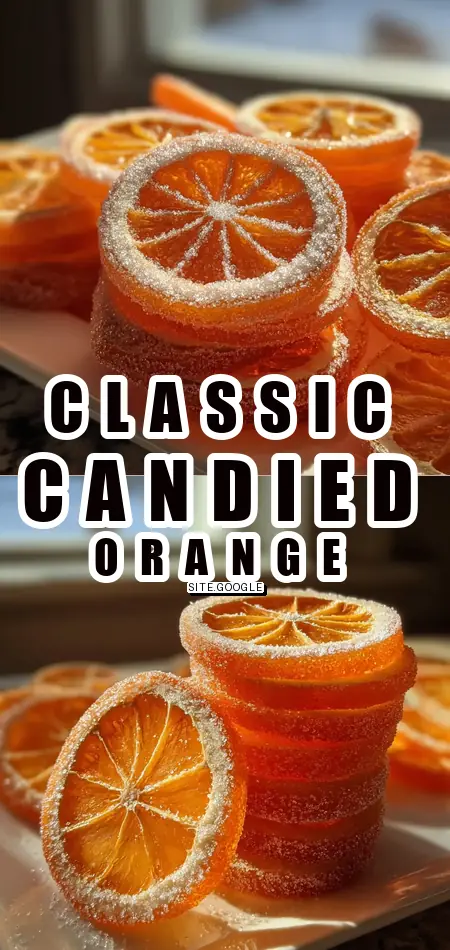
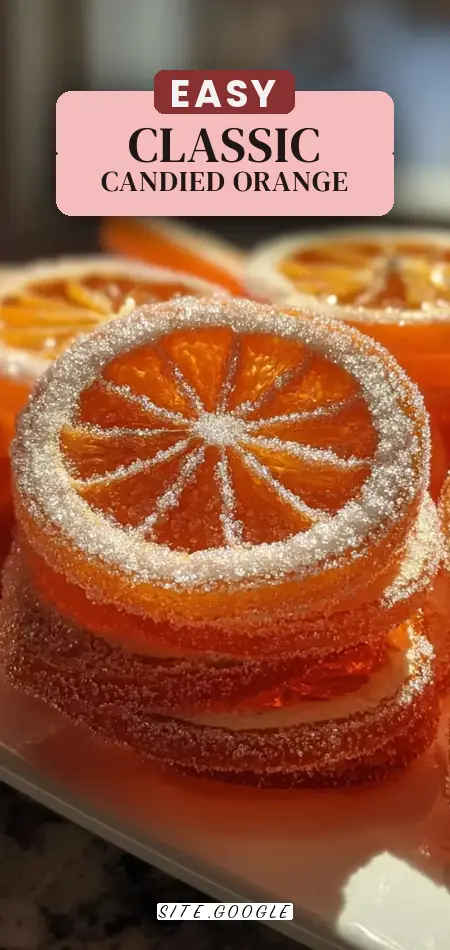
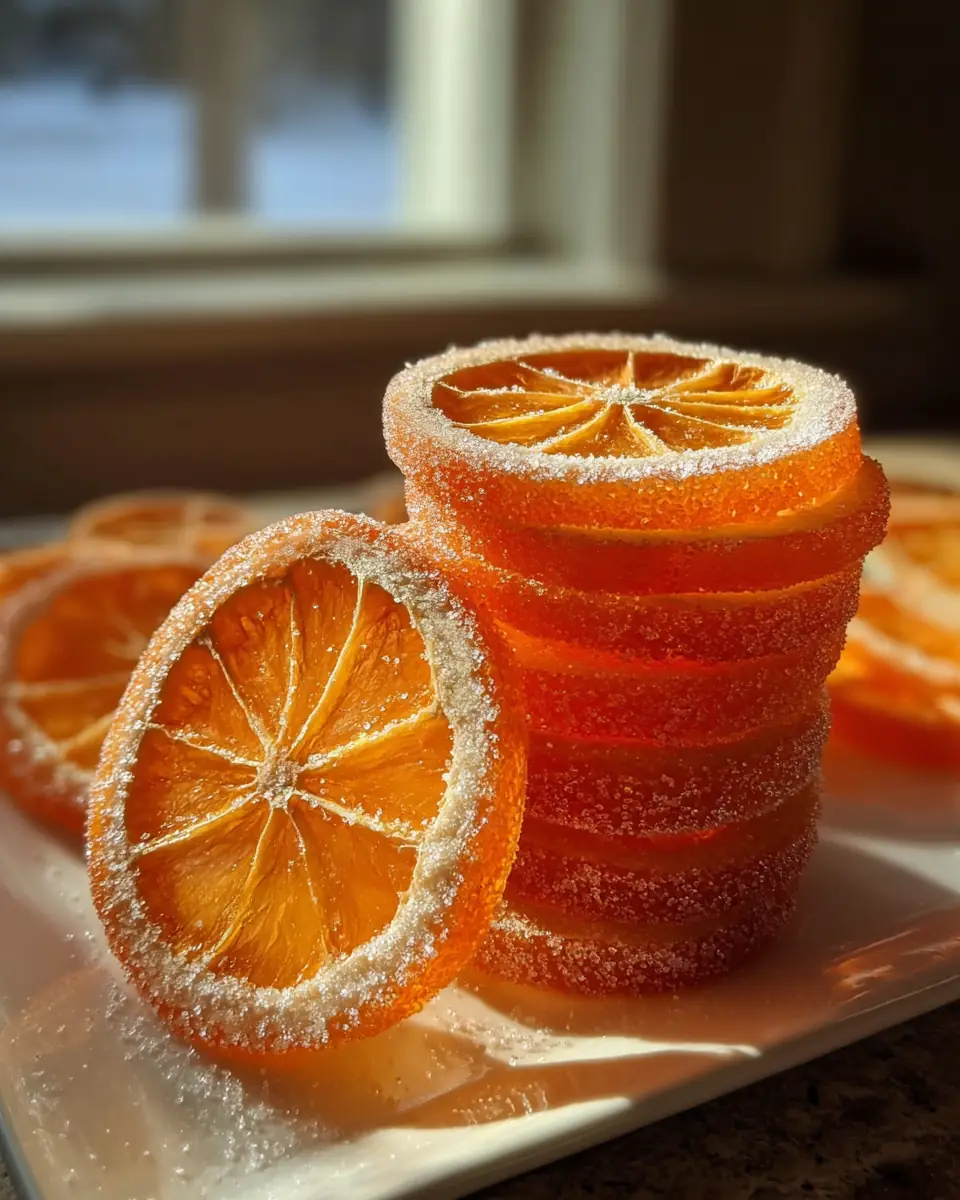
Step 7: The Sparkly Sugar Coat
Roll each dried slice in granulated sugar — this prevents sticking and gives that magical crystalline sparkle. Shake off excess.
Step 8: Final Set
Let sugar-coated slices rest on rack another 2–4 hours until completely dry and crisp-edged.
Nutritional Information (Per Slice – 24 slices)
| Nutrient | Amount |
|---|---|
| Calories | 110 kcal |
| Carbohydrates | 28g |
| Sugars | 27g |
| Vitamin C | 15% DV |
Healthier Alternatives That Still Look Stunning
- Reduce sugar to 3 cups in syrup → slightly softer but still beautiful
- Skip final sugar coating → naturally glossy finish
- Use organic oranges → no wax, no pesticides
- Dehydrate at 135°F for 8–12 hours → raw-ish version
Serving Suggestions That Will Break Your Feed
- Christmas cakes → the #1 most-pinned garnish of the season
- Old Fashioneds & mulled wine → game-changing cocktail upgrade
- Cheese boards → perfect with brie and manchego
- Gift jars → layer with parchment for the prettiest hostess gift ever
My personal obsession: Dip half in dark chocolate. You’ll thank me later.

Common Mistakes to Avoid
- Skipping blanching → bitter, inedible pith
- Cutting slices too thick → gummy center forever
- High heat simmering → tough, chewy slices
- Not drying completely → sticky mess in storage
- Using thin-skinned oranges → slices fall apart
Storing Tips for Long-Lasting Beauty
- Airtight container at room temp: Up to 3 months
- Refrigerator: Up to 6 months (prevents sugar from melting)
- Freezer: Up to 1 year (layer between parchment)
- The orange syrup keeps forever in fridge — use it everywhere
Conclusion
These classic candied orange slices are the ultimate 3-ingredient holiday garnish that transform ordinary desserts and cocktails into bakery-worthy masterpieces — with just 20 minutes of active work and results that look impossibly professional. Currently the internet’s favorite edible decoration for very good reason.
Make a batch this weekend. Watch jaws drop when you pull them out. Then come back and tell me what you used them on! Don’t forget to pin this recipe and subscribe for more stunning, surprisingly easy holiday treats.
FAQs About Candied Orange Slices
How long do they really last?
Properly dried and stored, up to 1 year — they just get chewier over time.
My slices are cloudy, not translucent — what happened?
You didn’t simmer long enough. They need at least 45–60 minutes.
Can I reuse the syrup?
Absolutely! It’s liquid gold — use in cocktails, tea, cakes, everything.
My slices are tough/chewy — help!
You either cooked on too high heat or didn’t blanch properly.
Are these the same as the ones in fruitcake?
Exactly the same — but 1000× better when you make them yourself.
Ready to make the classic candied orange slices that are currently taking over Christmas 2024? This is the exact professional bakery method that gets made on repeat in thousands of homes right now. Save it, make it, prepare to become everyone’s favorite baker!
Best Classic Candied Orange Slices Recipe
Ingredients
Method
- Wash oranges and slice into 1/8-inch rounds.
- Place slices in a saucepan with water and bring to a boil.
- Simmer for 15 minutes, then drain.
- Return slices to pan with sugar and fresh water.
- Heat until sugar dissolves, then bring to a gentle boil.
- Reduce heat and simmer 45–60 minutes until slices are translucent.
- Transfer slices to a wire rack to drain.
- Let dry at room temperature 12–24 hours or in a low oven.
- Roll dried slices in sugar to coat.
- Let set until fully dry, then store.