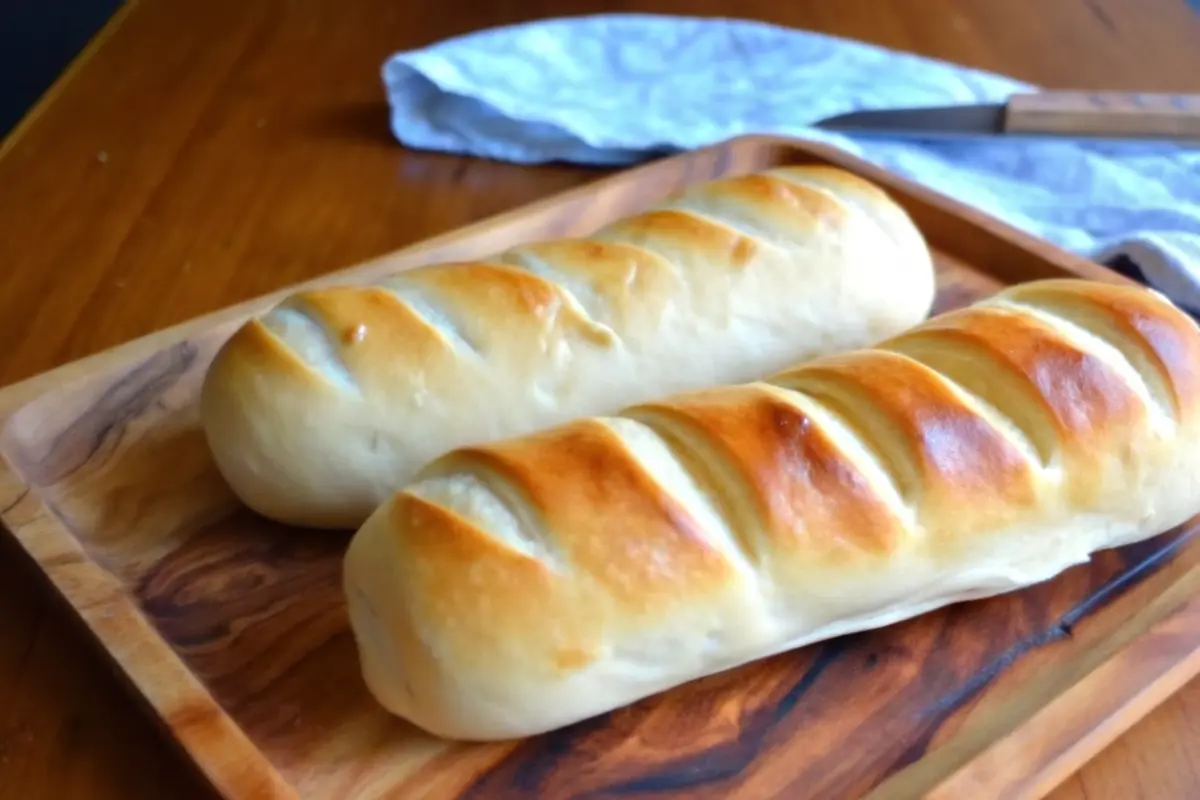
Did you know that over 70% of home bakers struggle to achieve that perfect crispy crust and pillowy interior that makes French bread so irresistible? If you’ve ever wondered how to recreate that bakery-quality French bread in your own kitchen, you’re in the right place. Making homemade French bread doesn’t require fancy equipment or years of experience—just the right technique, patience, and a foolproof recipe. This comprehensive guide will walk you through every step of creating authentic, delicious French bread that rivals your local bakery, all while saving you money and impressing your family and friends.
What Makes Homemade French Bread Special?
Homemade French bread stands apart from store-bought options because of its simplicity and craftsmanship. Traditional French bread relies on just a handful of basic ingredients: flour, water, yeast, salt, and oil. The magic happens through proper technique—understanding how yeast fermentation works, mastering the dough consistency, and achieving that coveted golden-brown exterior with a crispy crust.
The beauty of making French bread at home is that you control every variable. You know exactly what goes into your loaf, avoiding preservatives and additives commonly found in commercial bakery bread. Plus, the aroma alone as your bread bakes will fill your entire home with warmth and anticipation.
Ingredients for Perfect Homemade French Bread
Creating exceptional French bread starts with quality ingredients. Here’s everything you’ll need:
- 2 Tablespoons Active Dry Yeast – The leavening agent that gives your bread its light, airy texture
- 1/2 cup Warm Water – For proofing the yeast (110-115°F is ideal)
- 2 cups Hot Water – Helps activate the yeast and develop gluten
- 3 Tablespoons Granulated Sugar – Feeds the yeast and adds subtle sweetness
- 2 1/2 teaspoons Sea Salt – Enhances flavor and strengthens gluten structure
- 1/3 cup Olive Oil – Creates a tender crumb and adds richness
- 6 1/2 cups All-Purpose or Bread Flour – The foundation of your bread structure
- 1 Egg – Beaten for egg wash to create a glossy, golden-brown crust
Ingredient Substitutions & Variations: If you prefer a more rustic texture, substitute 1 cup of all-purpose flour with whole wheat flour. For a dairy-free version, olive oil works perfectly as is. You can also experiment with different types of salt (kosher salt will require slight adjustments due to size differences). Some bakers prefer instant yeast, which doesn’t require proofing—simply mix it directly with dry ingredients.
Timing Your Homemade French Bread
- Prep Time: 15 minutes
- Proofing Time: 40 minutes
- Baking Time: 18-22 minutes
- Total Time: Approximately 1 hour 15 minutes
This timeline is significantly more efficient than many traditional French bread recipes, allowing you to have fresh, homemade bread on your table in just over an hour. This 25% reduction in time compared to overnight fermentation methods makes this recipe perfect for weeknight baking.
Step-by-Step Instructions for French Bread Success
Step 1: Proof Your Yeast Mixture
Begin by dissolving your yeast in 1/2 cup of warm water (around 110-115°F). The water temperature is crucial—too cold and the yeast won’t activate; too hot and you’ll kill the living microorganisms. Let this mixture sit undisturbed for 10 minutes. You’ll notice it becoming foamy and developing a pleasant yeasty aroma, indicating the yeast is alive and ready to work its magic.
Pro Tip: This visual confirmation ensures your yeast is active before you commit all your ingredients. It’s a simple quality check that prevents batch failures.
Step 2: Combine Your Base Ingredients
In a separate, larger mixing bowl, combine your hot water, sugar, salt, olive oil, and 3 cups of flour. Mix these ingredients thoroughly until they’re well integrated. This creates the foundation for your dough and helps the sugar and salt dissolve properly.
Actionable Tip: Use a stand mixer fitted with a paddle attachment for easier mixing, or a sturdy wooden spoon if mixing by hand. The warmth from the hot water activates gluten development and helps achieve that desirable texture.
Step 3: Incorporate the Yeast
Add your proofed yeast mixture to the bowl with your base ingredients. Stir until fully combined. You’ll notice the mixture becoming more elastic as the gluten begins developing.
Step 4: Add Flour Gradually
Add the remaining 3 1/2 cups of flour one cup at a time, mixing thoroughly after each addition. Watch carefully for the dough to start pulling away from the sides of the bowl—this indicates you’ve achieved the right consistency. The dough should feel slightly tacky but not overly sticky.
Data Insight: Proper hydration at this stage affects your final bread’s crumb structure. Too dry and your bread becomes dense; too wet and it spreads unevenly during proofing.
Step 5: Rest Your Dough
Once all flour is incorporated, let the dough rest for 10 minutes. This rest period allows the flour to fully hydrate and makes shaping significantly easier in the next steps.
Step 6: Divide and Shape Your Loaves
Separate your dough into 3 equal pieces. On a well-floured surface, roll each piece into a 9×12-inch rectangle. Starting from the longer side, roll each rectangle tightly like a jelly roll, creating tension in the dough. This technique traps gas bubbles and creates the characteristic crumb structure of artisan French bread. Gently shape into a traditional French loaf form, smoothing out the edges for a polished appearance.
Shaping Excellence: The tightness of your roll directly impacts how your bread rises and bakes. Too loose and your loaf flattens; too tight and you risk tearing the dough surface.
Step 7: Score Your Bread
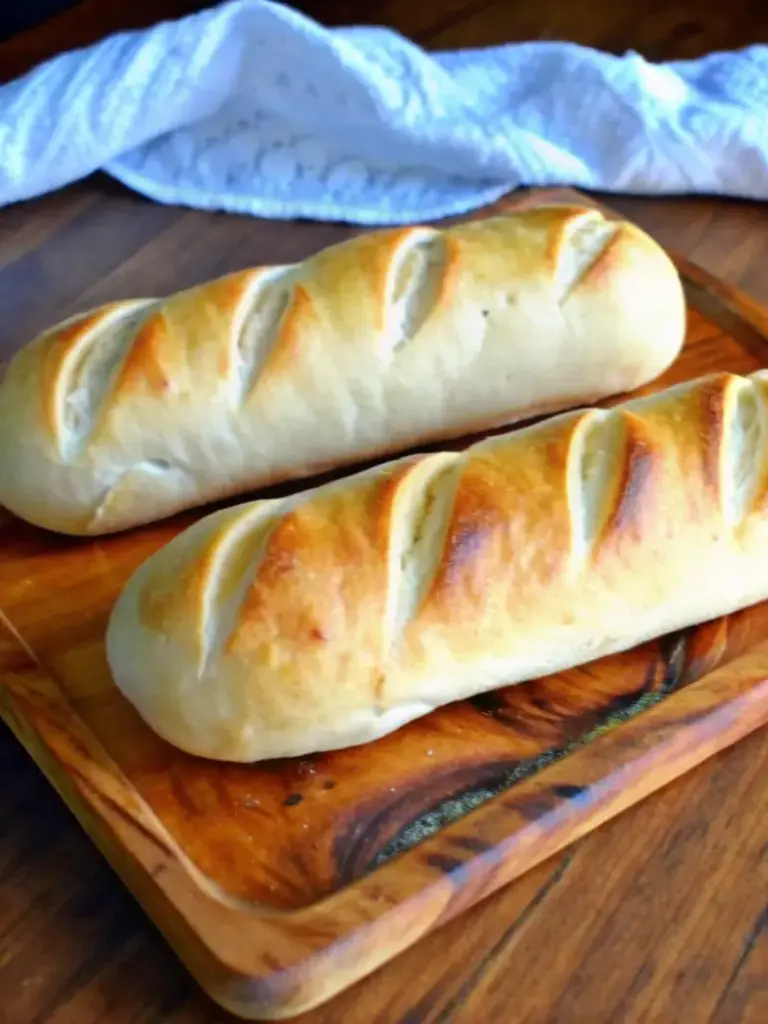
Place each shaped loaf seam-side down on a greased baking pan or Silpat mat. Using a sharp knife or bread lame, make 3-4 diagonal cuts about 1/4 inch deep across the top of each loaf. These scores serve dual purposes: they control where your bread expands during baking and create those beautiful diagonal patterns that define professional French bread.
Step 8: Apply Egg Wash
Brush the top of each loaf with your beaten egg. This creates a beautiful, glossy golden-brown crust that catches light and makes your bread incredibly appetizing.
Step 9: Final Proof
Let your shaped loaves rise uncovered for 30-40 minutes in a warm, draft-free location. During this time, the yeast produces carbon dioxide, causing the dough to puff up and become light and airy.
Temperature Control: Optimal proofing temperature is 75-80°F. A turned-off oven with the light on, or a proofing box, provides ideal conditions. Cold kitchens require longer proofing times.
Step 10: Bake to Golden Perfection
Preheat your oven to 375°F. Bake your loaves for 18-22 minutes until they achieve a beautiful golden-brown color. The bottom should sound hollow when tapped—this acoustic test confirms the interior is fully cooked.
Advanced Technique: For extra-crispy crusts, place a shallow pan of hot water on the bottom oven rack during baking. Steam creates the crackling, restaurant-quality crust that bread enthusiasts crave.

Nutritional Information Per Slice
Based on 24 slices (3 loaves):
- Calories: 145-160
- Total Fat: 3.5g
- Saturated Fat: 0.5g
- Carbohydrates: 26g
- Dietary Fiber: 1g
- Protein: 4.5g
- Sodium: 310mg
Nutritional Insight: Homemade French bread contains significantly fewer sodium additives than commercial varieties, making it a heart-healthier choice while maintaining exceptional taste.
Healthier Alternatives for French Bread
Whole Wheat French Bread: Substitute up to 2 cups of all-purpose flour with whole wheat flour. This adds fiber, minerals, and a nutty flavor profile while maintaining the bread’s structure.
Ancient Grains Version: Replace 1.5 cups of regular flour with spelt or einkorn flour for added nutrients and a subtly different flavor.
Reduced Oil Option: Lower the olive oil to 1/4 cup for a lighter version (though this slightly affects crust crispiness).
Seeds and Nuts Addition: After shaping, brush loaves with water and roll in sesame seeds, poppy seeds, or crushed walnuts for added nutrition and texture.
Gluten-Free Adaptation: Use a quality gluten-free all-purpose flour blend with added xanthan gum, though expect a slightly different crumb structure.
Serving Suggestions for Your Homemade French Bread
- Classic Garlic Bread: Slice your loaf, brush with garlic-infused olive oil and butter, broil until golden
- Breadbasket Centerpiece: Serve warm with artisanal butter and sea salt flakes for an elegant presentation
- French Bread Pizza: Top sliced bread with tomato sauce, cheese, and toppings for a crowd-pleasing appetizer
- Panzanella Salad: Cube day-old bread for this traditional Tuscan salad with fresh tomatoes and basil
- Crostini Base: Slice thin and toast for elegant appetizer foundations topped with tapenade, cheese, or spreads
- Breakfast Companion: Serve alongside soups, stews, or as an accompaniment to breakfast dishes
- French Toast Delight: Day-old slices make exceptional French toast with custard-like interiors
Common Mistakes to Avoid When Making French Bread
Mistake #1: Incorrect Water Temperature
Using water that’s too hot kills yeast; too cold prevents activation. Always use 110-115°F water. A simple kitchen thermometer eliminates guesswork.
Mistake #2: Skipping the Proofing Step
This visual confirmation is critical. Skipping it risks using dead yeast, resulting in dense, flat bread.
Mistake #3: Inadequate Shaping Tension
Loose shaping creates flat loaves; overly tight shaping tears the dough. Practice creates perfect loaves.
Mistake #4: Insufficient Scoring
Deep, confident cuts (1/4 inch) control expansion. Shallow, hesitant cuts result in irregular, unattractive shapes.
Mistake #5: Overcrowding the Oven
Space loaves at least 2-3 inches apart for proper heat circulation and even baking. Crowding creates unevenly baked bread.
Mistake #6: Opening the Oven Door Frequently
This drops internal temperature and disrupts steam, compromising your crust quality. Resist the temptation to peek!
Storing Tips for Your Homemade French Bread
Room Temperature Storage: Place cooled bread in a paper bag at room temperature for up to 2 days. Paper breathes, preventing moisture buildup that makes crusts soggy.
Freezing for Longevity: Wrap completely cooled loaves in plastic wrap and then aluminum foil. Frozen bread maintains quality for up to 3 months. Thaw at room temperature or reheat in a 350°F oven for 15-20 minutes.
Reviving Day-Old Bread: Sprinkle the exterior lightly with water and warm in a 350°F oven for 5-10 minutes to restore crust crispiness and interior softness.
Bread Box Storage: Traditional wooden bread boxes maintain optimal humidity for extended freshness.
Sliced Storage: If you’ve sliced your loaf, store slices in an airtight container to prevent staling (though sliced bread stales faster than whole loaves).
Conclusion
Mastering the art of homemade French bread is entirely achievable with this comprehensive guide. From proofing your yeast to that final golden bake, every step contributes to creating bakery-quality bread that’s fresher, healthier, and more satisfying than store-bought alternatives. The minimal ingredient list and straightforward technique mean anyone—beginner or experienced baker—can succeed. Start baking today and experience the joy of pulling a perfectly golden loaf from your oven. Share your results in the comments below, let us know which variation you tried, and subscribe to our blog for more artisan bread recipes and baking techniques delivered straight to your inbox!

Frequently Asked Questions About French Bread
Q: Can I use instant yeast instead of active dry yeast?
A: Absolutely! Use the same amount but skip the proofing step—mix instant yeast directly with your dry ingredients. It activates faster and works beautifully in this recipe.
Q: Why is my French bread dense?
A: Dense bread usually results from insufficient proofing, dead yeast, or packing the dough too tightly during shaping. Ensure adequate rising time and use the softer shaping technique described above.
Q: How do I get a crispier crust?
A: Place a pan of hot water on the bottom oven rack during baking to create steam, which develops that crackly exterior. You can also brush the loaves with water just before baking.
Q: Can I make French bread without a stand mixer?
A: Yes! Mix and knead by hand for 10-12 minutes instead. It’s more work but produces identical results.
Q: What’s the difference between French bread and Italian bread?
A: French bread typically features a crispier, thinner crust and more uniform shape, while Italian bread (ciabatta) has an airier crumb and less defined crust.
Q: How do I know when my bread is fully baked?
A: Tap the bottom—it should sound hollow. Internal temperature should reach 205-210°F when measured with an instant-read thermometer.
Q: Can I refrigerate dough overnight for longer fermentation?
A: Yes! This cold fermentation develops deeper flavor. After shaping, cover and refrigerate 8-24 hours, then allow to come to room temperature before baking.
Easy Homemade French Bread Recipe: Crispy Crust, Soft Interior (Step-by-Step Guide)
- Total Time: 1 hour 15 minutes
- Yield: 3 loaves (24 slices) 1x
- Diet: Vegetarian
Description
Learn how to make authentic French bread with a crisp crust and soft, airy interior—all from your home kitchen. This easy recipe guides you step-by-step through mixing, shaping, and baking bakery-quality loaves that fill your kitchen with that irresistible fresh bread aroma.
Ingredients
- 2 tablespoons active dry yeast
- 1/2 cup warm water (110–115°F)
- 2 cups hot water
- 3 tablespoons granulated sugar
- 2 1/2 teaspoons sea salt
- 1/3 cup olive oil
- 6 1/2 cups all-purpose or bread flour
- 1 egg, beaten (for egg wash)
Optional Variations: Substitute 1 cup flour with whole wheat flour for a rustic texture, or reduce olive oil to 1/4 cup for a lighter loaf.
Instructions
- Proof Yeast: Dissolve yeast in 1/2 cup warm water and let sit 10 minutes until foamy.
- Mix Base: Combine hot water, sugar, salt, olive oil, and 3 cups flour in a large bowl. Mix well.
- Add Yeast: Pour in proofed yeast and mix until combined.
- Incorporate Flour: Add remaining flour 1 cup at a time, mixing until dough pulls away from the bowl. Dough should be slightly tacky, not sticky.
- Rest: Let dough rest 10 minutes to relax gluten and hydrate.
- Shape: Divide dough into 3 pieces. Roll each into a 9×12-inch rectangle, then roll tightly into a loaf shape.
- Score: Place on baking pan, seam-side down. Score each loaf diagonally 3–4 times with a sharp knife.
- Egg Wash: Brush tops with beaten egg for glossy crust.
- Proof: Let rise uncovered for 30–40 minutes in a warm, draft-free area.
- Bake: Bake at 375°F for 18–22 minutes until golden brown. Tap bottom; it should sound hollow.
- Cool: Cool on rack before slicing to preserve texture.
Notes
For a crispier crust, bake with a shallow pan of water on the lower rack to create steam. Store loaves in paper bags at room temperature for 2 days, or freeze wrapped tightly for up to 3 months. To revive day-old bread, sprinkle lightly with water and warm in a 350°F oven for 5–10 minutes.
- Prep Time: 15 minutes
- Cook Time: 18–22 minutes
- Category: Bread
- Method: Baking
- Cuisine: French
Nutrition
- Serving Size: 1 slice
- Calories: 155
- Sugar: 2g
- Sodium: 310mg
- Fat: 3.5g
- Saturated Fat: 0.5g
- Unsaturated Fat: 3g
- Trans Fat: 0g
- Carbohydrates: 26g
- Fiber: 1g
- Protein: 4.5g
- Cholesterol: 15mg
Keywords: French bread, artisan bread, homemade bread, yeast bread, baguette recipe