Pop-Tarts are a beloved pastry treat enjoyed by people of all ages. While store-bought versions are convenient, making homemade Pop-Tarts allows for creativity, better flavors, and a sense of accomplishment. By making them from scratch, you have complete control over the ingredients, ensuring that every bite is as delicious as possible. Not only can you customize the flavors, but you can also experiment with unique combinations that aren’t available in stores.
Whether you love classic brown sugar cinnamon, fruity fillings, or even chocolate Pop-Tarts, this guide will walk you through the step-by-step process to create delicious homemade versions from scratch. With just a few simple ingredients and some basic baking techniques, you’ll be able to recreate this nostalgic treat in your own kitchen. Plus, making homemade Pop-Tarts is a fun activity for families, allowing children and adults alike to enjoy the process together.
Why Make Homemade Pop-Tarts?
If you’ve ever wondered why people go through the trouble of making DIY Pop-Tarts, here are some compelling reasons:
- Customization – Choose your favorite flavors, fillings, and toppings.
- Better Taste – Freshly baked pastries offer superior flavor compared to store-bought ones.
- Fun & Creative – A great baking activity for families and friends.
- Texture Control – Adjust crispiness and flakiness to your liking.
Before diving into the recipe, let’s take a quick look at how Pop-Tarts came to be. Originally introduced in the 1960s by Kellogg’s, these convenient pastries quickly became a breakfast staple. The idea was inspired by a similar product called “Country Squares,” developed by a competitor. However, Kellogg’s branding and marketing strategy helped Pop-Tarts gain immense popularity across the United States.
Over the years, the product evolved from simple fruit-filled pastries to a diverse range of flavors, including chocolate, s’mores, and limited-edition varieties. Today, toaster pastries remain a household favorite. King Arthur Baking shares an insightful history about the origins of toaster pastries and their rise in popularity, showcasing how these pastries have stood the test of time and continue to be enjoyed worldwide.

Ingredients and Tools for Homemade Pop-Tarts
To make your own batch of homemade Pop-Tarts, you will need a few essential ingredients and baking tools.
Ingredients for the Dough:
- 2 1/2 cups all-purpose flour
- 1 cup unsalted butter (cold, cubed)
- 1 tablespoon sugar
- 1 teaspoon salt
- 6 tablespoons ice-cold water
Ingredients for Classic Brown Sugar Cinnamon Filling:
- 1/2 cup brown sugar
- 2 teaspoons cinnamon
- 1 tablespoon all-purpose flour
- 1/4 cup softened butter
Ingredients for Fruit-Filled Pop-Tarts:
- 1/2 cup strawberry, raspberry, or blueberry jam (any favorite fruit preserve)
- 1 tablespoon cornstarch (optional for thickening)
Icing & Toppings:
- 1 cup powdered sugar
- 1-2 tablespoons milk
- 1/2 teaspoon vanilla extract
- Sprinkles (optional)
Essential Tools:
- Rolling pin
- Pastry brush
- Fork
- Baking sheet
- Parchment paper
- Sharp knife or pizza cutter
For a more in-depth pastry dough guide, Sally’s Baking Addiction provides excellent tips on achieving the perfect consistency.
Step-by-Step Guide to Making Homemade Pop-Tarts
1. Preparing the Dough
- In a large bowl, combine flour, sugar, and salt.
- Add cubed butter and mix until it resembles coarse crumbs.
- Gradually add ice-cold water while mixing until the dough forms a ball.
- Divide the dough in half, wrap in plastic wrap, and refrigerate for at least 30 minutes.
2. Making the Filling
Brown Sugar Cinnamon Filling:
- Mix brown sugar, cinnamon, and flour in a bowl.
- Stir in softened butter until combined.
Fruit Filling:
- Heat jam in a saucepan over low heat.
- Stir in cornstarch for a thicker consistency.
3. Assembling the Pop-Tarts
- Roll out the chilled dough into a large rectangle (about 1/8 inch thick).
- Cut into equal-sized rectangles (approximately 3×4 inches).
- Place half of the rectangles on a parchment-lined baking sheet.
- Spoon about 1-2 tablespoons of filling onto the center of each base rectangle.
- Place another rectangle on top and press the edges with a fork to seal.
- Poke a few holes on top using a fork to allow steam to escape.
4. Baking the Pop-Tarts
- Preheat the oven to 375°F (190°C).
- Brush each pastry with a light layer of egg wash (1 egg + 1 tablespoon water, beaten).
- Bake for 18-22 minutes until golden brown.
- Let them cool before adding icing.
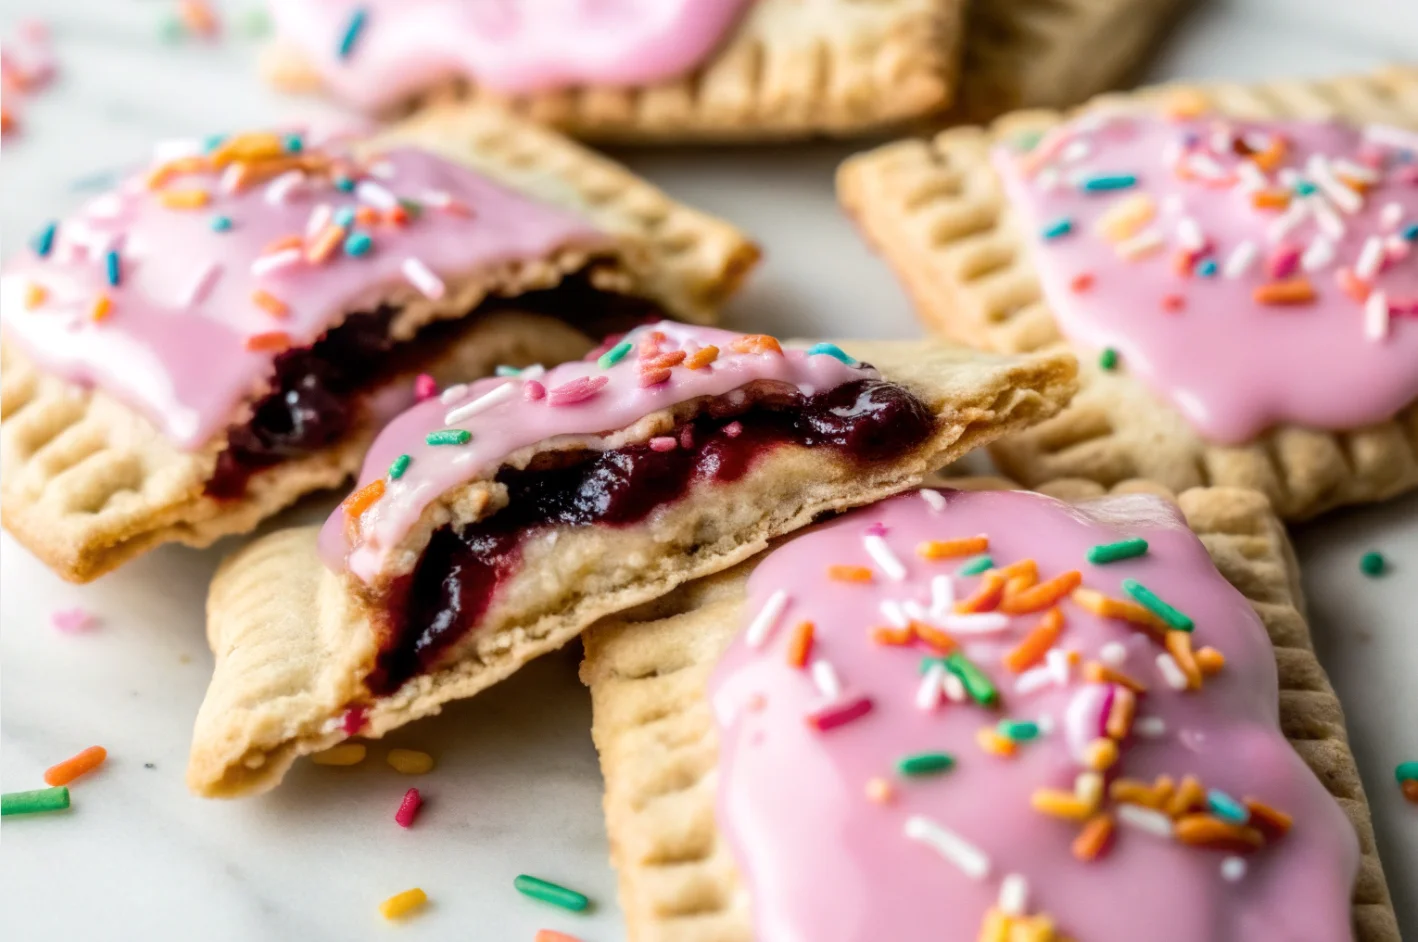
5. Adding the Icing
- Mix powdered sugar, vanilla extract, and milk to form a smooth glaze.
- Drizzle over cooled Pop-Tarts.
- Add sprinkles or extra cinnamon sugar on top.
Popular Variations of Homemade Pop-Tarts
- Chocolate-Filled Pop-Tarts – Replace the filling with chocolate ganache or Nutella.
- Peanut Butter & Jelly Pop-Tarts – Spread peanut butter and jam inside for a unique twist.
- Savory Pop-Tarts – Use cheese, ham, or pesto for a delicious savory option.
Pro Tips for the Best Homemade Pop-Tarts
- Keep the butter cold for a flaky crust.
- Don’t overfill the pastries to prevent leakage.
- Store baked Pop-Tarts in an airtight container at room temperature for up to three days.
- Reheat in a toaster or oven for the best texture.
Frequently Asked Questions (FAQs)
Can I use store-bought pie crust for Homemade Pop-Tarts?
Yes, you can use pre-made pie crust for a quicker version, though the homemade dough provides a more authentic texture.
How do I keep the filling from leaking out?
Make sure to seal the edges properly using a fork and avoid overfilling.
Can I freeze Homemade Pop-Tarts?
Absolutely! Freeze unbaked Pop-Tarts on a baking sheet, then store in a freezer bag for up to two months. When ready, bake straight from frozen, adding a few extra minutes.
What are some unique filling ideas?
Aside from fruit jams, try marshmallow fluff, caramel, or pumpkin spice for seasonal treats.
How long do homemade Pop-Tarts last?
They are best enjoyed fresh but will last up to a week when stored in an airtight container.
Conclusion
Making Homemade Pop-Tarts is a rewarding experience, offering delicious flavors, creative possibilities, and a fun baking project. Whether you stick with classic brown sugar cinnamon or experiment with new fillings, these pastries are guaranteed to be a hit. Plus, they make for an excellent homemade gift or a delightful weekend treat for the whole family.
One of the best parts of making your own Pop-Tarts is that you can tailor them to your preferences. From experimenting with different fillings to adjusting the sweetness of the icing, every aspect can be customized. You can even try different shapes beyond the traditional rectangle, making your pastries more visually appealing and fun to eat.
Try making a batch today and enjoy a homemade twist on this iconic treat! The joy of baking something from scratch is unparalleled, and once you taste a warm, freshly baked Pop-Tart from your oven, you’ll never want to go back to store-bought versions again. So grab your ingredients, roll out your dough, and let your creativity run wild in the kitchen!
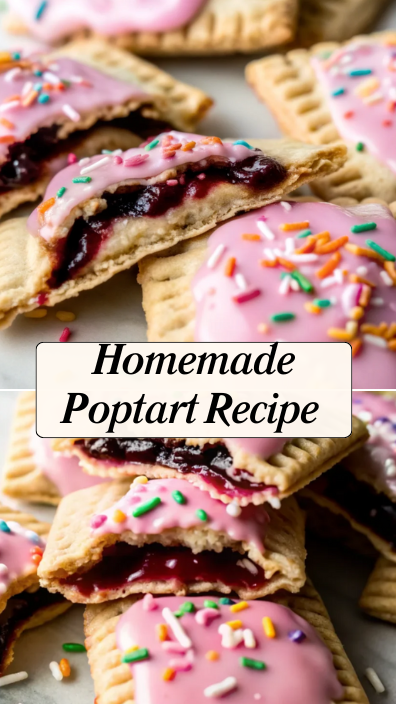

The Ultimate Guide to Homemade Poptart Recipe
- Total Time: 1 hour 5 minutes
- Yield: 8 poptarts 1x
Description
Learn how to make delicious, flaky, and buttery homemade poptarts filled with your favorite flavors. This easy step-by-step guide ensures perfect poptarts every time, whether you prefer fruit jam, chocolate, or cinnamon sugar fillings!
Ingredients
For the Dough:
- 2 ½ cups all-purpose flour
- 1 tablespoon granulated sugar
- 1 teaspoon salt
- 1 cup unsalted butter, cold and cubed
- 6 tablespoons ice water
For the Filling:
- ½ cup fruit jam (strawberry, raspberry, blueberry, etc.) or Nutella
- 1 tablespoon cornstarch (if using jam)
For the Egg Wash:
- 1 egg
- 1 tablespoon milk
For the Glaze:
- 1 cup powdered sugar
- 2 tablespoons milk
- ½ teaspoon vanilla extract
- Sprinkles (optional)
Instructions
Step 1: Make the Dough
- In a large bowl, whisk together the flour, sugar, and salt.
- Cut in the cold butter using a pastry cutter or food processor until the mixture resembles coarse crumbs.
- Gradually add the ice water, mixing until the dough comes together. Do not overwork the dough.
- Divide the dough in half, shape into discs, wrap in plastic wrap, and refrigerate for at least 30 minutes.
Step 2: Prepare the Filling
- If using jam, mix it with cornstarch in a small bowl to prevent it from leaking out during baking.
Step 3: Roll and Cut the Dough
- On a floured surface, roll out one dough disc into a ⅛-inch thick rectangle.
- Cut into 3×4-inch rectangles using a knife or pizza cutter. Repeat with the second dough disc.
- Place half of the rectangles on a parchment-lined baking sheet.
Step 4: Fill and Seal the Poptarts
- Spoon about 1 tablespoon of filling onto the center of each bottom rectangle.
- Brush the edges with the egg wash, then place a second rectangle on top.
- Use a fork to crimp the edges, sealing the poptarts.
- Poke a few holes on the top with a fork to allow steam to escape.
Step 5: Bake
- Preheat oven to 375°F (190°C).
- Brush the tops of the poptarts with the remaining egg wash.
- Bake for 20-25 minutes or until golden brown.
- Let them cool completely before glazing.
Step 6: Prepare the Glaze
- In a small bowl, mix powdered sugar, milk, and vanilla extract until smooth.
- Drizzle over the cooled poptarts and add sprinkles if desired.
- Let the glaze set before serving.
Notes
- For a flakier crust, use very cold butter and refrigerate the dough before rolling.
- You can freeze unbaked poptarts and bake them later for a quick treat.
- Experiment with different fillings like peanut butter, caramel, or homemade apple pie filling.
- Prep Time: 45 minutes
- Cook Time: 20 minutes
- Category: Breakfast, Dessert
- Method: Baking
- Cuisine: American
Keywords: homemade poptarts, easy poptarts, DIY poptarts, breakfast pastries