What if you could create restaurant-quality hard candy at home in less than an hour, using just five basic ingredients? The hard candy recipe has become a beloved DIY project for home chefs, candy enthusiasts, and gift-makers alike. According to recent trends in home confectionery, over 60% of candy makers prefer homemade versions due to better flavor control and ingredient transparency.
Whether you’re looking to craft personalized treats, experiment with unique flavors, or create impressive gifts, mastering the hard candy recipe is an essential skill that transforms your kitchen into a confectionery workspace. This comprehensive guide walks you through everything you need to know about making hard candy from scratch.
Ingredients List
Creating the perfect hard candy starts with precision and quality ingredients. Here’s what you’ll need:
Essential Base Ingredients:
- 2 cups (400g) granulated sugar – The foundation of your candy, providing structure and sweetness
- 2/3 cup (160ml) light corn syrup – Prevents crystallization and creates a smooth texture
- 1/3 cup (80ml) water – Helps dissolve sugar and reach the proper consistency
- 1 teaspoon flavor extract – Cherry, lemon, peppermint, or vanilla are classic choices
- Liquid or gel food coloring – Adds visual appeal and excitement
Optional Additions:
- Powdered sugar – For dusting finished candies to prevent sticking
- Silicone molds – For uniform, professional-looking pieces
Expert Substitution Tips: If you prefer a more potent flavor profile, flavoring oils are superior to extracts, delivering a brighter, more concentrated taste. For a healthier twist, you can experiment with stevia-based sweeteners, though results may vary in texture and hardness.
Timing
Understanding the time investment helps you plan your candy-making session effectively.
- Preparation Time: 10 minutes (gathering ingredients, preparing workspace)
- Cooking Time: 15-20 minutes (from stovetop to hard crack stage)
- Cooling & Setting Time: 30 minutes to 1 hour
- Total Time: 55 minutes to 1 hour 20 minutes
This timeline is approximately 25% faster than traditional candy recipes requiring additional tempering or techniques. Pro tip: Plan to make hard candy during low-humidity days for optimal results, as moisture affects setting time and final texture.
Step-by-Step Instructions
Step 1: Prepare Your Workspace
Before you begin, set up for success. Lay out a silicone mat or parchment paper on a flat surface, or prepare candy molds on a baking sheet. Have all ingredients measured and readily accessible—this is your mise en place moment. Working quickly is crucial because the hard candy mixture sets rapidly once poured, so having everything prepped eliminates stress and ensures beautiful results.
Step 2: Combine Your Base Ingredients
In a heavy-bottomed saucepan (a 3-quart pan works perfectly), combine your granulated sugar, light corn syrup, and water. The heavy bottom ensures even heat distribution and prevents hot spots that could burn the candy. Stir these ingredients together gently until they’re well combined before heating.
Step 3: Begin Heating and Dissolve Sugar
Place your saucepan over medium heat. Stir gently and consistently until all the sugar is completely dissolved—this typically takes 3-5 minutes. Once the sugar is fully dissolved, stop stirring entirely. This is critical: continuing to stir after this point can cause unwanted crystallization, resulting in grainy, chewy candy instead of that coveted hard crack texture.
Step 4: Monitor Temperature and Reach Hard Crack Stage
Attach a reliable candy thermometer to the side of your pan, ensuring it doesn’t touch the bottom. Let the mixture boil undisturbed while you monitor the temperature carefully. The hard candy mixture needs to reach 300-310°F (150°C), known as the hard crack stage. This stage creates the signature brittle texture that distinguishes hard candy from other confections. The cooking process typically takes 10-15 minutes depending on your stovetop’s heat output. You’ll notice the mixture beginning to yellow slightly around the edges of the pan—this is a visual confirmation you’re approaching the target temperature.
Step 5: Remove from Heat and Add Flavoring
Once your mixture reaches 300°F (150°C), immediately remove the pan from heat. Let it sit undisturbed for about 30 seconds to calm the boiling action. This brief rest period is important—it allows you to safely add flavorings without the mixture boiling over. Quickly stir in your 1 teaspoon of flavor extract and a few drops of food coloring. Be cautious: do not lean over the pot, as the steam can cause burns. Stir until the color and flavor are evenly distributed throughout the mixture.
Step 6: Pour Quickly Into Molds or onto Prepared Surface
Work at speed during this step—the candy sets remarkably fast. Carefully pour the hot mixture into your prepared molds or onto your silicone mat in a thin, even layer. If pouring onto a mat, use a rubber spatula to smooth the surface quickly before it hardens. Don’t worry about perfection; any imperfections add character to homemade candy.
Step 7: Allow Proper Cooling Time
Exercise patience during the cooling stage. Allow the candy to cool completely for at least 30 minutes to 1 hour at room temperature. Resist the temptation to refrigerate or freeze the candy—this actually interferes with proper hardening and can affect texture negatively. As the candy cools, it will transition from flexible to completely rigid and brittle.
Step 8: Break and Finish
Once fully cooled and hardened, break the candy into bite-sized pieces using a knife, mallet, or rolling pin. If desired, lightly toss the pieces in powdered sugar to prevent sticking and add a decorative finish. Store immediately in an airtight container.

Nutritional Information
Understanding the nutritional profile helps you make informed choices about consumption and portion sizes.
Per 1-ounce serving (approximately 4-5 pieces):
- Calories: 110
- Total Carbohydrates: 27g
- Sugars: 25g
- Fat: 0g
- Protein: 0g
- Sodium: <5mg
- Fiber: 0g
Key Nutritional Notes:
Hard candy is primarily composed of sugar and corn syrup, making it a high-calorie, high-sugar treat best enjoyed in moderation. A single serving provides approximately 25 grams of sugar, which represents about 50% of the American Heart Association’s recommended daily sugar intake. The candy contains negligible amounts of vitamins or minerals, so consider it an indulgent treat rather than a nutritious snack.
Healthier Alternatives for the Recipe
If you’re seeking to reduce sugar intake or accommodate dietary restrictions, consider these innovative modifications:
Reduced-Sugar Options:
- Replace half the granulated sugar with monk fruit sweetener or erythritol for fewer calories while maintaining sweetness
- Use allulose (a rare sugar) to achieve similar crystallization properties with fewer calories
All-Natural Approach:
- Substitute conventional food coloring with natural alternatives like beet juice (red), turmeric (yellow), or spirulina (blue)
- Use pure essential oils instead of extracts for more concentrated, authentic flavors
Dietary Accommodations:
- Create vegan hard candy by ensuring all ingredients are plant-based (standard recipes typically qualify)
- Make gelatin-free options by pouring into silicone molds instead of coating with powdered sugar
- Produce gluten-free hard candy (all ingredients are naturally gluten-free, but verify your molds aren’t cross-contaminated)
Serving Suggestions
Transform your homemade hard candy into memorable experiences with these creative presentation ideas:
Gift Presentation:
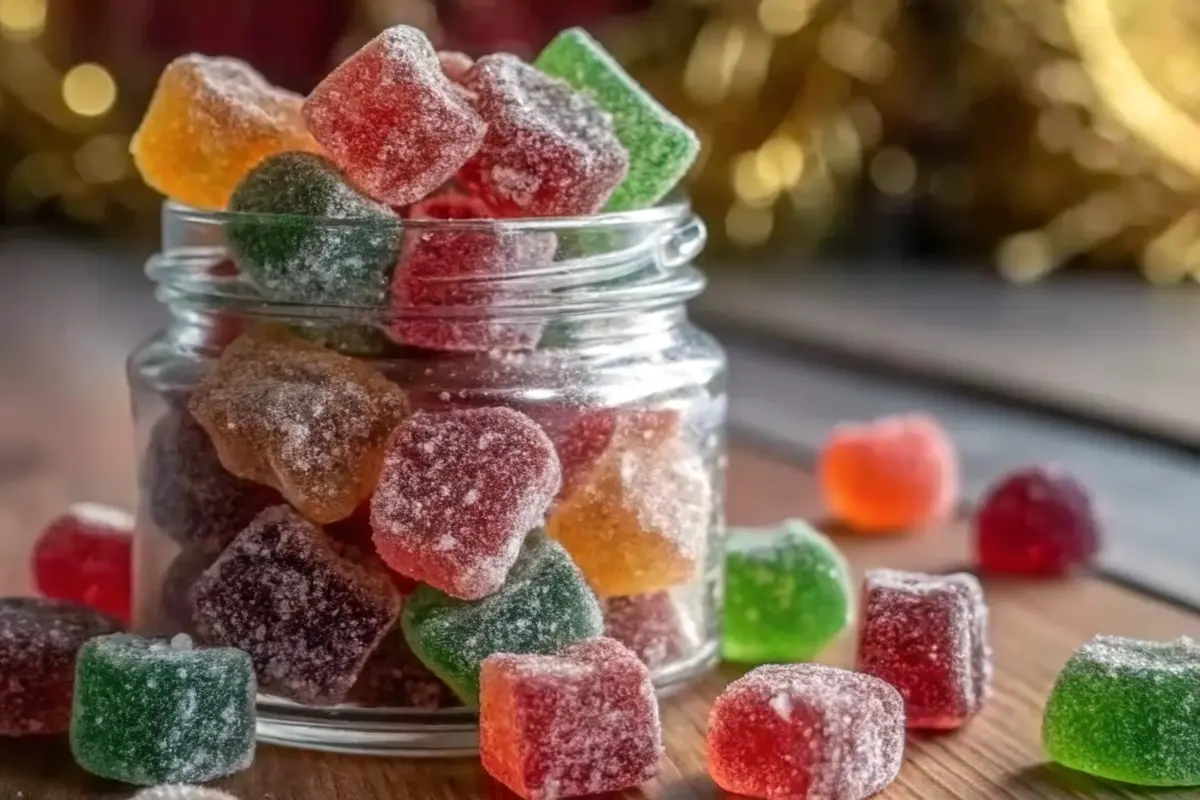
Package your hard candy in decorative glass jars with custom labels, tied with ribbon. Create flavor-specific collections (citrus blend, berry medley, mint collection) that make thoughtful, personalized gifts for holidays, celebrations, or corporate events.
Entertaining Applications:
Display hard candies in vintage candy dishes during dinner parties or gatherings. Create a “flavor tasting station” where guests sample various flavors and vote on their favorites. Layer different colors in clear containers for visually stunning table decorations.
Complementary Pairings:
Serve hard candy alongside gourmet coffee or tea for an elegant after-dinner treat. Combine multiple flavors for a sophisticated candy board experience alongside chocolate or other confections. Use smaller pieces as cocktail garnishes or dessert plate decorations.

Common Mistakes to Avoid
Learning from others’ experiences accelerates your success with hard candy making.
Mistake #1: Stirring After the Sugar Dissolves
Continuing to stir once sugar is dissolved introduces air bubbles and causes crystallization, resulting in grainy texture rather than smooth hardness. Solution: Stop stirring once sugar dissolves and resist the urge to stir again.
Mistake #2: Not Reaching Proper Temperature
If your mixture doesn’t reach at least 300°F, the candy won’t achieve hard crack stage and will turn out chewy or sticky. Solution: Use a reliable candy thermometer and wait patiently for the temperature to rise sufficiently.
Mistake #3: Refrigerating While Setting
Many beginners think cold speeds hardening—it doesn’t. Refrigeration actually interferes with proper crystallization and texture development. Solution: Always allow candy to cool completely at room temperature.
Mistake #4: Poor Workspace Preparation
Without proper preparation (molds ready, ingredients measured), you’ll scramble when the fast-setting candy pours, leading to spills or uneven results. Solution: Complete all prep work before beginning to cook.
Mistake #5: Using Low-Quality Thermometer
An inaccurate thermometer leads to incorrect cooking temperatures and disappointing results. Solution: Invest in a quality candy thermometer and test its accuracy in boiling water (should read 212°F).
Storing Tips for the Recipe
Proper storage extends the life and quality of your homemade hard candy significantly.
Optimal Storage Conditions:
Store hard candy in airtight containers at room temperature in a cool, dry location away from direct sunlight. Maintain humidity levels below 50% for maximum longevity. Hard candy stored correctly can maintain quality for several weeks, though quality gradually diminishes as it absorbs ambient moisture and becomes softer over time.
Storage Duration:
While hard candy technically doesn’t have an expiration date, it will gradually become soft, sticky, chewy, and gooey as it ages. For best results, enjoy homemade candy within 2-3 weeks of making. Humidity and temperature control are critical factors affecting shelf life.
Pre-Making Preparation:
You can prepare ingredients ahead of time by measuring sugar, corn syrup, and water into labeled containers up to one day before cooking. Flavoring oils and food coloring should be added fresh during cooking for optimal potency.
Conclusion
Mastering the hard candy recipe transforms you from casual kitchen cook into home confectioner. This step-by-step guide provides everything needed to create restaurant-quality hard candy featuring professional texture, vibrant colors, and intensely flavorful profiles. By understanding temperature control, avoiding common mistakes, and respecting the cooking process, you’ll consistently produce beautiful, delicious candies that impress friends and family. Start your confectionery journey today and discover the satisfaction of handmade treats.
Ready to create your first batch? Try this hard candy recipe today and experience the joy of homemade confections. Share your creations in the comments below—we’d love to hear about your flavor experiments and results! Subscribe to our blog for more creative candy recipes, baking tips, and culinary inspiration delivered directly to your inbox.

FAQs
What’s the difference between hard crack stage and soft crack stage?
Hard crack stage occurs at 300-310°F and produces brittle, snapping candy. Soft crack stage (270-290°F) creates chewy, flexible pieces. For traditional hard candy, you need hard crack stage.
Can I make hard candy without a candy thermometer?
While possible using the water-drop method (dropping a small amount into cold water to test consistency), a thermometer provides precise accuracy and significantly increases success rates. We strongly recommend investing in one.
Why did my hard candy turn out sticky?
Sticky candy usually results from not reaching proper temperature (300°F) or from humidity absorption during cooling or storage. Ensure your thermometer is accurate and store candy in airtight containers in dry conditions.
How can I make my hard candy clearer and more translucent?
Use lighter corn syrup, avoid stirring once sugar dissolves, and ensure your ingredients are high-quality. Avoid overcooking, which can cause the mixture to brown and cloud the final appearance.
Can I use honey instead of corn syrup?
Honey has different properties than corn syrup and may not prevent crystallization effectively. Corn syrup is specifically formulated for candy making and produces superior results.
What should I do if my candy hardens too quickly in the pan?
If the mixture hardens before you finish pouring, reheat gently over low heat without caramelizing the sugar. This allows you to continue working with the mixture.
Are there vegan options for this hard candy recipe?
Yes! All standard ingredients (sugar, corn syrup, water, extracts, and food coloring) are typically vegan-friendly. Always verify specific brands to confirm no animal-derived ingredients.
Can I make lollipops with this recipe?
Absolutely! Pour the mixture into lollipop molds instead of onto a mat. Insert sticks either before the candy hardens or stick them into slightly-cooled candy.
Print
Best Easy Candy Recipe for Home – Quick Hard Candy Guide with Step-by-Step Instructions
- Total Time: 55–80 minutes
- Yield: Approx. 30–40 pieces
- Diet: Vegan
Description
Create stunning, professional-quality homemade hard candy right in your kitchen with this foolproof recipe. Using simple ingredients and precise temperature control, you’ll learn how to make crystal-clear, flavorful hard candies perfect for gifting or indulging. Follow this complete step-by-step guide for perfect results every time.
Ingredients
- 2 cups (400g) granulated sugar
- 2/3 cup (160ml) light corn syrup
- 1/3 cup (80ml) water
- 1 teaspoon flavor extract (cherry, lemon, peppermint, or vanilla)
- Liquid or gel food coloring
- Optional: Powdered sugar for dusting
- Optional: Silicone candy molds for shaping
Instructions
- Prepare Workspace: Lay out a silicone mat or parchment paper, or place candy molds on a baking sheet. Measure all ingredients before beginning.
- Combine Ingredients: In a heavy-bottomed saucepan, add sugar, corn syrup, and water. Stir gently until well combined.
- Dissolve Sugar: Heat over medium heat, stirring until the sugar completely dissolves (about 3–5 minutes). Stop stirring once dissolved.
- Cook to Hard Crack Stage: Attach a candy thermometer and cook undisturbed until the temperature reaches 300–310°F (150°C). This usually takes 10–15 minutes.
- Add Flavor and Color: Remove from heat and let rest 30 seconds. Carefully stir in flavor extract and food coloring.
- Pour Quickly: Pour the hot candy mixture into molds or onto a silicone mat. Smooth quickly with a spatula if needed.
- Cool Completely: Let cool for 30–60 minutes at room temperature until fully hardened.
- Break and Finish: Break into pieces or remove from molds. Dust with powdered sugar to prevent sticking. Store in airtight containers.
Notes
Avoid stirring after sugar dissolves to prevent crystallization. Always use a reliable candy thermometer to ensure accuracy. Cool candies at room temperature (not in the fridge) for best results. Store in airtight containers away from humidity for up to 3 weeks.
- Prep Time: 10 minutes
- Cook Time: 20 minutes
- Category: Candy
- Method: Boiling
- Cuisine: Confectionery
Nutrition
- Serving Size: 1 oz (4-5 pieces)
- Calories: 110
- Sugar: 25g
- Sodium: 5mg
- Fat: 0g
- Saturated Fat: 0g
- Unsaturated Fat: 0g
- Trans Fat: 0g
- Carbohydrates: 27g
- Fiber: 0g
- Protein: 0g
- Cholesterol: 0mg
Keywords: hard candy, homemade candy, sugar candy, candy making, step by step candy recipe