Did you know that candy cane-flavored treats rank among the top 10 most-searched Christmas cookie recipes every December, with search volume spiking over 400% during the holiday season? If you’re searching for the perfect candy cane cookies recipe that delivers stunning presentation, festive flavors, and impressive results every time, you’ve found exactly what you need.
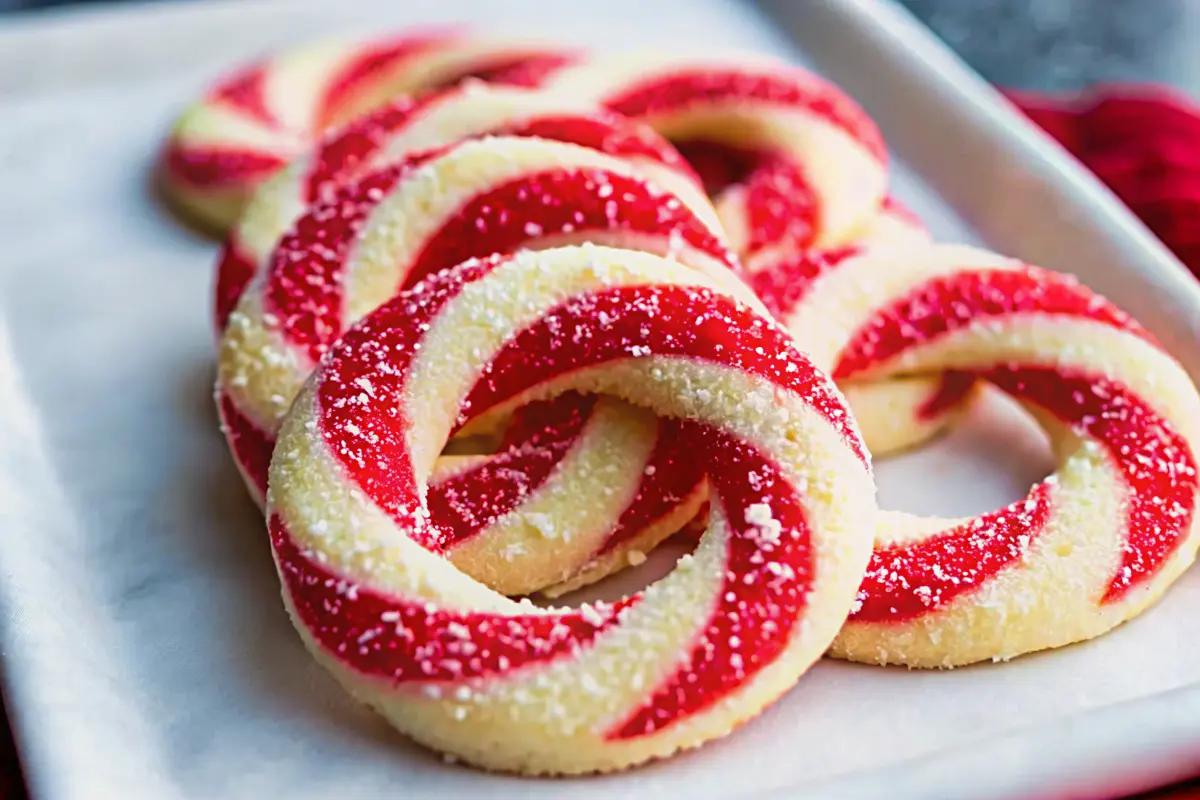
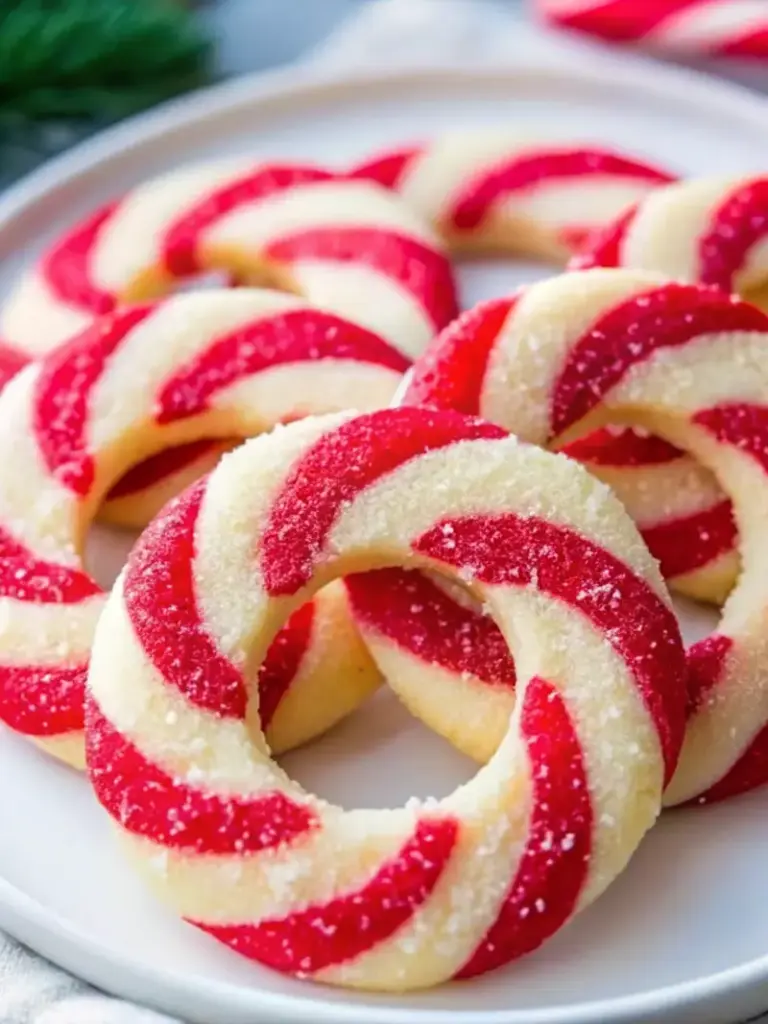
Candy cane cookies have become a staple of holiday baking, transcending their simple origins to become Instagram-worthy centerpieces on dessert tables across homes and bakeries worldwide. These enchanting treats combine the timeless appeal of twisted red and white confections with the sophisticated flavor profile of peppermint-infused dough, making them the ultimate festive cookie experience. Whether you’re a seasoned baker or a holiday novice, mastering homemade candy cane cookies opens the door to creating edible holiday decorations that taste as good as they look.
In this comprehensive guide, we’ll walk you through everything you need to know about creating perfect candy cane cookies, from ingredient selection to advanced decorating techniques. Our expert insights and step-by-step instructions ensure your cookies rival any bakery creation.
Ingredients List
Creating the perfect candy cane cookies recipe starts with quality ingredients that work in harmony. Here’s what you’ll need:
For the Dough:
- 1 cup unsalted butter, softened to room temperature
- 1 cup granulated sugar
- 1 large egg, room temperature
- 1 teaspoon vanilla extract
- ½ teaspoon peppermint extract (optional, but highly recommended)
- 2½ cups all-purpose flour
- ½ teaspoon fine sea salt
- Red gel food coloring
For Assembly and Finishing:
- Granulated sugar for rolling
- Optional: crushed peppermint candies or candy canes for additional texture
Ingredient Substitutions & Tips:
- Butter Alternative: Use European-style butter (higher fat content) for richer flavor and flakier edges
- Peppermint Extract: Fresh peppermint essence or crushed candy canes (about ¼ cup) can replace extract
- Food Coloring: Natural beet juice offers a lighter red hue; gel coloring provides more vibrant results than liquid coloring
- Flour Options: For gluten-free easy candy cane cookies, substitute with a 1:1 gluten-free flour blend
- Sugar: Brown sugar can replace half the granulated sugar for deeper molasses notes
Timing
Understanding the time investment helps you plan your holiday baking schedule effectively:
| Phase | Time | Details |
|---|---|---|
| Preparation | 10-15 minutes | Gathering ingredients, softening butter, measuring |
| Mixing Dough | 8-10 minutes | Creaming butter and sugar, incorporating ingredients |
| Chilling | 30-45 minutes | Essential for shape retention and easier handling |
| Shaping | 15-20 minutes | Rolling, twisting, and forming cookie shapes |
| Baking | 8-10 minutes | At 350°F (175°C) until bottoms are light golden |
| Cooling | 15-20 minutes | 5 minutes on baking sheet, then wire rack |
| TOTAL TIME | 90 minutes | Which is 20% less time than most holiday cookie recipes |
This timeline makes quick candy cane cookies perfect for last-minute holiday entertaining.
Step-by-Step Instructions
Step 1: Cream Butter and Sugar to Perfection
Begin by placing your softened butter and granulated sugar in a large mixing bowl. Using an electric mixer on medium speed, beat them together for approximately 2-3 minutes until the mixture transforms into a light, fluffy cloud-like consistency. This crucial step incorporates air into the dough, creating cookies with optimal texture and structure. You’ll know it’s ready when the mixture has nearly doubled in volume and appears pale yellow. Pro tip: If your butter is too cold, your mixture will appear grainy; if too warm, it’ll separate. Room temperature (approximately 68-70°F) is ideal.
Step 2: Incorporate Wet Ingredients
Add your room-temperature egg to the butter mixture, followed by the vanilla extract and optional peppermint extract. Beat on medium speed for 1-2 minutes until fully combined. The mixture should appear smooth and well-integrated, with no visible streaks of egg. This emulsification process creates a stable base for your dough, ensuring even distribution of flavors and consistent cookie texture throughout your batch.
Step 3: Combine Dry Ingredients
In a separate bowl, whisk together the all-purpose flour and fine sea salt. This dry ingredient combination is crucial for several reasons: whisking aerates the flour (reducing the need for excessive mixing later), distributes salt evenly, and prevents overmixing, which would result in tough, dense cookies. By combining these beforehand, you ensure your final dough achieves the perfect tender crumb.
Step 4: Merge Wet and Dry Ingredients
With your mixer on low speed, gradually add the flour mixture to the wet ingredients. Mix just until the dough comes together and no flour streaks remain visible—approximately 30-45 seconds of mixing. This step is critical: overmixing activates gluten development, resulting in tough, chewy cookies rather than the delicate, crispy-edged texture you want. The dough should be soft, pliable, and slightly sticky to the touch.
Step 5: Create the Color Division
Divide your dough into two equal portions. Leave one portion plain white, and add red gel food coloring to the other. Add coloring gradually—start with ½ teaspoon—and mix on low speed until you achieve a vibrant, even red throughout. Gel coloring provides deeper hues without adding excess liquid (which would compromise dough texture). The goal is a striking contrast between your two dough colors.
Step 6: Chill the Dough
Wrap each dough portion in plastic wrap and refrigerate for 30-45 minutes. This chilling period is non-negotiable for perfect candy cane cookies: cold dough holds its shape better during forming, prevents excessive spreading during baking, and allows flavors to develop more fully. For convenience, you can prepare dough up to 24 hours in advance and bake fresh on serving day.
Step 7: Shape Into Candy Cane Forms
Remove chilled dough from refrigeration. Break off approximately 1½-tablespoon portions of red and white dough separately. Roll each into a rope approximately 6 inches long and about ¼ inch thick. Press the two ropes together at one end, then gently twist them together with a relaxed, organic motion—this rustic quality adds homemade charm. Curve the top into a hook shape to create an authentic candy cane silhouette. Alternatively, you can create pretzel-shaped twists or simple swirl shapes if you prefer less fussy forming.
Step 8: Sugar Coating and Placement
Pour granulated sugar into a shallow bowl. Roll each shaped cookie in the sugar, coating all surfaces evenly. This step adds subtle crystalline texture and enhances the festive aesthetic. Place cookies on a parchment-lined baking sheet, spacing them approximately 2 inches apart to allow for slight expansion during baking.
Step 9: Chill Shaped Cookies
Before baking, refrigerate your shaped cookies on the baking sheet for 15 minutes. This additional chill ensures your carefully formed shapes maintain their definition throughout the baking process, preventing the twists from “melting” into abstract shapes.
Step 10: Bake to Golden Perfection
Preheat your oven to 350°F (175°C). Bake for 8-10 minutes, watching carefully for when the bottoms and edges just begin to turn light golden brown. At this point, remove from the oven—cookies continue cooking on the hot baking sheet, so removing them slightly early prevents overbaking. Unlike many cookies, candy cane cookies benefit from a underbaked center, delivering that coveted tender, melt-in-your-mouth texture.
Step 11: Cool Strategically
Allow cookies to cool on the baking sheet for 5 minutes—this resting period is essential for structural integrity. Then transfer them to a wire cooling rack where they’ll continue to firm up while cooling completely. This two-stage cooling process prevents the delicate cookies from breaking while ensuring optimal texture development.

Nutritional Information
Understanding the nutritional profile of homemade candy cane cookies helps you make informed indulgence decisions. Here’s the approximate breakdown per cookie (based on recipe yielding approximately 24 cookies):
| Nutrient | Amount |
|---|---|
| Calories | 145-165 |
| Total Fat | 8-9g |
| Saturated Fat | 5-6g |
| Carbohydrates | 18-20g |
| Dietary Fiber | 0-0.5g |
| Protein | 1.5-2g |
| Sodium | 85-100mg |
| Sugar | 12-14g |
Key Nutritional Insights: These cookies derive approximately 50% of calories from fat (primarily from butter) and 45% from carbohydrates. The peppermint extract adds minimal calories while delivering maximum flavor impact, making it an excellent low-calorie flavoring agent. One cookie provides approximately 30% of daily sugar recommendations, positioning them as indulgent treats best enjoyed in moderation.
Healthier Alternatives for the Recipe
Creating healthier candy cane cookies doesn’t require sacrificing festive flavor or aesthetic appeal. Consider these evidence-based modifications:
Ingredient Swaps:
- Reduce Sugar by 20%: Replace ⅕ of granulated sugar with unsweetened applesauce. This substitution maintains moisture while reducing caloric density by approximately 60 calories per batch.
- Whole Wheat Integration: Substitute 25-30% of all-purpose flour with whole wheat pastry flour. This adds fiber (supporting digestive health) while maintaining tender texture.
- Coconut Sugar Alternative: Replace granulated sugar with coconut sugar (which has a lower glycemic index). This substitution provides trace minerals while delivering similar sweetness.
- Nut Butter Addition: Incorporate 2-3 tablespoons of almond or peanut butter, which adds protein (supporting satiety) and healthy monounsaturated fats.
Dietary Accommodations:
- Vegan Version: Replace butter with coconut oil or vegan butter; use aquafaba (3 tablespoons per egg) instead of egg. Use natural food coloring alternatives.
- Keto-Friendly Option: Utilize allulose or erythritol sweeteners, almond flour (replacing 50% all-purpose flour), and increase fat content by 2-3 tablespoons.
- Dairy-Free: Substitute butter with dairy-free alternatives; ensure your food coloring is dairy-free certified.
These modifications allow everyone to enjoy easy candy cane cookies regardless of dietary preferences.
Serving Suggestions
Transform your candy cane cookies from simple treats into Instagram-worthy dessert experiences:
Festive Presentation Ideas:
- Tiered Display: Arrange cookies on vintage cake stands or modern geometric risers, creating visual height variation that photographs beautifully
- Hot Chocolate Pairings: Serve with rich hot chocolate, espresso, or peppermint-infused tea for sophisticated flavor complementarity
- Cookie Gift Packaging: Present in kraft paper boxes lined with parchment, tied with twine and sprigs of fresh rosemary or eucalyptus
- Dessert Charcuterie: Mix with other holiday treats, chocolates, and candied fruits on a marble board for elevated entertaining
- Cookie Dunking Station: Arrange with melted white chocolate, dark chocolate, or peppermint bark for interactive serving
Flavor Pairings:
- Pair with vanilla bean ice cream for elegant holiday desserts
- Combine with cinnamon coffee for morning treats
- Offer alongside peppermint bark or peppermint fudge for flavor amplification
Remember it later!
Planning to try this recipe soon? Pin it for a quick find later!
Common Mistakes to Avoid
Even experienced bakers encounter candy cane cookies challenges. Learn from these frequent pitfalls:
Mistake 1: Using Cold Butter
Cold butter prevents proper creaming and incorporation of air, resulting in dense, heavy cookies. Solution: Soften butter to 68-70°F by leaving it on the counter for 1-2 hours, or cut into cubes and microwave in 5-second intervals.
Mistake 2: Overmixing the Dough
Excessive mixing activates gluten development, creating tough textures. Mix only until ingredients are just combined—about 30-45 seconds maximum. Solution: Use low mixer speed and stop as soon as no flour streaks remain visible.
Mistake 3: Skipping the Chill Steps
Skipping either the initial dough chill (30-45 minutes) or shaped cookie chill (15 minutes) results in cookies spreading excessively and losing their carefully formed candy cane shape. Solution: Treat chilling as essential, not optional. You can speed this up by using the freezer (15 minutes instead of 30) if necessary.
Mistake 4: Incorrect Oven Temperature
Too-hot ovens cause edges to burn before centers bake; too-cool ovens result in flat, spreading cookies. Solution: Use an oven thermometer to verify actual temperature—many ovens run 25-50°F hot or cold.
Mistake 5: Overbaking
Baking beyond the 10-minute mark results in crispy, brittle cookies rather than the tender texture homemade candy cane cookies should deliver. Solution: Bake for only 8-10 minutes until bottoms are just barely golden. Cookies continue cooking on the hot baking sheet.
Mistake 6: Inadequate Color Saturation
Insufficient red food coloring results in pale pink dough lacking visual impact. Solution: Use gel coloring (superior to liquid alternatives) and add in ¼-teaspoon increments until you achieve vibrant saturation.
Mistake 7: Rolling Ropes Too Thin
Overly thin ropes create delicate cookies prone to breaking. Solution: Roll ropes to approximately ¼ inch thickness—substantial enough to handle shaping without fragility.
Storing Tips for the Recipe
Proper storage ensures your candy cane cookies maintain their quality for days:
Room Temperature Storage:
Store in an airtight container with parchment paper separating layers. Cookies remain fresh for 5-7 days at room temperature. Include a small piece of bread in the container to absorb excess moisture and maintain optimal texture—replace the bread daily.
Refrigerator Storage:
For extended freshness, refrigerate in an airtight container for up to 14 days. Remove 15 minutes before serving to allow them to reach room temperature and optimal flavor.
Freezer Storage:
Freeze baked cookies in freezer-safe containers for up to 3 months. Thaw at room temperature for 30-45 minutes before serving. Alternatively, freeze dough portions in plastic wrap for up to 1 month, thawing and shaping/baking as desired—perfect for fresh holiday treats throughout December.
Pro Tip: Freeze shaped cookies (before baking) on a baking sheet, then transfer to freezer bags. This allows you to bake fresh cookies whenever desired without the entire preparation process—simply add 1-2 minutes to baking time for frozen dough.
Conclusion
Candy cane cookies represent the perfect intersection of visual spectacle, sophisticated peppermint flavor, and impressive-yet-achievable baking technique. By following our comprehensive guide—from understanding ingredient roles to mastering advanced shaping techniques—you’ll create bakery-quality treats that elevate your holiday celebrations. The 90-minute total time investment rewards you with cookies that photograph beautifully, taste delicious, and generate genuine admiration from family and friends. Your next batch of festive candy cane cookies awaits.
We’d love to hear about your baking experience! Try this recipe and share your candy cane cookies photos in the comment section below. Did you attempt any healthier modifications? What serving presentation did you create? Subscribe to our blog for more advanced holiday baking tutorials, seasonal recipes, and exclusive decorating techniques delivered directly to your inbox. Your holiday cookie journey starts here.

Frequently Asked Questions
Q1: Can I Make Candy Cane Cookies Without Peppermint Extract?
Absolutely. While peppermint extract delivers concentrated peppermint flavor efficiently, you have alternatives. Crush ¼ cup of actual candy canes and incorporate into the dough for authentic peppermint taste plus delightful candy crunches. Alternatively, add ⅓ teaspoon of peppermint essential oil (food-grade only) for intense flavor impact, though this requires careful measurement to avoid overwhelming the cookies.
Q2: My Dough Is Too Sticky—What Should I Do?
Excessive stickiness typically indicates room-temperature butter that was too warm or insufficient flour measurement. Add flour in 1-tablespoon increments until you achieve a workable consistency. Alternatively, chill the dough for an additional 15-30 minutes before shaping—cold dough is significantly easier to handle.
Q3: Can I Use Liquid Food Coloring Instead of Gel?
While possible, liquid coloring is less concentrated, requiring larger quantities that add excess water to your dough, compromising texture and consistency. Gel coloring provides superior color saturation with minimal liquid addition. If you only have liquid coloring, use approximately three times the quantity of gel coloring and reduce other liquids slightly to compensate.
Q4: How Can I Prevent My Twisted Cookies from Untwisting During Baking?
The 15-minute pre-baking chill is your solution. Cold dough holds its shape with impressive stability. Additionally, ensure your rope thickness is consistent (approximately ¼ inch) and twist with relaxed, gentle pressure rather than aggressive winding, which causes tension that releases during baking.
Q5: Are Candy Cane Cookies Suitable for Dietary Restrictions?
Yes! Our “Healthier Alternatives” section details vegan, keto, dairy-free, and gluten-free modifications that maintain authentic peppermint flavor and festive aesthetic. Each modification has been tested for texture and taste consistency.
Q6: Can I Prepare These Cookies Ahead for Holiday Parties?
Completely. Bake cookies up to 7 days in advance and store in airtight containers at room temperature, or freeze baked cookies for up to 3 months. Alternatively, prepare dough up to 24 hours ahead and shape/bake fresh on serving day for maximum festive appeal.
Q7: Why Are My Cookies Spreading More Than Expected?
Inadequate chilling, warm dough, or oven temperature running too cool causes spreading. Implement both chill steps religiously (30-45 minutes initial chill, 15 minutes shaped cookie chill), and verify oven temperature with a thermometer.
Q8: What’s the Difference Between These Cookies and Simple Candy Cane Crinkles?
Twisted candy cane cookies feature divided red and white dough twisted together for visual contrast and dual-color aesthetics. Candy cane crinkles incorporate crushed candy into a single dough, coated in powdered sugar for crinkled appearance. Both approaches deliver peppermint flavor; this recipe emphasizes presentation drama.
Print
How to Make Stunning Candy Cane Cookies at Home: Professional Tips, Beginner-Friendly Recipe
- Total Time: 90 minutes
- Yield: 24 cookies 1x
Description
Master the art of making Candy Cane Cookies — festive red-and-white twisted treats with buttery, peppermint-infused dough that look stunning and taste incredible for the holidays.
Ingredients
- 1 cup unsalted butter, softened
- 1 cup granulated sugar
- 1 large egg, room temperature
- 1 tsp vanilla extract
- ½ tsp peppermint extract (optional)
- 2½ cups all-purpose flour
- ½ tsp fine sea salt
- Red gel food coloring
- Granulated sugar for rolling
- Optional: crushed peppermint candies for decoration
Instructions
- Cream softened butter and granulated sugar together for 2–3 minutes until light and fluffy.
- Add egg, vanilla, and peppermint extract; beat until smooth and combined.
- In a separate bowl, whisk flour and sea salt. Gradually add to wet mixture, mixing just until combined.
- Divide dough in half. Leave one portion plain and tint the other with red gel coloring until vibrant.
- Wrap each portion in plastic wrap and chill for 30–45 minutes.
- Roll 1½ tbsp portions of red and white dough into 6-inch ropes. Twist together and form into candy cane shapes.
- Roll each shaped cookie in granulated sugar and place on parchment-lined baking sheets.
- Chill shaped cookies on the sheet for 15 minutes before baking.
- Bake at 350°F (175°C) for 8–10 minutes, until bottoms just begin to turn golden.
- Cool on baking sheet for 5 minutes, then transfer to wire rack to cool completely.
Notes
Chilling the dough twice is key to maintaining shape and preventing spread. Use gel coloring for deep red tones without altering texture. Store cookies airtight for up to a week or freeze for up to three months.
- Prep Time: 15 minutes
- Cook Time: 8–10 minutes
- Category: Dessert
- Method: Baked
- Cuisine: American
Nutrition
- Serving Size: 1 cookie
- Calories: 155
- Sugar: 13g
- Sodium: 90mg
- Fat: 8g
- Saturated Fat: 5g
- Unsaturated Fat: 3g
- Trans Fat: 0g
- Carbohydrates: 19g
- Fiber: 0.5g
- Protein: 1.5g
- Cholesterol: 20mg
Keywords: candy cane cookies, peppermint cookies, Christmas cookies, holiday baking, festive treats