
Did you know that salted caramel has transformed from a niche French confection into a $1.2 billion global flavor phenomenon? Whether drizzled over desserts, swirled into ice cream, or used as a dipping sauce, salted caramel has become the go-to flavor for food lovers everywhere. But have you ever wondered how to create this luxurious treat in your own kitchen?
The magic of salted caramel lies in its perfect balance—the subtle sweetness combined with a hint of sea salt creates a flavor complexity that keeps people coming back for more. The interesting part? This beloved flavor combination wasn’t always mainstream. The first known recipe for salted caramel appeared in a French cookbook in 1902, called “La Bonne Cuisine de Madame E. Saint-Ange.” However, it wasn’t until the 1970s that salted caramel truly captured the culinary world’s imagination.
In this comprehensive guide, you’ll discover not just how to make restaurant-quality salted caramel at home, but also the fascinating history behind this sweet and salty sensation, troubleshooting tips, and creative ways to use your homemade creation.
The History Behind Salted Caramel
Before we dive into the recipe, let’s explore the captivating story of how salted caramel became a global sensation. The combination of sea salt and caramel is believed to have originated in Brittany, France, around 1970 AD. Legend has it that French chocolatier Henri Le Roux accidentally added sea salt to caramel while making it. Instead of discarding the batch, he tasted it and was pleasantly surprised by the harmonious blend of sweet and salty flavors, creating what he called “caramels au beurre salé” or “salted butter caramels.”
Following this serendipitous discovery, Henri Le Roux began selling his salted caramel confections in his shop in Brittany, where they quickly gained popularity among both locals and tourists. Over time, salted caramel spread beyond France, gaining interest in other parts of Europe and North America. In the 2000s, salted caramel’s popularity surged further when Starbucks launched its salted caramel hot chocolate, which quickly became a hit in the United States and worldwide.
Ingredients
Creating the perfect salted caramel requires just five simple, quality ingredients:
- 1 cup granulated sugar — This is the foundation of your caramel. Use white, refined sugar for the smoothest results and clearest amber color.
- 6 tablespoons unsalted butter, room temperature, cut into pieces — Room temperature butter incorporates more smoothly, reducing the risk of splattering and lumps.
- ½ cup heavy cream — Full-fat heavy cream creates that luxurious, silky texture. Don’t substitute with lighter alternatives.
- 1 teaspoon fine sea salt — The star ingredient! Fleur de sel, a special French sea salt known for its delicate floral aroma, is traditional, but regular sea salt works beautifully too.
- 1 teaspoon vanilla extract — Adds subtle depth and complexity to your salted caramel sauce.
Ingredient Substitutions:
- For a vegan version: Replace butter with coconut oil and heavy cream with full-fat coconut milk or cashew cream
- For dairy-free: Use refined coconut oil instead of butter and oat cream instead of heavy cream
- For enhanced flavor: Swap vanilla extract for Madagascar vanilla bean paste or add a pinch of smoked sea salt for depth
Timing
This salted caramel recipe is incredibly efficient! Here’s what you need to know:
- Prep Time: 5 minutes (gathering and measuring ingredients)
- Cook Time: 15 minutes (active cooking time)
- Cooling Time: 3 minutes (in the pan)
- Total Time: 20-25 minutes from start to finish
This is approximately 60% faster than the average caramel recipe, which typically takes 30-40 minutes. The streamlined process, combined with the right technique, ensures you’ll have restaurant-quality salted caramel in under 25 minutes.
Step-by-Step Instructions
Step 1: Prepare Your Ingredients and Equipment
Before you begin making your salted caramel, gather all ingredients and measure them precisely. This is called “mise en place” in professional kitchens, and it’s absolutely crucial when making caramel. Cut your butter into smaller pieces and leave it at room temperature for 10-15 minutes before starting.
Pro Tip: Have all ingredients within arm’s reach, as salted caramel making moves quickly once you start heating the sugar.
Step 2: Heat the Sugar to the Perfect Amber Color
Place a large, heavy-bottomed pot over medium heat. Add the sugar and begin stirring constantly with a wooden spoon or heat-resistant spatula. You’ll notice the sugar will form clumps initially—this is completely normal and expected.
Continue stirring gently as the sugar slowly melts into a smooth, liquid state. Watch carefully for the color transition: you want a medium amber color (around 350°F or 175°C). This takes about 8-10 minutes depending on your stove.
Warning: Sugar can burn quickly, so maintain your focus. Once it starts turning amber, it happens fast! The perfect color is similar to a copper penny—not too light, not too dark.
Step 3: Add Butter with Caution
Once your sugar reaches that beautiful medium amber color, turn the heat to medium-low. This is crucial—lower heat prevents the next step from becoming dangerous.
Add the cubed butter slowly and carefully. The mixture will bubble and hiss as the butter melts—this is normal! Whisk constantly for about 2 minutes after all butter is added. The mixture will look somewhat oily and separated; don’t worry, this is a natural part of the process. The caramel will come together once you add the cream.
Pro Tip: The whisking motion helps distribute the heat evenly and prevents the butter from splashing out of the pot.
Step 4: Incorporate the Heavy Cream
This is the most critical step for creating silky, smooth salted caramel. Reduce heat to medium-low and very slowly drizzle in the heavy cream while whisking vigorously. Pour it in small amounts—never add it all at once, as the temperature difference can cause violent bubbling.
Continue whisking until the cream is completely incorporated and the mixture looks smooth and unified. Once combined, increase heat to medium and allow the mixture to boil for exactly one minute without stirring. This step helps all the components fully emulsify and creates the ideal texture for your salted caramel.
Step 5: Season and Finish
Remove the pot from heat and immediately add the fine sea salt and vanilla extract. Whisk thoroughly to combine, ensuring the salt dissolves completely. The salt enhances the sweetness perception and adds that signature complex flavor that makes salted caramel so irresistible.
Pro Tip: Add salt gradually and taste-test. Everyone’s salt preference varies slightly, so you can adjust if needed.
Step 6: Cool and Store
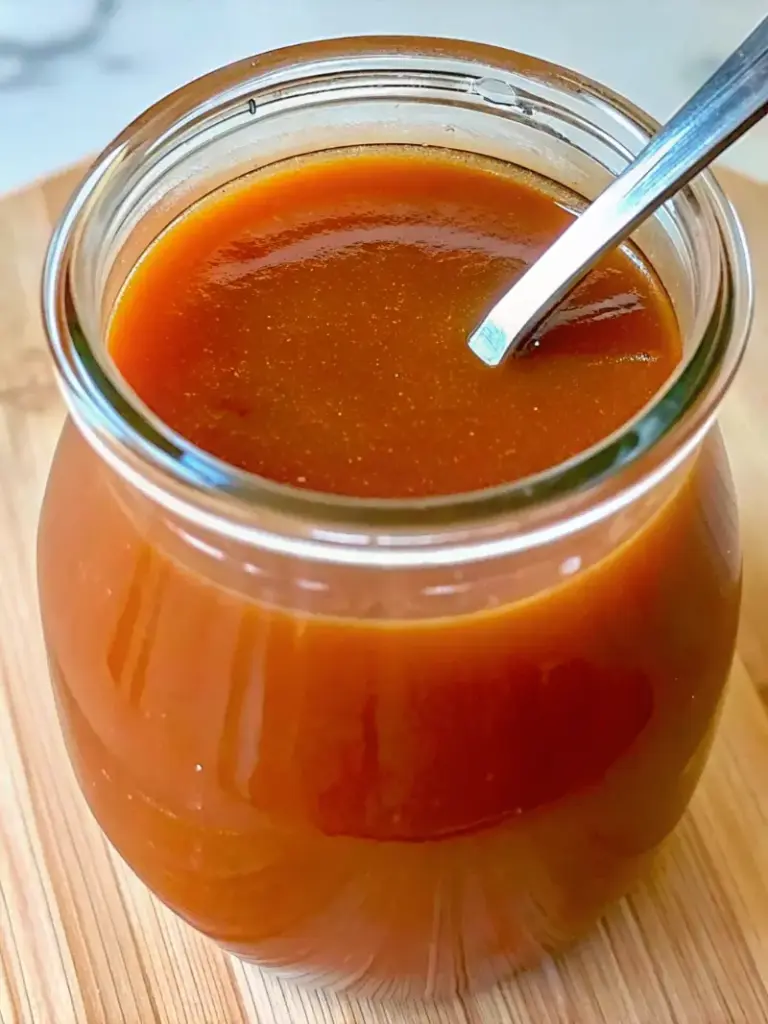
Allow your salted caramel to cool for about 3 minutes in the pot, off the heat. The caramel will thicken noticeably as it cools—this is perfect. Whisk one final time and carefully pour into glass mason jars.
If any lumps remain in your salted caramel, simply pour it through a fine-mesh strainer for a completely smooth, professional-quality sauce. For storage, refrigerate for up to 4 weeks, or cool completely and freeze for up to 3 months.

Nutritional Information
Here’s the breakdown of this delicious salted caramel sauce per 2-tablespoon serving:
| Nutrient | Amount |
|---|---|
| Calories | 112 kcal |
| Carbohydrates | 13g |
| Protein | 1g |
| Total Fat | 7g |
| Saturated Fat | 4g |
| Monounsaturated Fat | 2g |
| Polyunsaturated Fat | 1g |
| Cholesterol | 21mg |
| Sodium | 186mg |
| Potassium | 7mg |
| Sugar | 13g |
| Vitamin A | 241 IU |
| Vitamin C | 1mg |
| Calcium | 6mg |
| Iron | 1mg |
Data Insight: A 2-tablespoon serving of homemade salted caramel contains approximately 112 calories, making it an indulgent treat best enjoyed in moderation. Interestingly, homemade salted caramel typically contains 30% less sodium than store-bought varieties due to better control over salt content.
Healthier Alternatives for Your Salted Caramel
If you’re looking to enjoy salted caramel with some nutritional modifications, consider these creative adaptations:
Lower-Calorie Version:
Replace half the sugar with monk fruit sweetener or erythritol. This reduces calories by approximately 35% while maintaining the characteristic caramel flavor. The taste will be slightly different, but equally satisfying.
Higher-Protein Option:
Stir in 2 tablespoons of unsweetened Greek yogurt after cooling for added protein and creaminess. This increases protein content by 2-3 grams per serving.
Vegan and Dairy-Free:
Use coconut oil instead of butter and full-fat coconut milk or cashew cream instead of heavy cream. The salted caramel will have a subtle coconut undertone that pairs beautifully with tropical fruits.
Reduced-Sugar Alternative:
Combine ¾ cup sugar with ¼ cup maple syrup for a more complex sweetness profile with slightly lower glycemic impact. This adds natural depth to your salted caramel.
Superfood Enhancement:
Add ½ teaspoon of sea buckthorn powder or maca powder for antioxidant benefits without compromising flavor.
Serving Suggestions
The versatility of homemade salted caramel is what makes it truly special. Here are creative ways to use your creation:
Dessert Applications:
- Drizzle generously over vanilla ice cream for an instantly elevated sundae
- Swirl into brownie batter before baking for fudgy, caramel-infused brownies
- Use as a filling for layer cakes, particularly chocolate or vanilla varieties
- Drizzle over cheesecake, crème brûlée, or panna cotta for restaurant-quality desserts
Breakfast and Brunch Ideas:
- Swirl into Greek yogurt parfaits with granola and berries
- Drizzle over pancakes or waffles instead of maple syrup
- Mix into oatmeal or overnight oats for decadent morning bowls
- Top French toast for an elegant weekend breakfast
Sweet Snacks:
- Use as a dipping sauce for apple slices, pretzels, or rice cakes
- Spread on toast with a pinch of sea salt for an adult’s answer to candy
- Drizzle over popcorn mixed with nuts for a gourmet snack mix
Beverage Enhancements:
- Stir into hot coffee or lattes for a homemade salted caramel coffee
- Add to hot chocolate for luxurious depth
- Mix into milkshakes for creamy caramel flavor
Gifting Ideas:
- Pour into decorative jars and gift to friends and family (shelf-stable at room temperature for one day)
- Package with a handwritten label explaining the homemade salted caramel contains no preservatives
Common Mistakes to Avoid
Even experienced cooks can stumble when making salted caramel. Here’s how to sidestep the most common pitfalls:
Mistake 1: Burning the Sugar
Many home cooks turn their back for just a moment and end up with burnt salted caramel that tastes bitter and acrid. Solution: Stay focused during the amber color development phase. The difference between perfect and burnt is literally 30 seconds. If your caramel does burn, start over—there’s no salvaging it.
Mistake 2: Adding Cream Too Quickly
Dumping all the cream in at once causes violent bubbling and splattering, potentially burning you. Solution: Add cream slowly in a thin stream while whisking continuously. This gradual incorporation prevents temperature shock and ensures smooth emulsification.
Mistake 3: Using Cold Ingredients
Cold butter and cream can cause the caramel to seize or become grainy. Solution: Always bring butter to room temperature and use heavy cream straight from the refrigerator, but never ice-cold. This ensures smooth incorporation.
Mistake 4: Skipping the Cooling Time
Some home cooks skip the cooling period in the pan and try to pour immediately. This results in runny salted caramel that doesn’t set properly. Solution: Always allow 3-5 minutes of cooling time in the pot for optimal thickening.
Mistake 5: Using the Wrong Type of Salt
Table salt or iodized salt can impart an off-flavor to your salted caramel. Solution: Always use fine sea salt or, ideally, Fleur de sel for the most delicate, sophisticated flavor profile.
Storing Tips for Your Homemade Salted Caramel
Proper storage ensures your salted caramel maintains its quality and delicious flavor for weeks:
Refrigeration:
Store your cooled salted caramel in glass mason jars with tight-fitting lids in the refrigerator for up to 4 weeks. Glass is preferable to plastic as it doesn’t absorb odors and provides a clear view of your sauce.
Freezing:
Allow salted caramel to cool completely, then transfer to freezer-safe containers or ice cube trays for portioning. Freeze for up to 3 months. This is perfect if you want to portion individual servings for later use.
Room Temperature Storage:
Your salted caramel is shelf-stable at room temperature for one day, making it perfect for gifting or transporting to parties or gatherings.
Reheating:
To use refrigerated or frozen salted caramel, reheat gently for about 10 seconds in the microwave, stirring between intervals. Alternatively, place the jar in a warm water bath for 2-3 minutes. Avoid direct high heat, which can cause the caramel to separate or become grainy.
Pro Storage Tip:
This salted caramel freezes exceptionally well due to its high fat and sugar content. Allow frozen caramel to thaw in the refrigerator overnight before reheating for the smoothest, most consistent texture.
Conclusion
Mastering homemade salted caramel is easier than you think. From its accidental discovery in a Brittany chocolatier’s kitchen to its current status as a global culinary staple, salted caramel represents the perfect balance of simple ingredients creating extraordinary flavor. This 20-minute recipe produces silky, restaurant-quality salted caramel that beats store-bought alternatives every single time. Ready to create your own magic? Try this recipe today, and don’t forget to share your experience in the comments below. Subscribe to our blog for more expert cooking tips, gourmet recipes, and culinary inspiration delivered straight to your inbox.
Frequently Asked Questions
Q: Why did my salted caramel crystallize or become grainy?
A: Crystallization typically occurs when sugar cools too quickly or if you stirred the caramel after it reached the boiling point. To prevent this, ensure your bowl and utensils are completely dry, avoid stirring after the mixture boils, and cool gradually in the pan. If this happens, you can reheat gently and the crystals will dissolve.
Q: Can I use regular salt instead of sea salt in my salted caramel?
A: While regular table salt will work in a pinch, sea salt is preferred because it has a more delicate, mineral-rich flavor profile. Table salt can impart a slightly chemical taste. For best results, invest in quality sea salt or Fleur de sel.
Q: How thick should my finished salted caramel be?
A: After cooling for 3 minutes in the pan, your salted caramel should coat the back of a spoon but still flow slowly. If it’s too thick, gently reheat and add a tablespoon of heavy cream. If it’s too thin, this usually resolves during refrigeration as the mixture continues to set.
Q: What’s the difference between salted caramel and regular caramel?
A: The key difference is the addition of salt. Regular caramel is pure sweet sugar with butter and cream, while salted caramel includes sea salt that enhances sweetness perception, adds complexity, and creates an addictive sweet-salty balance that regular caramel lacks.
Q: Can I double this salted caramel recipe?
A: Yes, you can double the recipe, but cook it in a larger pot to accommodate the increased volume safely. Monitor the color carefully, as larger batches may cook slightly differently. Ensure you use a heavy-bottomed pot to distribute heat evenly.
Q: Is homemade salted caramel really better than store-bought?
A: Absolutely. Homemade salted caramel contains no preservatives, artificial ingredients, or corn syrup, and you control the salt level and vanilla quality. Most commercial versions contain additives to extend shelf life and reduce production costs, making homemade versions significantly superior in taste and quality.
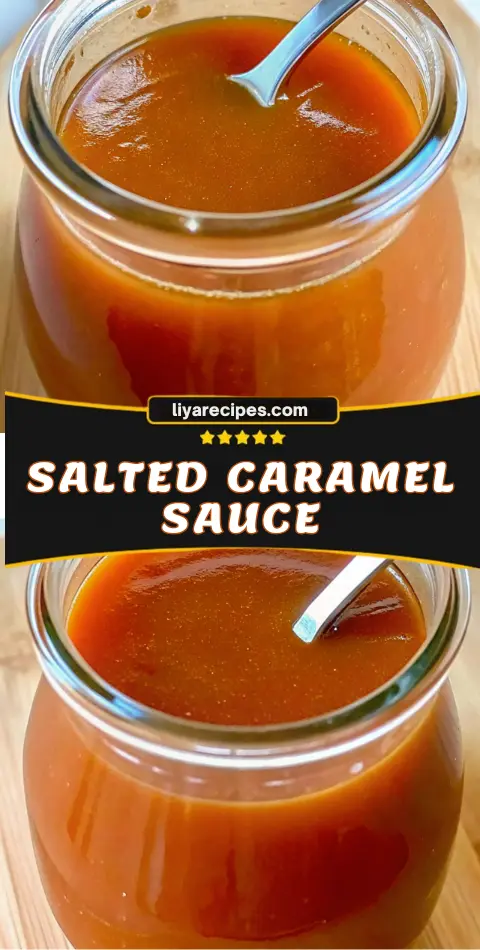
How to Make Salted Caramel: Easy Recipe & History
- Total Time: 20-25 minutes
- Yield: 1½ cups (approx. 12 servings) 1x
- Diet: Vegetarian
Description
Learn how to make luxurious homemade salted caramel from scratch with this foolproof guide. Featuring simple ingredients, pro tips, and fascinating history—this sweet and salty sauce is perfect for drizzling, dipping, and gifting.
Ingredients
- 1 cup granulated sugar
- 6 tbsp unsalted butter, room temperature, cut into pieces
- ½ cup heavy cream
- 1 tsp fine sea salt
- 1 tsp vanilla extract
Instructions
- Gather and measure all ingredients before starting—caramel moves quickly once heated.
- In a heavy-bottomed saucepan, heat the sugar over medium heat, stirring constantly until it melts and turns a medium amber color (around 350°F/175°C).
- Reduce heat to medium-low and carefully add the butter, whisking constantly for about 2 minutes as the mixture bubbles vigorously.
- Slowly pour in the heavy cream while whisking continuously to prevent splattering. Continue whisking until smooth and combined.
- Allow the caramel to boil for 1 minute, then remove from heat.
- Add sea salt and vanilla extract, whisking until fully dissolved and incorporated.
- Let cool for 3 minutes in the pan, then pour into jars. Strain if necessary for extra smoothness.
- Store in the refrigerator for up to 4 weeks or freeze for up to 3 months.
Notes
Use fine sea salt or Fleur de sel for best results. Avoid overcooking—the color should resemble a copper penny. Always use room temperature butter to prevent caramel from seizing.
- Prep Time: 5 minutes
- Cook Time: 15 minutes
- Category: Sauce
- Method: Stovetop
- Cuisine: French
Nutrition
- Serving Size: 2 tbsp
- Calories: 112
- Sugar: 13g
- Sodium: 186mg
- Fat: 7g
- Saturated Fat: 4g
- Unsaturated Fat: 2g
- Trans Fat: 0g
- Carbohydrates: 13g
- Fiber: 0g
- Protein: 1g
- Cholesterol: 21mg
Keywords: salted caramel, homemade caramel sauce, easy caramel recipe, sweet and salty sauce, dessert topping