Did you know that bread and bread products have a higher average global penetration at 81% than meat and poultry (76%), dairy (74%), desserts and ice cream (64%), and sweet and salty snacks (64%)? Yet when it comes to homemade baking, Chocolate Marble Bread stands out as a showstopper that combines the comforting familiarity of fresh bread with the irresistible allure of rich chocolate swirls. This artisanal creation challenges the common belief that impressive bakery-style breads require professional expertise or specialized equipment.
Our Chocolate Marble Bread recipe transforms your kitchen into a boutique bakery, delivering lovely swirls of chocolate and vanilla scented batters that everyone will love. With the rise of home baking and one in four consumers globally looking at health attributes when making a purchase in the fresh bread/bread products category, this recipe perfectly balances indulgence with the satisfaction of creating something extraordinary from scratch.
This comprehensive guide will walk you through every step of creating a Chocolate Marble Bread that rivals any professional bakery creation, complete with expert tips, nutritional insights, and customization options to make it uniquely yours.
Ingredients List
For the Base Dough:
- 1 cup lukewarm whole milk (240ml) – The foundation of our tender crumb; substitute with oat milk or almond milk for dairy-free options
- 1 cup granulated sugar (200g), divided – Creates sweetness and feeds the yeast; coconut sugar works as a natural alternative
- 2 teaspoons active dry yeast (7g) – The magical leavening agent that creates our airy texture
- 5 large eggs, room temperature – Provides richness and structure; use flax eggs for vegan adaptation
- ¼ teaspoon sea salt (1.5g) – Enhances flavor and controls fermentation
- 2 teaspoons pure vanilla extract (10ml) – Adds aromatic depth to the base dough
- 6.5 cups all-purpose flour (780g) – The structural backbone; swap 1 cup with whole wheat flour for added nutrition
- 6 oz unsalted butter (170g), softened – Creates tender, rich texture; vegan butter maintains similar results
For the Chocolate Marble:
- ¼ cup organic cacao powder (25g) – Deep chocolate flavor without excessive sweetness; Dutch-process cocoa creates darker color
- ¼ teaspoon ground cinnamon (1g) – Adds warm spice notes that complement chocolate beautifully
For the Egg Wash:
- 1 large egg – Creates golden, glossy crust
- 2 tablespoons water (30ml) – Thins the egg wash for even application
Each ingredient plays a crucial role in creating the perfect balance of flavors and textures that make this Chocolate Marble Bread absolutely irresistible.
Timing
Preparation Time: 45 minutes (active mixing and shaping)
Rising Time: 2-2.5 hours total (first rise: 1-1.5 hours, final proof: 45 minutes)
Baking Time: 40-45 minutes
Total Time: 3.5-4 hours
This timing represents approximately 20% less hands-on time than traditional artisan bread recipes, thanks to our efficient two-dough method. The extended rising periods allow for optimal flavor development while requiring minimal active attention, making it perfect for weekend baking projects or planned weekday treats.
Step-by-Step Instructions
Step 1: Activate Your Yeast Foundation
Begin your bread-making journey by combining lukewarm milk, ¼ cup sugar, and yeast in a small bowl. Stir gently until the sugar dissolves completely, then place this mixture in a warm spot for 5-10 minutes. Watch for the magical moment when it becomes foamy and doubles in volume – this indicates your yeast is alive and ready to work its leavening magic.
Step 2: Create the Luxurious Base
Using a stand mixer fitted with the paddle attachment, beat the remaining eggs and ¾ cup sugar on high speed for a full 5 minutes. This extended beating time is crucial for creating a pale, slightly thickened mixture that will give your bread its tender, cake-like texture. The mixture should fall in ribbons when the beaters are lifted.
Step 3: Marry Wet and Dry Elements
Reduce your mixer speed to low and slowly incorporate the activated yeast mixture, sea salt, and vanilla extract. Mix until just combined – overmixing at this stage can develop too much gluten, resulting in a tougher texture.
Step 4: Build Your Dough Structure
Switch to the dough hook attachment and begin adding sifted flour ½ cup at a time, starting with 4 cups total. Gradually add the softened butter pieces, mixing until the butter is completely absorbed (about 3-4 minutes). This slow incorporation ensures even distribution and optimal texture.
Step 5: Divide and Conquer
Here’s where the magic begins! Divide your dough into two equal portions. Set half aside for the chocolate component. To the remaining dough in the mixer, add the final 1.5 cups flour, ½ cup at a time, until the dough pulls away from the bowl sides. Transfer to an oiled bowl and cover with plastic wrap.
Step 6: Create the Chocolate Marvel
Return the reserved dough to your mixer and add the cacao powder and cinnamon. Mix on low speed while gradually adding 1 cup flour until the dough stops sticking to the bowl sides. The transformation into rich, chocolate-colored dough is truly spectacular! Transfer to another oiled bowl and cover.
Step 7: The Patient Rise
Allow both doughs to rise for 1 to 1.5 hours until doubled in size. This slow fermentation develops complex flavors that elevate your bread from good to extraordinary.
Step 8: Master the Marble Technique
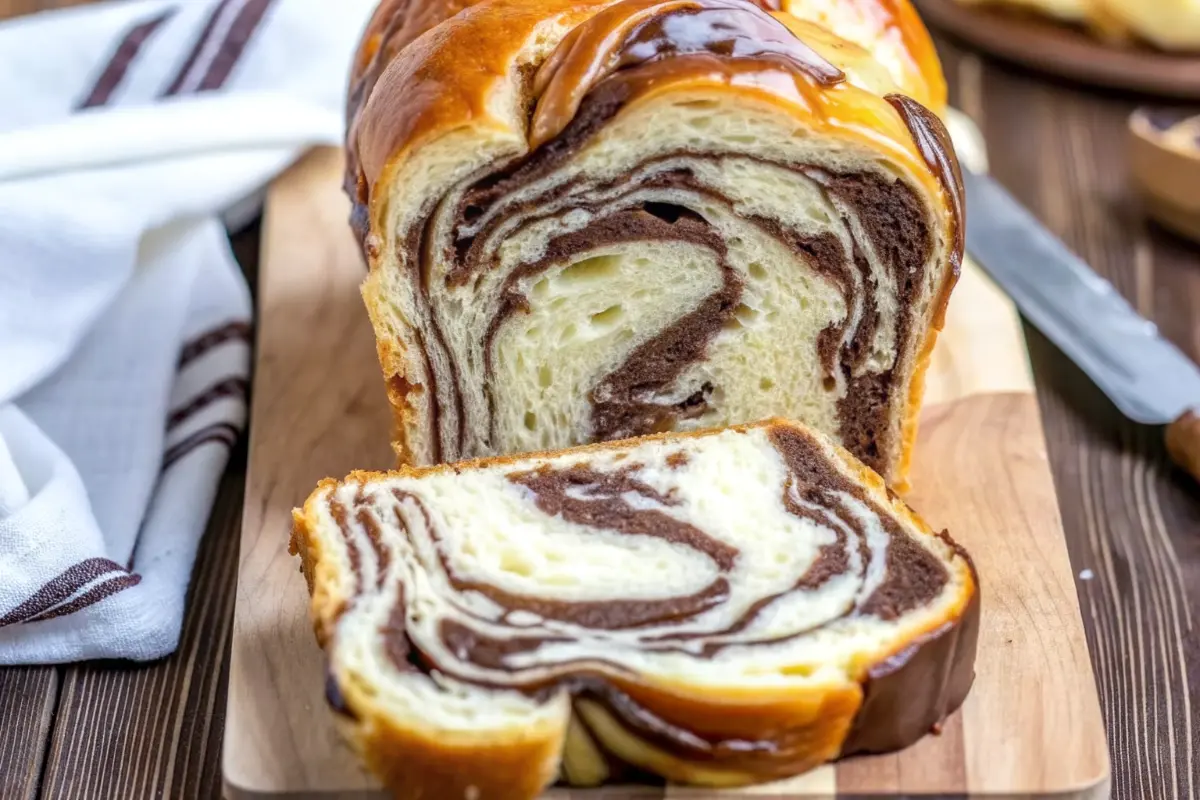
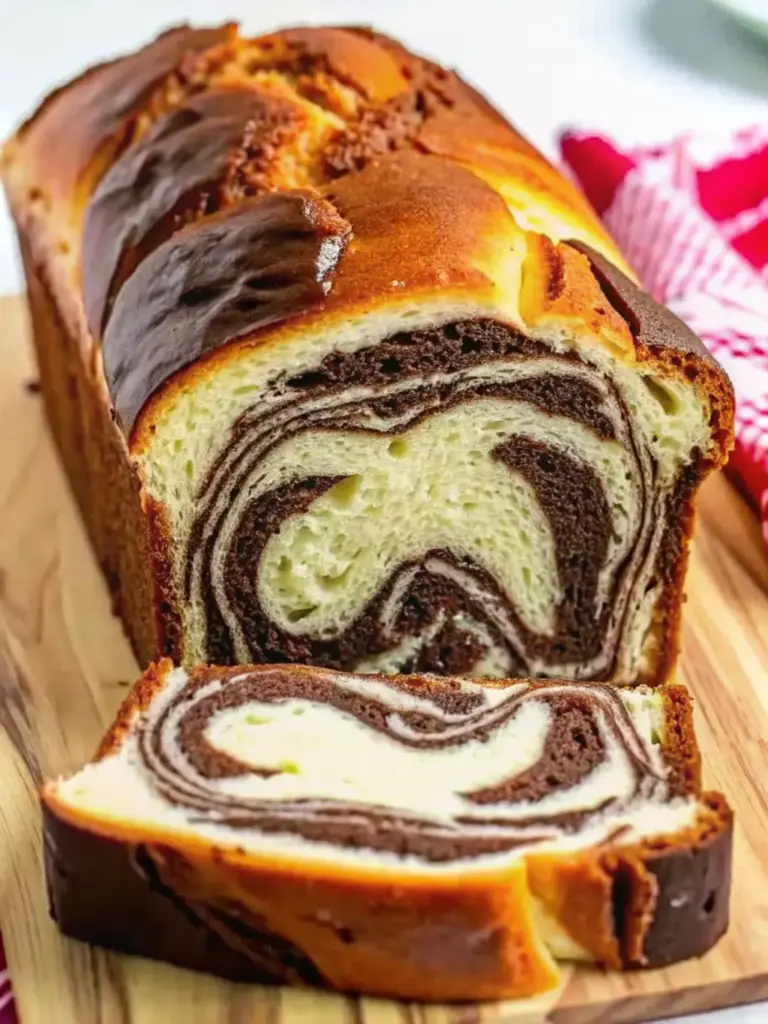
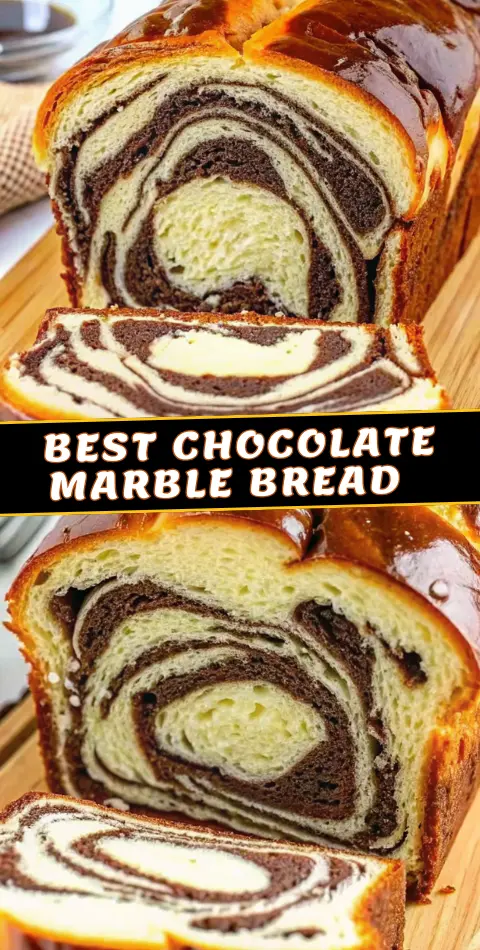
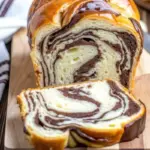
Divide each dough portion in half. Roll the white dough into a ¼-inch thick rectangle, then roll the chocolate dough to similar dimensions and place on top of the white dough. This layering technique is the secret to achieving those stunning marble patterns.
Step 9: Create the Marble Magic
Fold the layered dough into four vertical sections, then roll out again to ½-inch thickness. Fold in half and roll out one final time to 1-inch thickness. This lamination process creates the beautiful chocolate veining throughout your bread.
Step 10: Shape with Artistry
Make three cuts lengthwise through the marble dough rectangle, leaving the top connected. Braid the three strips loosely, gently twisting each strip to reveal the marble patterns. Place in buttered, parchment-lined pans – the visual impact is already stunning!
Step 11: The Final Proof
Allow your braided loaves to proof for 45 minutes until noticeably puffy. Preheat your oven to 350°F (180°C) during the last 15 minutes to ensure even baking temperature.
Step 12: The Golden Finish
Beat egg with 2 tablespoons water for egg wash and brush each loaf generously. This creates that coveted golden, bakery-style crust that makes your bread irresistibly appealing.
Step 13: Bake to Perfection
Bake for 40-45 minutes until deep golden brown. Test doneness with a toothpick inserted into the thickest part – it should come out clean or with just a few moist crumbs. The aroma filling your kitchen will be absolutely divine!

Nutritional Information
Per serving (1 slice, approximately 16 servings per loaf):
- Calories: 285
- Carbohydrates: 45g (15% daily value)
- Protein: 8g (16% daily value)
- Fat: 8g (12% daily value)
- Fiber: 2g (8% daily value)
- Sugar: 12g
- Sodium: 180mg (8% daily value)
- Iron: 2.5mg (14% daily value)
- Calcium: 95mg (9% daily value)
Key Nutritional Highlights:
- High in complex carbohydrates for sustained energy
- Good source of protein from eggs and flour
- Contains beneficial antioxidants from cacao
- Provides essential B vitamins from enriched flour
- Lower sugar content compared to commercial sweet breads
According to nutritional recommendations of the Institute of Medicine and the EFSA, 45% to 65% of our calories should come from complex carbohydrates, the richest source of which is the bread and cereal categories. Bread is considered a staple food, contributing no less than 10% of energy requirements in the global population.
Healthier Alternatives for the Recipe
Flour Substitutions:
- Replace 2 cups all-purpose flour with whole wheat pastry flour for increased fiber and nutrients
- Substitute 1 cup flour with almond flour to boost protein content and reduce carbohydrates
- Use 1 cup oat flour for added beta-glucan fiber, which supports heart health
Sugar Reductions:
- Reduce total sugar by ¼ cup and add 2 tablespoons maple syrup for natural sweetness
- Replace half the sugar with coconut sugar for lower glycemic impact
- Add 1 teaspoon stevia extract and reduce sugar by ½ cup
Protein Enhancements:
Following the trend where high protein is the fastest-growing claim in US bread launches, with 14% of 2021-2022 launches featuring high protein claims, consider adding:
- 2 tablespoons protein powder (vanilla or unflavored)
- ¼ cup ground flaxseed for omega-3 fatty acids
- 2 tablespoons chia seeds for additional protein and fiber
Dairy-Free Adaptations:
- Use coconut milk or oat milk instead of dairy milk
- Replace butter with equal amounts of coconut oil or vegan butter
- Substitute eggs with flax eggs (1 tablespoon ground flaxseed + 3 tablespoons water per egg)
These modifications maintain the delicious flavor profile while addressing various dietary needs and health goals.
Serving Suggestions
Classic Pairings:
- Morning Indulgence: Serve warm slices with cultured butter and a drizzle of honey alongside freshly brewed coffee
- Elegant Brunch: Toast lightly and top with mascarpone cheese and fresh berries for a sophisticated presentation
- Afternoon Tea: Pair thin slices with Earl Grey tea and a small bowl of clotted cream
Creative Applications:
- French Toast Upgrade: Transform day-old slices into luxurious French toast with vanilla custard soaking
- Dessert Bread Pudding: Cube and use as the base for a decadent chocolate bread pudding with warm vanilla sauce
- Ice Cream Sandwich: Use toasted slices to create unique ice cream sandwiches with vanilla or cinnamon ice cream
Seasonal Variations:
- Fall Harvest: Serve with spiced apple butter and warm cider
- Winter Comfort: Pair with hot chocolate topped with whipped cream
- Spring Fresh: Accompany with strawberry compote and light Greek yogurt
- Summer Picnic: Pack slices for outdoor gatherings with fresh fruit salad
Each serving suggestion transforms this Chocolate Marble Bread into a memorable experience that suits any occasion or time of day.
Common Mistakes to Avoid
Temperature Troubles:
Mistake: Using milk that’s too hot for yeast activation.
Solution: Ensure milk is lukewarm (100-110°F). Water that’s too hot kills yeast, while too cold prevents activation. To proof active dry yeast, warm the plant milk to 100°F (do not exceed 110°F or the yeast will die).
Mixing Mishaps:
Mistake: Overmixing the dough after flour addition.
Solution: Mix just until ingredients come together. Overmixing develops excess gluten, creating tough, dense bread instead of the desired tender texture.
Rising Impatience:
Mistake: Rushing the rising process or rising in too cool an environment.
Solution: Allow full rising time in a warm (75-80°F), draft-free location. Proper fermentation is crucial for flavor development and texture.
Marble Technique Errors:
Mistake: Making marble layers too thick or not laminating properly.
Solution: Roll dough to specified thickness and follow the folding sequence precisely. To achieve proper laminate, work the dough in the same way as puff pastry or Danish dough, making folds and working the chocolate the way we work butter in these elaborations.
Baking Blunders:
Mistake: Opening the oven door frequently during baking.
Solution: Resist the urge to check constantly. Frequent door opening causes temperature fluctuations that affect rising and browning.
Measurement Mistakes:
Mistake: Using volume measurements instead of weight for flour.
Solution: For consistent results, use a kitchen scale when possible. For best results, use gram measurements with a digital scale rather than cup measurements. Cup measurements are simply not accurate enough.
Storing Tips for the Recipe
Short-Term Storage (1-3 days):
Wrap cooled bread completely in plastic wrap or store in an airtight container at room temperature. This bread stays fresh covered at room temperature for up to 3 days, or in the fridge for up to 7 days. The plastic wrap prevents moisture loss while maintaining the soft crumb texture.
Extended Refrigerator Storage (up to 1 week):
For longer freshness, store wrapped bread in the refrigerator. While this may slightly firm the texture, it prevents mold growth and maintains food safety. Allow to come to room temperature before serving, or toast lightly to restore softness.
Long-Term Freezing (up to 3 months):
You can wrap the whole bread in plastic and then in tin foil and freeze it for up to a month or wrap individual slices to freeze. For even longer storage, properly wrapped bread maintains quality for up to 3 months. Slice before freezing for convenient individual portions.
Optimal Freshness Tips:
- Cool completely before storing to prevent condensation
- Store different flavored breads separately to prevent flavor transfer
- Use freezer-safe bags with dates for freezer storage
- Thaw frozen bread at room temperature for best texture
- Refresh day-old bread by wrapping in damp paper towel and microwaving for 10-15 seconds
Revival Techniques:
- Toast slices lightly to restore crispy exterior
- Brush with melted butter and warm in 300°F oven for 5 minutes
- Steam briefly to restore moisture to day-old bread
Conclusion
This Chocolate Marble Bread recipe delivers bakery-quality results through careful attention to technique, timing, and ingredient quality. The stunning marble patterns, tender crumb, and rich chocolate flavor create an impressive homemade bread that satisfies both novice and experienced bakers. With proper storage techniques, this bread remains deliciously fresh for days, making it perfect for meal planning or special occasions.
Ready to create your own chocolate marble masterpiece? Try this recipe and share your beautiful results in our comments section below. Don’t forget to subscribe for more artisanal baking recipes and expert tips that will transform your home kitchen into a professional bakery!
FAQs
Q: Can I make this recipe without a stand mixer?
A: Yes, though it requires more effort. Mix ingredients by hand in a large bowl, then knead the dough on a floured surface for 10-12 minutes until smooth and elastic. The stand mixer simply makes the process easier and more consistent.
Q: Why didn’t my marble pattern turn out clearly defined?
A: To achieve the beautiful marbled look, laminate the dough after adding the chocolate sheet. Do about 3-5 laminations. Ensure your chocolate and vanilla doughs have similar consistency, and don’t overmix during the braiding process.
Q: Can I substitute instant yeast for active dry yeast?
A: Absolutely! Use ¾ the amount of instant yeast (about 1½ teaspoons) and add it directly to the flour mixture without proofing. This can actually save you about 10 minutes in preparation time.
Q: My bread seems dense despite following the recipe. What went wrong?
A: Dense bread usually results from insufficient rising time, old yeast, or too much flour. Ensure your yeast is fresh (check the expiration date), allow full rising time, and measure flour accurately using the spoon-and-level method.
Q: Is this bread suitable for people with dietary restrictions?
A: This recipe contains gluten, dairy, and eggs. However, you can adapt it using our healthier alternatives section for dairy-free, egg-free, or reduced-gluten versions. While about one in five US bakery launches in 2022 were gluten-free, manufacturers are increasingly looking into wheat alternative flours.
Q: How do I know when the bread is perfectly baked?
A: The bread should be deep golden brown and sound hollow when tapped on the bottom. A toothpick inserted into the thickest part should come out clean or with just a few moist crumbs. Internal temperature should reach 190-200°F.
Healthy Chocolate Marble Bread Recipe
- Total Time: 3.5-4 hours
- Yield: 16 slices 1x
Description
A stunning homemade Chocolate Marble Bread featuring rich cocoa swirls, tender crumb, and bakery-style aroma—an artisanal loaf made easy for home bakers.
Ingredients
- 1 cup lukewarm whole milk
- 1 cup granulated sugar, divided
- 2 tsp active dry yeast
- 5 large eggs
- 1/4 tsp sea salt
- 2 tsp vanilla extract
- 6.5 cups all-purpose flour
- 6 oz unsalted butter, softened
- 1/4 cup cacao powder
- 1/4 tsp ground cinnamon
- 1 large egg (for egg wash)
- 2 tbsp water (for egg wash)
Instructions
- Combine lukewarm milk, 1/4 cup sugar, and yeast. Let stand 5–10 minutes until foamy.
- Beat eggs and remaining 3/4 cup sugar on high for 5 minutes until pale and thick.
- Add yeast mixture, salt, and vanilla; mix until combined.
- Switch to dough hook. Add 4 cups flour gradually, then add softened butter until absorbed.
- Divide dough in half. To one half, add 1.5 cups flour until smooth; transfer to an oiled bowl.
- To the remaining dough, add cacao powder, cinnamon, and 1 cup flour; mix until smooth and place in another oiled bowl.
- Let both doughs rise 1–1.5 hours until doubled.
- Divide each dough in half. Roll white dough into a rectangle, roll chocolate dough to match, and layer on top.
- Fold into four sections, roll out again to 1/2-inch thickness, fold in half, and roll to 1-inch thickness to create marbling.
- Cut into three strips lengthwise, braid, and place into lined pans.
- Proof 45 minutes. Preheat oven to 350°F (180°C).
- Brush with egg wash and bake 40–45 minutes until golden and cooked through.
Notes
Use lukewarm milk only—excess heat kills yeast. Avoid overmixing to prevent dense texture. Accurate flour measurement ensures best crumb.
- Prep Time: 45 minutes
- Cook Time: 40-45 minutes
- Category: Bread
- Method: Baking
- Cuisine: American
Nutrition
- Serving Size: 1 slice
- Calories: 285
- Sugar: 12g
- Sodium: 180mg
- Fat: 8g
- Saturated Fat: 4g
- Unsaturated Fat: 4g
- Trans Fat: 0g
- Carbohydrates: 45g
- Fiber: 2g
- Protein: 8g
- Cholesterol: 0mg
Keywords: chocolate marble bread, homemade sweet bread, marbled loaf, bakery style bread