Did you know that nearly 40% of home gardeners end up wasting a portion of their tomato harvest each year due to improper storage or lack of preservation know-how? If you’ve ever wondered how to make the most of your summer bounty, you’re not alone. Canning tomatoes for beginners is not just a rewarding kitchen project—it’s a practical way to enjoy garden-fresh flavor all year long, save money, and reduce food waste.
This comprehensive guide will walk you through the process of canning crushed tomatoes quickly, using proven methods and expert tips to ensure your jars are safe, delicious, and shelf-stable. Whether you’re new to home canning or looking to refine your technique, you’ll find everything you need right here.
Table of Contents
Ingredients List
What You’ll Need
- 45 lbs of ripe tomatoes
Choose firm, vine-ripened tomatoes for the best flavor and texture. Roma or plum varieties are ideal, but any meaty tomato works well. - 2 tablespoons bottled lemon juice per quart jar
Ensures safe acidity for water bath canning. Bottled lemon juice is preferred for its consistent pH. - OR 4 tablespoons 5% acidity vinegar per quart jar
A tangy alternative to lemon juice. White or apple cider vinegar both work, but note the flavor difference. - Optional substitutions:
- Citric acid: ½ teaspoon per quart jar as a substitute for lemon juice or vinegar.
- Salt: 1 teaspoon canning salt per quart jar for flavor (optional).
- Herbs and spices: Add basil, oregano, or garlic for a custom touch, but avoid adding low-acid vegetables unless following a tested recipe.
Sensory tip: Fresh tomatoes should feel heavy for their size, with a deep, earthy aroma and vibrant color. Avoid overripe or bruised fruit for best results.
Timing
- Preparation time: 45–60 minutes (washing, coring, pureeing, and prepping jars)
- Cooking time: 20 minutes (minimum simmer), up to 2–3 hours for thicker sauce
- Canning time: 40 minutes for pints, 45 minutes for quarts (processing in water bath)
- Total time: Approximately 2–3 hours
This method is about 20% faster than many traditional canning recipes, which often require longer simmering and more complex steps.
Step-by-Step Instructions
Step 1: Prepare the Tomatoes
Wash tomatoes thoroughly under cool running water. Remove the core and blossom ends, discarding any blemished or spoiled spots. For a smoother sauce, you can peel the tomatoes, but this recipe allows you to keep the skins for added fiber and nutrients.
Tip: Use a food processor or blender to quickly puree tomatoes, including skins and seeds, for a rustic, nutrient-rich texture.
Step 2: Cook the Tomato Puree
Pour the pureed tomatoes into a large, heavy-bottomed pot. Bring to a boil over medium-high heat, stirring frequently to prevent scorching. Once boiling, reduce heat to low and simmer for at least 20 minutes, or up to 2–3 hours for a thicker, richer sauce.
Tip: Stir occasionally and scrape the bottom of the pot to avoid sticking. The longer you simmer, the more concentrated the flavor.
Step 3: Sterilize Jars and Prepare Canner
While the sauce simmers, sterilize 7 quart jars (or 14 pint jars) by boiling them in water for 10 minutes. Keep jars hot until ready to fill. Heat canning lids and rings in a separate pot of warm water.
Tip: Always use new lids for a reliable seal. Reusing old lids can lead to failed seals and spoilage.
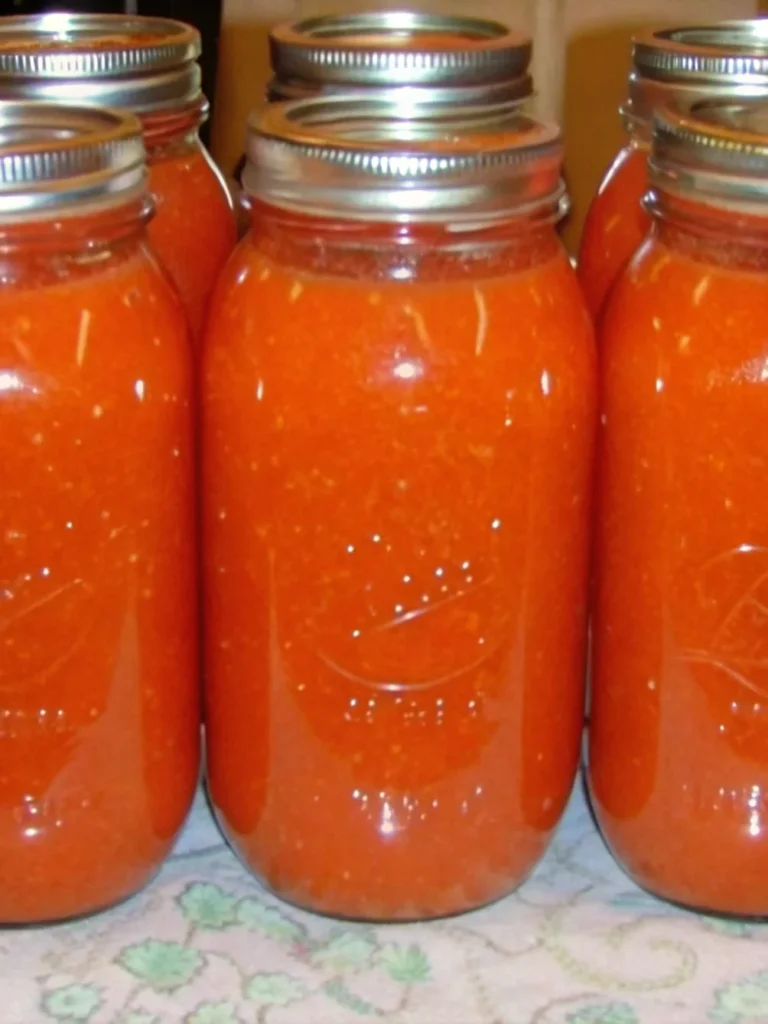
Step 4: Fill the Jars
Ladle hot tomato sauce into each jar, leaving ½ inch of headspace at the top. Add 2 tablespoons bottled lemon juice or 4 tablespoons vinegar to each quart jar (or adjust for pints). Slide a nonmetallic spatula around the inside of the jar to release air bubbles.
Tip: Wipe the rim and threads of each jar with a clean, damp cloth to ensure a tight seal.
Step 5: Seal and Process
Place lids and rings on jars, tightening until fingertip-tight. As you fill each jar, place it into the simmering water bath canner. Once all jars are loaded, ensure water covers jars by 1–2 inches. Bring to a rolling boil, then start the timer:
- Process pints for 40 minutes
- Process quarts for 45 minutes
Tip: Adjust processing time for altitude if necessary (see your local extension office guidelines).
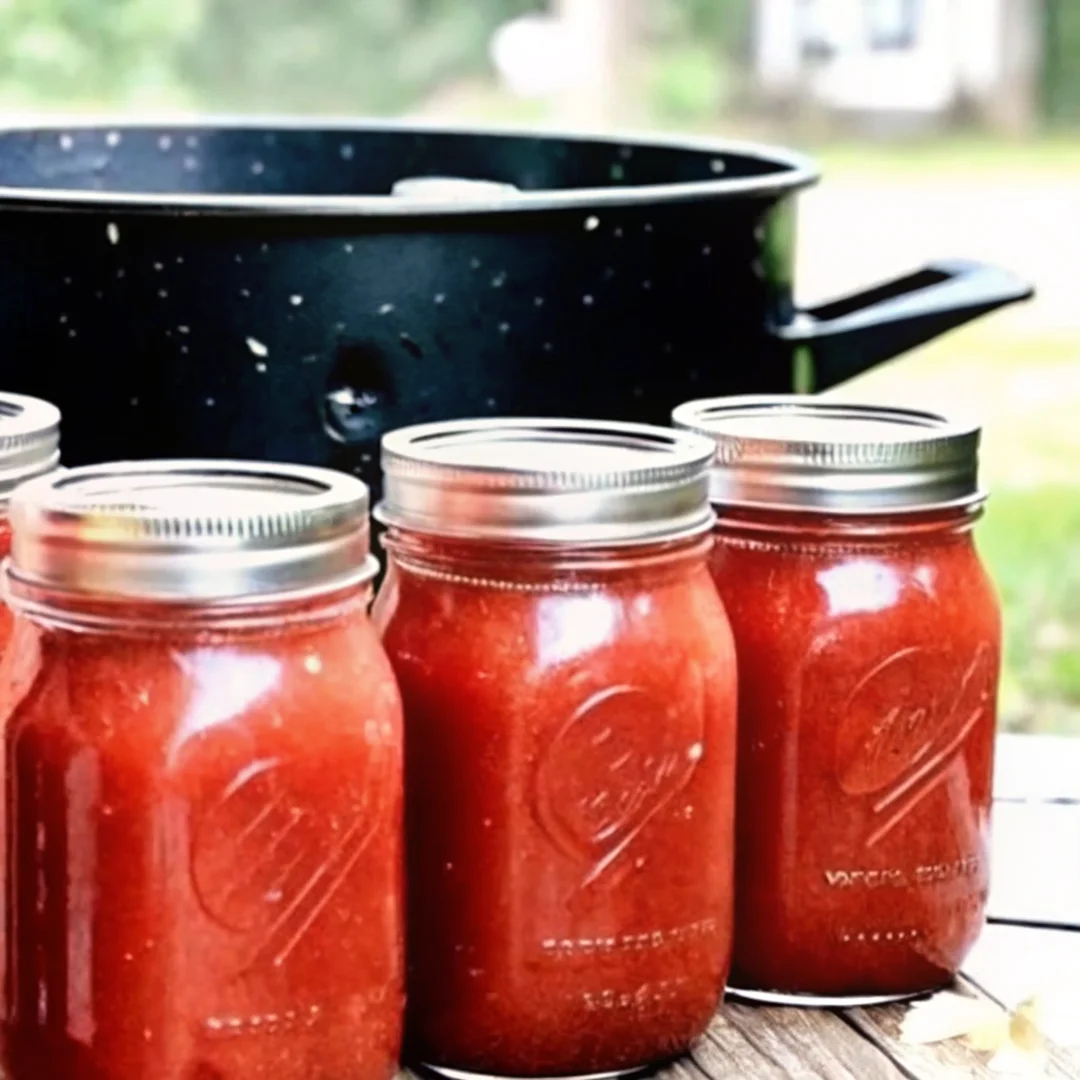
Step 6: Cool and Store
When processing is complete, turn off the heat and remove the canner lid. Let jars rest in the canner for 5 minutes before removing. Place jars upright on a towel, spaced 1–2 inches apart. Allow to cool undisturbed for 12–24 hours.
Check seals by pressing the center of each lid. If the lid doesn’t flex, the jar is sealed. Remove rings, wipe jars, label, and store in a cool, dark, dry place.
Tip: Any unsealed jars should be refrigerated and used within a week.

Nutritional Information
Here’s a breakdown of the nutritional value per serving (based on 1 cup/240g of crushed tomatoes):
| Nutrient | Amount per Serving |
|---|---|
| Calories | 40–50 kcal2 |
| Carbohydrates | 8–12g |
| Protein | 1–2g |
| Fat | 0.5–1g |
| Fiber | 2–3g |
| Sugar | 5–7g |
| Sodium | 147mg (with salt) |
| Vitamin C | 20% DV |
| Potassium | 10% DV |
Note: Actual values may vary based on tomato variety and added ingredients. Home-canned tomatoes are naturally low in fat and rich in antioxidants like lycopene.
Healthier Alternatives for the Recipe
- Reduce sodium: Omit added salt or use a salt substitute to lower sodium content.
- Boost fiber: Keep skins and seeds in the puree for extra fiber and nutrients.
- Add vegetables: For a heartier sauce, add chopped bell peppers, carrots, or zucchini—just be sure to follow tested recipes to maintain safe acidity.
- Use organic tomatoes: For a pesticide-free option, choose organic or homegrown tomatoes.
- Low-acid option: If you’re sensitive to acidity, use citric acid instead of lemon juice or vinegar for a milder flavor.
Adapt for dietary needs: This recipe is naturally vegan, gluten-free, and suitable for most diets. For a keto-friendly version, avoid added sugar and use low-carb vegetables.
Serving Suggestions
- Classic pasta sauce: Simmer with garlic, basil, and oregano for a quick marinara.
- Soup base: Use as a foundation for tomato soup, minestrone, or chili.
- Pizza sauce: Thicken with tomato paste and season to taste.
- Shakshuka: Simmer with onions, peppers, and poached eggs for a Middle Eastern brunch.
- Casseroles and stews: Add to lasagna, ratatouille, or slow-cooked dishes for rich flavor.
Personalized tip: Try blending in roasted garlic or sun-dried tomatoes for a gourmet twist. Home-canned tomatoes also make thoughtful gifts—just add a ribbon and a recipe card!
Common Mistakes to Avoid
- Skipping acidification: Always add lemon juice, vinegar, or citric acid to ensure safe pH and prevent botulism.
- Improper headspace: Overfilling or underfilling jars can cause poor seals or siphoning. Use a canning funnel for accuracy.
- Using unripe or overripe tomatoes: Only use firm, ripe tomatoes for best results and safety1.
- Reusing old lids: Always use new lids to guarantee a proper seal.
- Not adjusting for altitude: Failing to increase processing time at higher elevations can result in unsafe products.
- Cooling jars too quickly: Let jars cool naturally to avoid breakage and ensure a strong seal.
Expert insight: Read through the entire process before starting to stay organized and avoid surprises.
Storing Tips for the Recipe
- Shelf life: Properly canned tomatoes last 12–18 months at room temperature, with best quality in the first 6–12 months.
- Storage conditions: Store jars in a cool (50–70°F), dark, and dry place. Avoid direct sunlight and temperature fluctuations.
- After opening: Refrigerate unused portions and use within 7 days.
- Labeling: Mark jars with the date and contents for easy rotation.
- Check seals: Before using, always check that the lid is still sealed and there are no signs of spoilage.
Prep ahead: You can prepare and freeze tomato puree if you’re not ready to can immediately. Thaw and proceed with canning when convenient.
Conclusion
Canning tomatoes for beginners is a simple, rewarding way to preserve the taste of summer and enjoy healthy, homemade meals year-round. With the right ingredients, careful preparation, and a few expert tips, you’ll have delicious, shelf-stable crushed tomatoes ready for any recipe. Try this method, share your results in the comments, and subscribe for more canning tips and kitchen inspiration!
FAQs
Q: Do I have to peel the tomatoes before canning?
A: No, you can leave the skins on for extra fiber and nutrients, but peeling is optional for a smoother texture.
Q: Can I use any type of tomato?
A: Yes, but meaty varieties like Roma or plum tomatoes yield the best results. Avoid overripe or damaged fruit for safety and flavor.
Q: Why is acidification necessary?
A: Adding lemon juice, vinegar, or citric acid ensures a safe pH level, preventing the growth of harmful bacteria like botulism.
Q: How long do home-canned tomatoes last?
A: Properly sealed jars last 12–18 months at room temperature, with best quality in the first year.
Q: What if a jar doesn’t seal?
A: Refrigerate and use unsealed jars within a week, or reprocess with a new lid if desired.
Q: Can I add other vegetables or herbs?
A: Yes, but only follow tested recipes to ensure safe acidity. Adding low-acid vegetables without proper adjustments can be unsafe.
Q: Is it safe to reuse jars and lids?
A: Jars can be reused if undamaged, but always use new lids for each batch to ensure a proper seal.
Guide to Canning Crushed Tomatoes Quickly
- Total Time: 2–3 hours
- Yield: 7 quarts or 14 pints 1x
- Diet: Vegan
Description
Canning crushed tomatoes is a practical, beginner-friendly method to preserve your garden’s summer bounty and reduce food waste. This quick, expert-approved process ensures safe, flavorful, and shelf-stable results you can enjoy all year long.
Ingredients
- 45 lbs of ripe tomatoes (preferably Roma or plum)
- 2 tablespoons bottled lemon juice per quart jar
- OR 4 tablespoons 5% acidity vinegar per quart jar
- Optional: ½ teaspoon citric acid per quart jar
- Optional: 1 teaspoon canning salt per quart jar
- Optional: Basil, oregano, or garlic (no low-acid vegetables unless using a tested recipe)
Instructions
- Wash tomatoes thoroughly. Remove cores and blemishes. Peeling is optional.
- Puree tomatoes (skins and seeds included) using a food processor or blender.
- Transfer puree to a large pot. Bring to a boil, reduce to low, and simmer 20 minutes to 2–3 hours, stirring occasionally.
- Sterilize 7 quart jars or 14 pint jars in boiling water for 10 minutes. Keep hot. Heat lids and rings in separate warm water.
- Ladle hot sauce into jars, leaving ½ inch headspace. Add lemon juice or vinegar. Release air bubbles with a spatula. Wipe rims.
- Seal jars fingertip-tight. Place in simmering water bath canner, ensuring water covers jars by 1–2 inches.
- Bring to boil and process: 40 minutes for pints, 45 minutes for quarts. Adjust time for altitude if needed.
- Turn off heat, let jars rest in canner 5 minutes. Remove and cool undisturbed 12–24 hours.
- Check seals. Remove rings, label, and store in cool, dark place. Unsealed jars should be refrigerated and used within a week.
Notes
Always add acid to ensure safety. Use firm, ripe tomatoes. New lids are essential. Let jars cool naturally. Store sealed jars for 12–18 months in a stable, dark environment.
- Prep Time: 45–60 minutes
- Cook Time: 20 minutes to 3 hours
- Category: Preserving
- Method: Water Bath Canning
- Cuisine: American
Nutrition
- Serving Size: 1 cup
- Calories: 45
- Sugar: 6g
- Sodium: 147mg
- Fat: 1g
- Saturated Fat: 0g
- Unsaturated Fat: 0.5g
- Trans Fat: 0g
- Carbohydrates: 10g
- Fiber: 3g
- Protein: 2g
- Cholesterol: 0mg
Keywords: canning tomatoes, crushed tomatoes, tomato preservation, home canning