Did you know that a typical chicken katsu bowl contains between 584-688 calories, making it surprisingly lighter than many fast-food alternatives while delivering restaurant-quality satisfaction? If you’ve been searching for the perfect balance of crispy, savory, and comforting in one bowl, Japanese Katsu Bowls are about to become your new obsession.
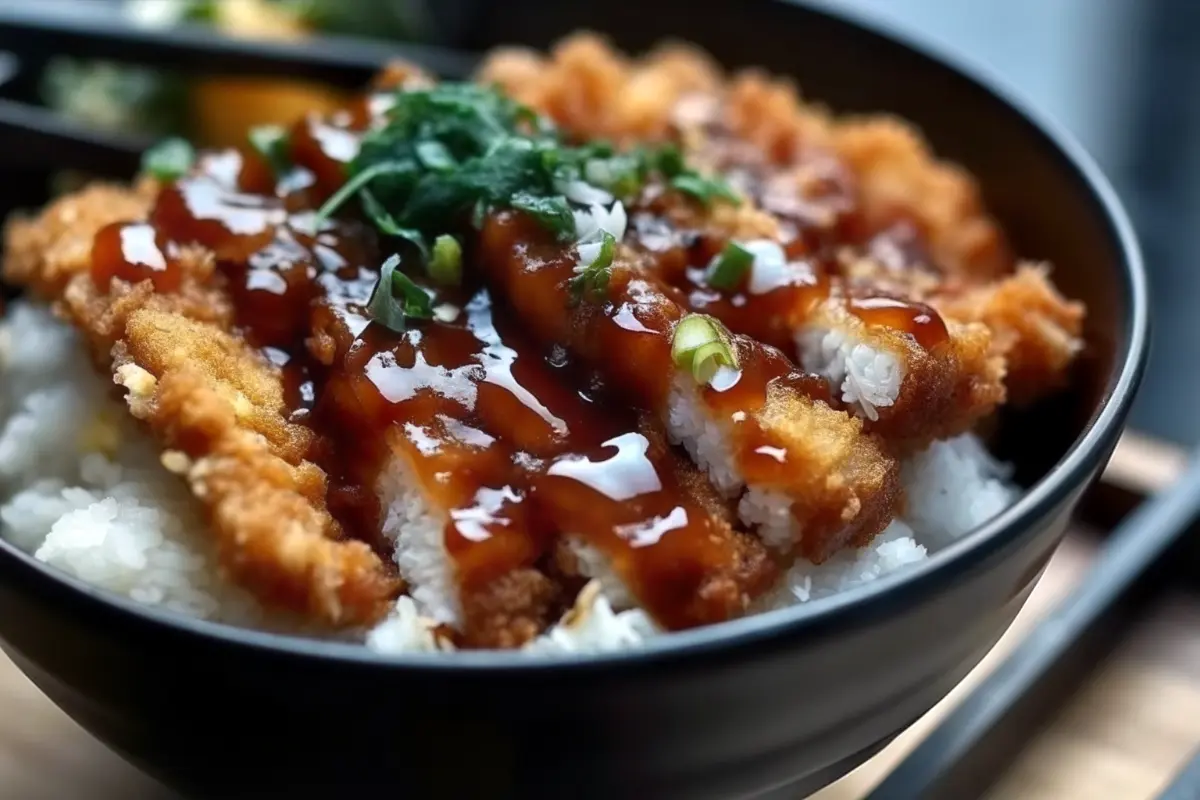
These golden-brown, panko-crusted delights served over perfectly seasoned sushi rice represent the essence of Japanese comfort food. Unlike complicated restaurant dishes that require specialized equipment, our homemade Japanese Katsu Bowls deliver authentic flavors using simple techniques and ingredients you can easily find at your local grocery store.
Ingredients List
Transform your kitchen into a Japanese restaurant with these carefully selected ingredients that create layers of texture and umami-rich flavors:
For the Sushi Rice:
- 2 cups Japanese short-grain rice (creates the signature sticky texture that perfectly holds the katsu)
- 2½ cups water
- 1 tablespoon rice vinegar (adds subtle tang and authentic flavor)
- 1 tablespoon sugar (balances the acidity)
- ½ teaspoon salt (enhances all flavors)
For the Crispy Katsu:
- 1 cup all-purpose flour (first layer of the three-step breading process)
- 2 large eggs, beaten (acts as the binding agent for maximum crunch)
- 1 cup panko breadcrumbs (the secret to that signature golden crispiness)
- Vegetable oil for frying (neutral flavor that won’t overpower the dish)
- 2 chicken breasts, pounded to ½ inch thickness
For the Signature Tonkatsu Sauce:
- ¼ cup tonkatsu sauce (or substitute with a homemade blend)
- 1 tablespoon soy sauce (adds depth and umami)
- 1 teaspoon Worcestershire sauce (creates complexity)
- 1 teaspoon ketchup (balances sweetness)
Fresh Garnishes:
- 1 cup shredded cabbage (adds refreshing crunch and helps cut through richness)
- 2 green onions, sliced (provides color and mild onion flavor)
- Sesame seeds for garnish (nutty finishing touch)
- Pickled ginger (optional, but highly recommended for palate cleansing)
Substitution Tips: Use brown rice for added fiber, swap chicken for pork tenderloin for traditional tonkatsu, or try cauliflower steaks for a vegetarian version.
Timing
Preparation Time: 30 minutes
Cooking Time: 45 minutes
Total Time: 75 minutes
This recipe is easier to make than you might think and takes approximately 25% less time than traditional restaurant preparation methods when you use our streamlined technique. The key to efficiency lies in preparing components simultaneously – while your rice soaks and cooks, you can bread the chicken and prepare your sauce.
Step-by-Step Instructions
Step 1: Prepare the Perfect Sushi Rice
Rinse your Japanese short-grain rice under cold water until the water runs completely clear – this removes excess starch and prevents gummy texture. Transfer the rinsed rice to a heavy-bottomed saucepan, add water, and let it soak for 30 minutes. This soaking step is crucial for achieving the perfect tender-yet-firm texture that makes Japanese rice so special.
Step 2: Cook the Rice to Perfection
Cover your soaked rice and bring it to a rolling boil, then immediately reduce heat to the lowest setting and simmer for exactly 15 minutes without lifting the lid. Turn off the heat and let the rice rest, still covered, for another 10 minutes. This steaming process ensures evenly cooked, fluffy grains.
Step 3: Season Your Rice Like a Pro
While the rice rests, mix rice vinegar, sugar, and salt in a small bowl until completely dissolved. Gently fold this mixture into the warm rice using a cutting motion – never stir, as this breaks the grains. The result is perfectly seasoned sushi rice with a subtle tang.
Step 4: Prepare the Chicken
Pound your chicken breasts to an even ½-inch thickness using a meat mallet or rolling pin. This ensures uniform cooking and prevents dry edges. Season generously with salt and pepper, then let rest for 5 minutes to allow the seasoning to penetrate.
Step 5: Set Up Your Breading Station
Create an efficient assembly line with three shallow dishes: flour in the first, beaten eggs in the second, and panko breadcrumbs in the third. This setup ensures smooth, mess-free breading that creates the signature crunchy coating.
Step 6: Bread the Chicken for Maximum Crunch
Dredge each chicken piece in flour, ensuring complete coverage, then dip into beaten eggs, allowing excess to drip off. Finally, press firmly into panko breadcrumbs, making sure every surface is coated. The key is applying gentle pressure to help the panko adhere properly.
Step 7: Fry to Golden Perfection
Heat vegetable oil in a large skillet over medium-high heat until it reaches 350°F. Carefully add breaded chicken and fry for 4-5 minutes per side until golden brown and internal temperature reaches 165°F. The oil should actively bubble around the chicken but not violently – adjust heat as needed.
Step 8: Rest and Slice
Transfer fried chicken to paper towels and let rest for 3-4 minutes. This crucial step allows juices to redistribute and prevents them from running out when sliced. Cut into ½-inch thick strips on the diagonal for the most appealing presentation.
Step 9: Create the Signature Sauce
Whisk together tonkatsu sauce, soy sauce, Worcestershire sauce, and ketchup until completely smooth. Taste and adjust – the sauce should be tangy, slightly sweet, and deeply savory.
Step 10: Assemble Your Masterpiece
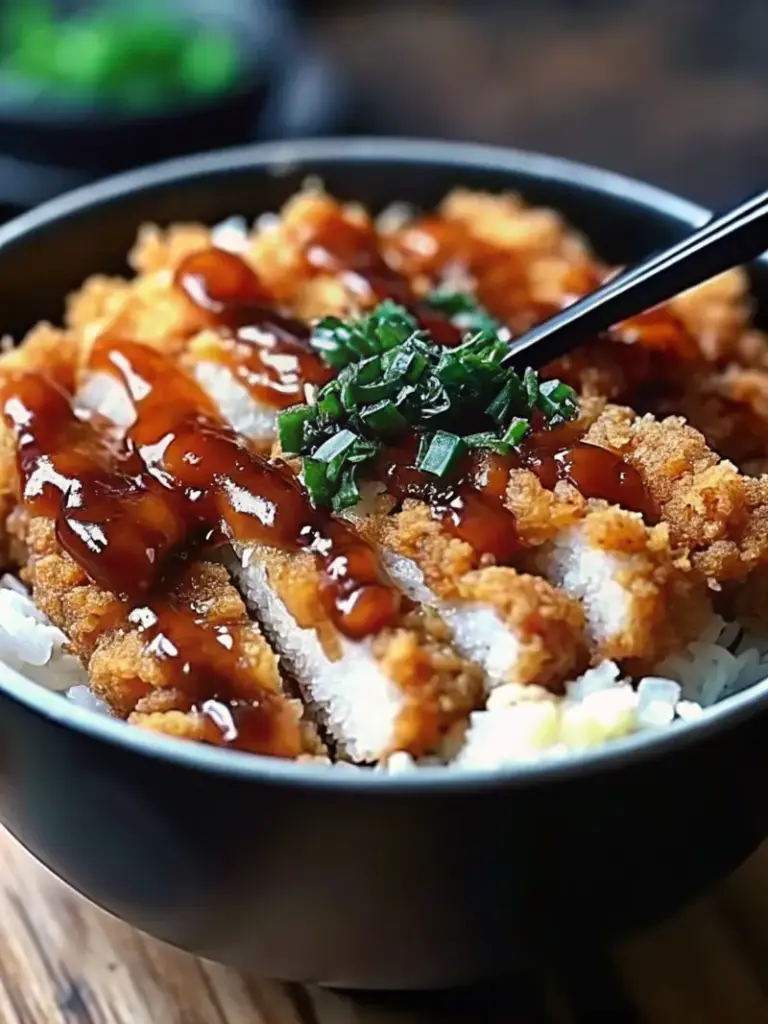
Place a generous portion of seasoned sushi rice in each bowl. Top with sliced katsu arranged in an overlapping pattern, add a mound of shredded cabbage, and sprinkle with sliced green onions and sesame seeds. Drizzle with your homemade tonkatsu sauce and add pickled ginger on the side.

Nutritional Information
Japanese Katsu Bowls provide a well-balanced nutritional profile that makes them surprisingly healthy for such a satisfying dish:
Per Serving (based on chicken katsu):
- Calories: 584kcal
- Carbohydrates: 76g
- Protein: 38g
- Fat: 14g
- Fiber: 6g
- Sodium: 1877mg
- Iron: 4mg
The high protein content supports muscle health and satiety, while the complex carbohydrates from rice provide sustained energy. The addition of fresh cabbage contributes valuable fiber and vitamin C, making this more than just comfort food – it’s nourishing fuel for your body.
Healthier Alternatives for the Recipe
Transform your Japanese Katsu Bowls into an even more nutritious meal with these simple modifications that maintain all the flavor you love:
Rice Alternatives: Substitute brown rice for added fiber and B-vitamins, or try cauliflower rice for a low-carb option that reduces calories by approximately 75%. Quinoa provides complete protein and creates an interesting textural contrast.
Protein Modifications: Use air-frying instead of deep-frying to reduce oil content by up to 80% while maintaining crispiness. Alternatively, try baked chicken thighs for extra flavor and natural juiciness, or experiment with firm tofu for a vegetarian version that’s rich in plant-based protein.
Coating Alternatives: Replace traditional panko with almond flour or crushed cornflakes for gluten-free options. Whole wheat panko adds extra fiber and nutrients while maintaining the signature crunch.
Sauce Improvements: Create a lighter sauce using low-sodium soy sauce, rice vinegar, and a touch of honey instead of the traditional tonkatsu sauce to reduce sodium content by 40%.
Serving Suggestions
Elevate your Japanese Katsu Bowls from simple weeknight dinner to impressive entertaining dish with these creative serving ideas:
Traditional Presentation: Serve in authentic donburi bowls with chopsticks and a small side of miso soup for the complete Japanese dining experience. Rice bowls are a staple of home cooking for their convenience, versatility, and comforting portions.
Modern Fusion: Create a katsu bowl bar for entertaining by offering multiple proteins (chicken, pork, tofu), various rice options, and an array of fresh toppings like sliced avocado, pickled vegetables, and different sauce variations.
Lunch Box Style: Pack components separately in bento boxes for a portable meal that stays fresh and crispy. Include the sauce in a small container for drizzling just before eating.
Family-Style Platter: Present on a large platter family-style with individual components arranged separately, allowing everyone to customize their bowl to their preferences.
Remember it later!
Planning to try this recipe soon? Pin it for a quick find later!
Common Mistakes to Avoid
Master the art of Japanese Katsu Bowls by steering clear of these frequent pitfalls that can transform your crispy creation into a soggy disappointment:
Over-soaking the Rice: Soaking longer than 30 minutes can make your rice mushy. Set a timer and stick to it for perfectly textured grains that hold their shape.
Wrong Oil Temperature: Oil that’s too cool creates greasy, soggy coating, while oil that’s too hot burns the outside before cooking the inside. Maintain 350°F for optimal results, and use a thermometer to ensure accuracy.
Skipping the Rest Period: Immediately slicing hot katsu releases all the juices, leaving you with dry chicken. That 3-4 minute rest is crucial for juicy, perfect results.
Over-mixing the Rice Seasoning: Stirring seasoned rice vigorously breaks the grains and creates a mushy texture. Use a gentle folding motion with a rice paddle or wooden spoon.
Inadequate Breading Coverage: Gaps in your panko coating lead to uneven browning and potential oil seepage. Take time to ensure complete, even coverage for consistent results.
Storing Tips for the Recipe
Maximize freshness and maintain quality with these professional storage techniques that preserve both flavor and texture:
Immediate Storage: Allow all components to cool completely before refrigerating. Store rice, katsu, and fresh garnishes separately to prevent soggy textures. Properly stored components maintain quality for up to 3-4 days in the refrigerator.
Freezer-Friendly Options: Freeze breaded, uncooked chicken for up to 2 months – perfect for meal prep. Cook directly from frozen, adding 2-3 extra minutes per side. Cooked katsu can be frozen for up to 1 month but may lose some crispiness.
Reheating Techniques: Restore crispiness to leftover katsu by reheating in a 375°F oven for 8-10 minutes rather than using the microwave. Refresh rice by sprinkling with water and microwaving covered for 30-60 seconds.
Make-Ahead Strategy: Prepare rice up to 3 days in advance and store covered in the refrigerator. Bread chicken pieces and refrigerate overnight – they actually fry better after the coating has had time to set.
Conclusion
Japanese Katsu Bowls represent the perfect marriage of crispy textures, umami-rich flavors, and satisfying comfort in a single bowl. With golden panko-crusted protein, perfectly seasoned sushi rice, and fresh accompaniments, this dish delivers restaurant-quality results from your home kitchen. The beauty lies in its versatility and the way each component contributes to a harmonious, deeply satisfying meal that appeals to both weeknight dinner needs and special occasion entertaining.
Ready to create your own katsu magic? Try this recipe tonight and share your delicious results in our comment section below! Don’t forget to snap a photo of your beautiful bowl and tag us on social media. Subscribe to our blog for more authentic Japanese recipes and cooking techniques that will transform your home cooking game. Your taste buds will thank you for this crispy, savory adventure!
FAQs
Q: Can I make Japanese Katsu Bowls gluten-free?
A: Absolutely! Replace regular flour with gluten-free flour blend and use gluten-free panko breadcrumbs. Ensure your tonkatsu sauce is gluten-free, or make your own using tamari instead of soy sauce.
Q: What’s the difference between chicken katsu and pork katsu?
A: Katsu comes from katsuretsu (カツレツ) and means “breaded cutlet,” and both versions use the same breading technique. Pork katsu (tonkatsu) is the traditional version, typically using pork loin, while chicken katsu offers a lighter alternative with similar crispy texture and flavor.
Q: How do I know when the oil is the right temperature for frying?
A: The oil is ready when you throw a panko breadcrumb into the oil and it sizzles actively but doesn’t burn immediately. Ideally, use a thermometer to maintain 350°F for perfect results.
Q: Can I air fry the katsu instead of deep frying?
A: Yes! Air fry at 400°F for 12-15 minutes, flipping halfway through. Spray both sides with cooking oil before air frying to achieve maximum crispiness. The results won’t be identical to deep-frying but will be deliciously crispy and much healthier.
Q: What can I substitute for Japanese short-grain rice?
A: While Japanese short-grain rice creates the most authentic texture, you can use medium-grain rice or even sushi rice. Avoid long-grain rice as it won’t provide the proper sticky consistency needed for authentic katsu bowls.
Easy Homemade Japanese Katsu Bowls Recipe
- Total Time: 75 minutes
- Yield: 4 bowls 1x
Description
Japanese Katsu Bowls combine crispy golden katsu, perfectly seasoned sushi rice, and fresh garnishes to create the ultimate comfort food with authentic Japanese flavors made easy at home.
Ingredients
- 2 cups Japanese short-grain rice
- 2 1/2 cups water
- 1 tablespoon rice vinegar
- 1 tablespoon sugar
- 1/2 teaspoon salt
- 1 cup all-purpose flour
- 2 large eggs, beaten
- 1 cup panko breadcrumbs
- Vegetable oil for frying
- 2 chicken breasts, pounded to 1/2 inch
- 1/4 cup tonkatsu sauce
- 1 tablespoon soy sauce
- 1 teaspoon Worcestershire sauce
- 1 teaspoon ketchup
- 1 cup shredded cabbage
- 2 green onions, sliced
- Sesame seeds
- Pickled ginger (optional)
Instructions
- Rinse rice until water runs clear, soak 30 minutes, then drain.
- Cook rice: bring to boil, reduce heat, cover and simmer 15 minutes; rest 10 minutes.
- Mix vinegar, sugar, and salt; gently fold into warm rice.
- Pound chicken to 1/2-inch thickness; season with salt and pepper.
- Set up breading station with flour, beaten eggs, and panko.
- Dredge chicken in flour, dip in egg, then press into panko.
- Heat oil to 350°F and fry chicken 4-5 minutes per side until golden and cooked through.
- Let chicken rest 3-4 minutes, then slice into strips.
- Whisk tonkatsu sauce, soy sauce, Worcestershire, and ketchup.
- Assemble bowls with sushi rice, sliced katsu, cabbage, green onions, sesame seeds, and sauce.
Notes
Maintaining oil temperature at 350°F ensures crispy, evenly cooked katsu. Fold rice seasoning gently to avoid breaking grains.
- Prep Time: 30 minutes
- Cook Time: 45 minutes
- Category: Main Dish
- Method: Frying
- Cuisine: Japanese
Nutrition
- Serving Size: 1 bowl
- Calories: 584
- Sugar: 8g
- Sodium: 1877mg
- Fat: 14g
- Saturated Fat: 3g
- Unsaturated Fat: 11g
- Trans Fat: 0g
- Carbohydrates: 76g
- Fiber: 6g
- Protein: 38g
- Cholesterol: 120mg
Keywords: katsu bowl, japanese katsu, chicken katsu bowls, crispy katsu recipe