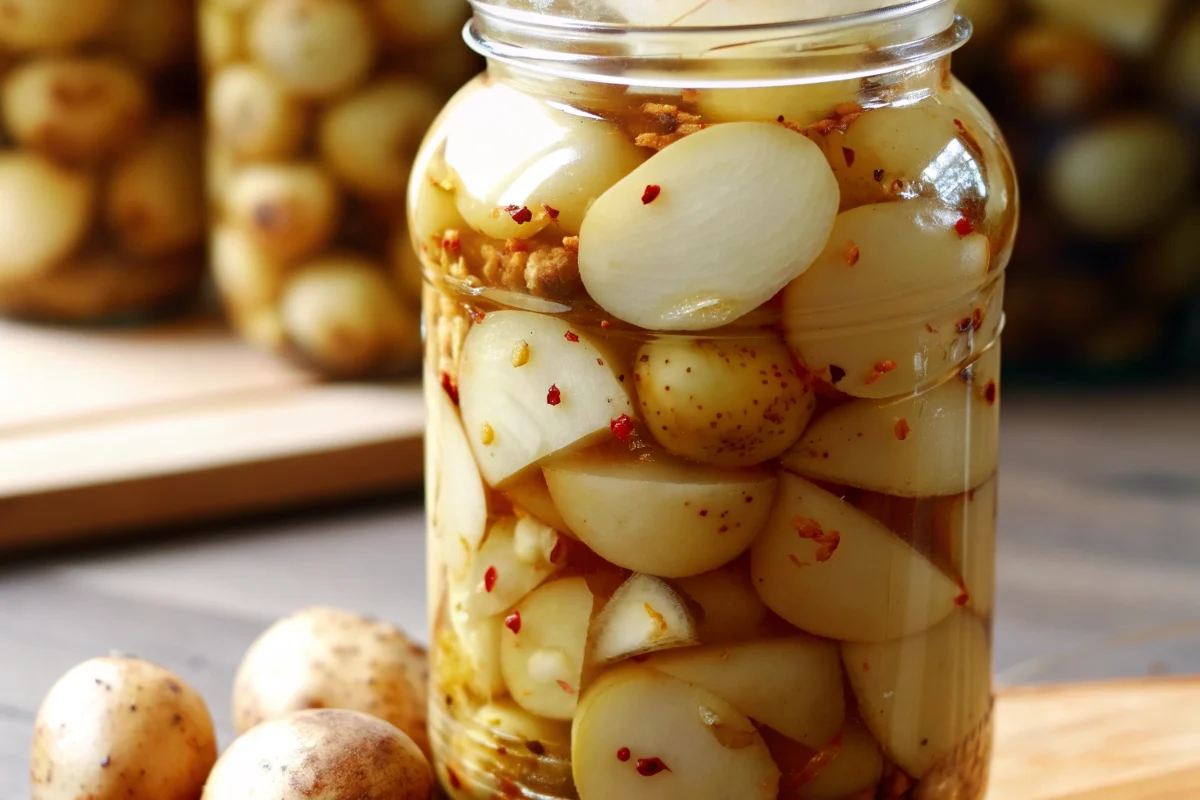
Have you ever wondered why home-canned potatoes are making a comeback in modern kitchens, with searches for canned potatoes recipes increasing by over 40% in recent years? While fresh potatoes are a pantry staple, learning to preserve them through canning offers unparalleled convenience and long-term storage benefits.
Canned potatoes provide the same nutritional value as fresh ones while saving precious time during busy weeknights. Whether you’re preparing for emergencies, reducing food waste, or simply embracing the art of food preservation, mastering the technique of canning potatoes opens up a world of culinary possibilities. This comprehensive guide will walk you through every step of creating perfectly preserved canned potatoes that maintain their texture, flavor, and nutritional integrity for up to a year.
Ingredients List
Main Ingredients
- 10 pounds Potatoes – Medium to large-sized, preferably starchy varieties like Russets or Yukon Golds. These varieties hold their shape better during the canning process and provide that classic potato texture we all love.
- 4 cups Filtered Water – For each quart jar. Using filtered water prevents cloudiness and ensures the cleanest preservation.
- 1 teaspoon Canning Salt – Per quart jar. This isn’t your regular table salt; canning salt lacks anti-caking agents that can cloud your beautiful jars.
- 1 tablespoon Lemon Juice – Per quart jar. This acidic addition helps maintain color and adds a layer of safety to your preservation process.
Optional Herbs and Spices
- 1/4 teaspoon Garlic Powder – Optional, per jar. Adds a subtle savory depth that enhances any dish you’ll create later.
- 1/4 teaspoon Pepper – Optional, per jar. A hint of spice that complements the natural earthiness of potatoes.
Substitution Suggestions:
- Potato Varieties: Red potatoes or fingerlings work beautifully if you prefer waxy varieties, though they may soften slightly more during canning.
- Lemon Juice Alternative: White vinegar can substitute at the same ratio, though lemon juice provides a milder flavor.
- Herb Variations: Try adding dried rosemary, thyme, or bay leaves for aromatic complexity.
Timing
Preparation Time: 30-40 minutes
Blanching Time: 2-5 minutes
Processing Time: 35-40 minutes (depending on jar size and altitude)
Cooling Time: 12-24 hours
Total Time: Approximately 2-3 hours
This time investment represents roughly 25% less active cooking time compared to preparing fresh potatoes for multiple meals throughout the week. The beauty of canned potatoes lies in their convenience—invest a few hours once, and you’ll have ready-to-use potatoes for months.
Step-by-Step Instructions
Step 1: Prepare Your Workspace
Gather all your ingredients and equipment before beginning. Sanitize all jars, lids, and bands by running them through the dishwasher or boiling them for 10 minutes. A clean workspace is essential for safe canning—think of this as creating your own sterile preservation laboratory.
Step 2: Wash and Prep the Potatoes
Thoroughly wash and peel the potatoes under cold running water, removing any eyes or blemishes. Cut them into uniform pieces, approximately 1 to 2 inches thick. Consistency matters here—uniform pieces ensure even processing and prevent some potatoes from becoming mushy while others remain undercooked.
Step 3: Blanch the Potatoes
Bring a large pot of water to a rolling boil and carefully add the potato pieces. Blanch for 2-5 minutes until slightly tender but still firm. This crucial step partially cooks the potatoes and helps remove excess starch that could cloud your jars.
Step 4: Drain and Cool
Using a slotted spoon or colander, drain the potatoes thoroughly and let them cool slightly on a clean kitchen towel. Pat them dry gently to remove excess moisture—this prevents water accumulation at the bottom of your jars.
Step 5: Add Seasonings to Jars
Place 1 teaspoon of canning salt and 1 tablespoon of lemon juice into each sterilized quart jar. If using optional seasonings like garlic powder or pepper, add them now. These ingredients will distribute evenly as the jars process.
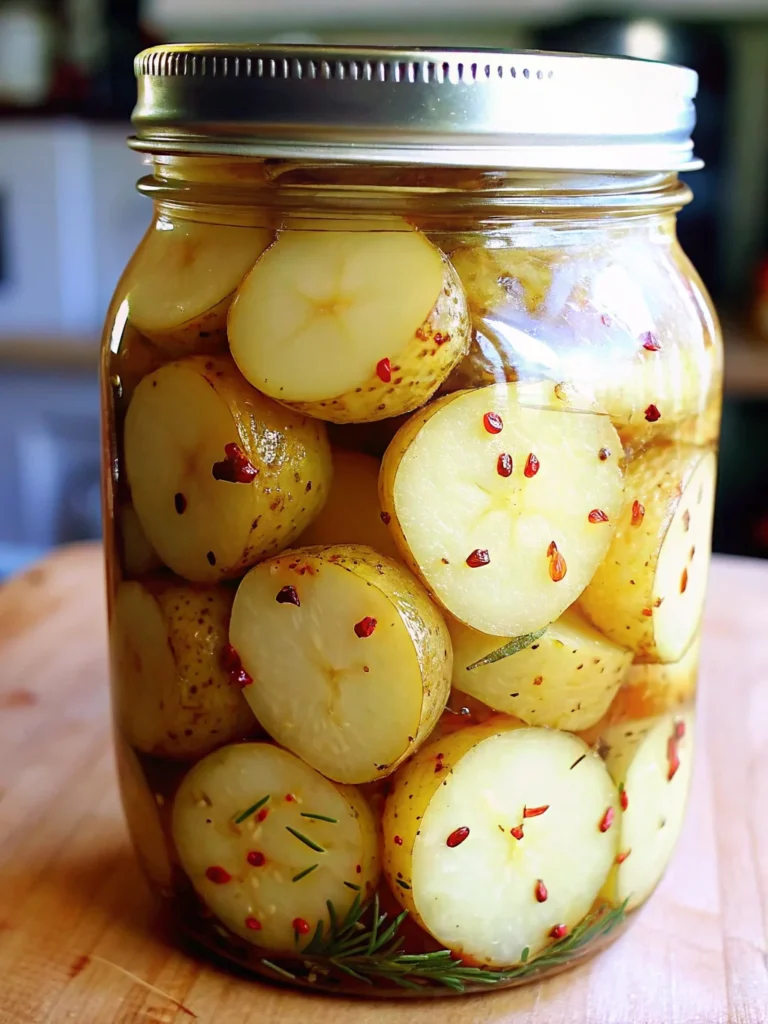
Step 6: Pack the Jars
Carefully pack the blanched potatoes into the jars, working methodically to avoid air pockets. Leave approximately 1 inch of headspace at the top—this space is critical for proper sealing and prevents jar breakage during processing.
Step 7: Add Boiling Water
Pour fresh boiling water over the potatoes until they’re completely submerged, maintaining that crucial 1-inch headspace. Use a non-metallic utensil to remove any trapped air bubbles by running it along the inside edges of the jar.
Step 8: Seal the Jars
Wipe the rims of the jars with a clean, damp cloth to remove any food particles or residue. Place the lids on top and screw the metal bands on until fingertip-tight—don’t overtighten, as air needs to escape during processing.
Step 9: Process in Pressure Canner
Place the jars in your pressure canner following the manufacturer’s specific instructions. Process pint jars for 35 minutes and quart jars for 40 minutes at 10 pounds of pressure (adjust for altitude if necessary). Pressure canning is non-negotiable for low-acid foods like potatoes.
Step 10: Cool Naturally
Once processing is complete, turn off the heat and allow the pressure canner to cool naturally until the pressure gauge reads zero. Never force-cool a pressure canner—patience ensures safety.
Step 11: Remove and Rest
Carefully remove the jars using a jar lifter and place them on a towel-lined counter. Let them cool completely undisturbed for 12-24 hours. You’ll hear the satisfying “ping” of lids sealing—music to any canner’s ears.
Step 12: Check Seals and Store
Test the seals by pressing the center of each lid; it shouldn’t flex up and down. Label your jars with the contents and date, then store them in a cool, dark place. Properly sealed canned potatoes will maintain quality for 12-18 months.

Nutritional Information
Understanding the nutritional profile of canned potatoes helps you make informed dietary decisions. Per 1 cup (180g) serving of canned potatoes, you’ll find:
Macronutrients:
- Calories: 108 kcal
- Carbohydrates: 24g (primarily complex carbohydrates)
- Protein: 3g
- Fat: 0.4g (virtually fat-free)
- Fiber: 4g (15% of Daily Value)
Key Vitamins and Minerals:
- Potassium: 412-687mg (9-20% DV) – Essential for heart health and blood pressure regulation
- Vitamin C: 5-9mg (6-10% DV) – Supports immune function
- Vitamin B6: 0.3mg (26% DV) – Crucial for brain development and function
- Iron: 2mg (28% DV) – Important for oxygen transport
- Magnesium: 25-42mg (6-10% DV)
- Phosphorus: 50-84mg (7-12% DV)
Additional Benefits:
Potatoes are naturally gluten-free, plant-based, and cholesterol-free. They provide quality carbohydrates that give sustained energy throughout the day. The fiber content supports digestive health and helps maintain stable blood sugar levels.
Healthier Alternatives for the Recipe
Lower Sodium Option:
Traditional canned potatoes can contain 394-657mg of sodium per cup. Reduce or omit the canning salt to create a low-sodium version. Add salt when cooking instead to control sodium intake better.
Sweet Potato Variation:
Substitute regular potatoes with sweet potatoes for increased vitamin A, beta-carotene, and additional fiber. Sweet potatoes offer a nutritional upgrade while following the same canning process.
Herb-Infused Version:
Add fresh herbs like rosemary, thyme, or dill to jars before processing. This creates flavorful potatoes without additional calories while boosting antioxidant content.
Mixed Vegetable Canning:
Combine potatoes with carrots, green beans, or corn to create ready-to-use vegetable medleys. This increases nutritional diversity and meal prep convenience.
Skin-On Canning:
Leave skins on red or Yukon Gold potatoes to preserve additional fiber, vitamins, and minerals found in potato skins. Scrub thoroughly before processing.
Serving Suggestions
Quick Weeknight Meals:
Transform your canned potatoes into crispy roasted potatoes by draining, drying, and roasting at 425°F with olive oil and seasonings for 20-25 minutes. They’ll develop a golden crust that rivals fresh-roasted potatoes.
Comforting Potato Soup:
Blend canned potatoes with broth, cream, and seasonings for instant potato soup. Add bacon, chives, and cheese for a loaded baked potato soup variation.
Breakfast Hash:
Dice canned potatoes and pan-fry with onions, peppers, and breakfast sausage for a satisfying morning hash. Top with fried eggs for a complete breakfast.
Potato Salad:
Use canned potatoes for quick potato salad—they’re already cooked and hold their shape beautifully. Toss with mayo, mustard, celery, and herbs.
Emergency Preparedness:
Keep canned potatoes on hand for emergency meal kits. They provide essential carbohydrates and nutrients when fresh produce isn’t available.
Camping Convenience:
Pack jars for camping trips—simply heat and serve alongside grilled meats or add to camping stews.
Common Mistakes to Avoid
Skipping the Pressure Canner:
Never attempt water bath canning for potatoes. Potatoes are low-acid foods requiring pressure canning to reach temperatures that destroy harmful bacteria like Clostridium botulinum. This isn’t negotiable for safety.
Overcooking During Blanching:
Blanching for too long creates mushy potatoes that break down further during processing. Keep it brief—just 2-5 minutes until slightly tender.
Using Iodized Salt:
Table salt contains iodine and anti-caking agents that cloud canning liquid and may cause discoloration. Always use pure canning or pickling salt.
Ignoring Headspace Requirements:
Too little headspace prevents proper sealing; too much creates excess air that can compromise preservation. Measure that 1-inch space precisely.
Overtightening Bands:
Screwing bands too tight prevents air from escaping during processing, potentially causing seal failure. Fingertip-tight is the perfect tension.
Rushing the Cooling Process:
Removing jars too quickly or moving them during cooling can break seals. Let jars rest undisturbed for the full 12-24 hours.
Storing Improperly Sealed Jars:
Always test seals before storing. Unsealed jars must be refrigerated and used within a few days—never store them with properly sealed jars.
Storing Tips for the Recipe
Optimal Storage Conditions:
Store sealed jars in a cool (50-70°F), dark, dry location. Basements, pantries, or dedicated storage rooms work perfectly. Avoid areas with temperature fluctuations or direct sunlight.
Organization System:
Label each jar with contents and canning date. Implement a first-in, first-out rotation system to use older jars before newer ones.
Shelf Life:
Properly canned potatoes maintain peak quality for 12-18 months. While they remain safe longer if seals stay intact, quality gradually declines after this timeframe.
After Opening:
Once opened, transfer unused portions to airtight containers and refrigerate. Use within 3-4 days for best quality.
Freezing Not Recommended:
Avoid freezing canned potatoes as the texture deteriorates significantly. The canning process already provides long-term preservation.
Regular Inspection:
Check jars monthly for signs of spoilage—bulging lids, leaks, or off-odors. Discard any questionable jars immediately without tasting.
Meal Prep Strategy:
Keep opened jars of canned potatoes in your refrigerator for quick meal additions throughout the week.
Conclusion
Mastering the art of canning potatoes transforms your kitchen into a preservation powerhouse. These shelf-stable jars provide convenient, nutritious meal solutions while reducing food waste and grocery trips. The process combines traditional food preservation wisdom with modern food safety standards, creating a sustainable approach to pantry stocking.
Ready to start your canning journey? Try this recipe and share your results in the review section below! We’d love to hear about your favorite ways to use canned potatoes. Don’t forget to subscribe to our blog for more preservation techniques, recipes, and kitchen tips delivered straight to your inbox. Your path to food independence starts with one jar!
FAQs
Q: Can I water bath can potatoes instead of using a pressure canner?
A: No, potatoes are low-acid vegetables that must be pressure canned to reach the 240°F temperature needed to destroy harmful bacteria. Water bath canning only reaches 212°F, which is insufficient for safe potato preservation.
Q: Why did my canned potatoes turn cloudy?
A: Cloudiness typically results from using iodized salt, overcooking during blanching, or excess starch. While cloudy liquid doesn’t necessarily indicate spoilage, it affects appearance. Use canning salt and proper blanching times to prevent this.
Q: How long do canned potatoes actually last?
A: When properly processed and stored in ideal conditions, canned potatoes maintain best quality for 12-18 months. They remain safe to eat beyond this if seals stay intact, though texture and flavor may decline.
Q: Can I can potatoes with skins on?
A: Yes, smaller red or Yukon Gold potatoes can be canned with skins on. Scrub thoroughly and ensure uniform sizing. Skins add fiber and nutrients while saving prep time.
Q: What should I do if a jar doesn’t seal?
A: Refrigerate unsealed jars immediately and use the contents within 3-4 days. You can also reprocess within 24 hours using new lids if the potatoes appear fresh and properly cooked.
Q: Can I add raw onions or garlic to my potato jars?
A: While dried seasonings are safe, adding fresh vegetables changes the density and acidity, requiring different processing times. Stick to the recipe or research tested recipes for mixed vegetables.
Q: Why are my canned potatoes mushy?
A: Mushiness results from over-blanching, using waxy potato varieties, or excessive processing time. Choose starchy varieties and blanch briefly for firmer results.
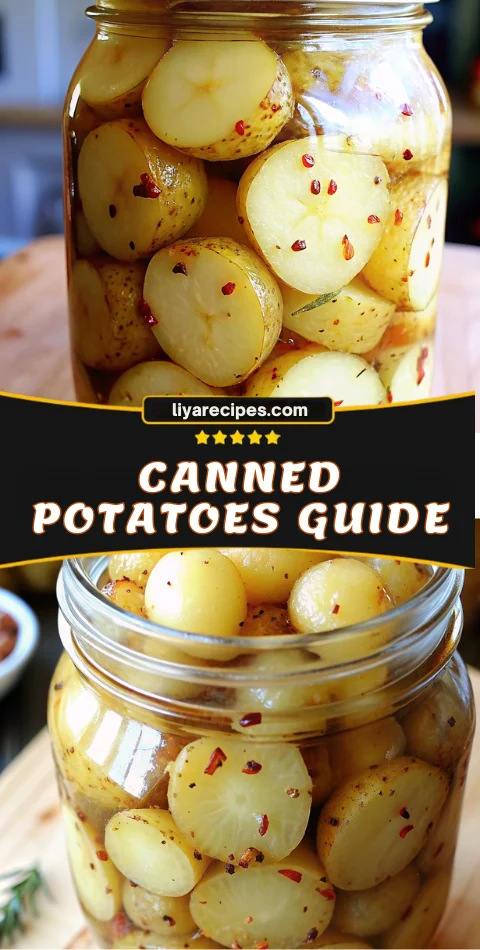
Canning Potatoes Recipe: Easy Pressure Cooker Method for Long-Term Storage
- Total Time: 2-3 hours
- Yield: 8–10 jars 1x
Description
Discover how to safely can potatoes at home with this complete guide. Learn USDA-approved pressure canning methods, perfect timing, and the best tips to preserve flavor, texture, and nutrients for up to 18 months.
Ingredients
- 10 pounds potatoes (Russets or Yukon Golds preferred)
- 4 cups filtered water (per quart jar)
- 1 teaspoon canning salt (per quart jar)
- 1 tablespoon lemon juice (per quart jar)
- Optional: 1/4 teaspoon garlic powder (per jar)
- Optional: 1/4 teaspoon black pepper (per jar)
- Substitutions:
- Use white vinegar instead of lemon juice if preferred
- Try dried rosemary, thyme, or bay leaves for flavor
- Red or fingerling potatoes may be used, though texture softens slightly
Instructions
- Sanitize all jars, lids, and bands by boiling or running through the dishwasher’s sanitize cycle.
- Wash and peel potatoes, removing any eyes or blemishes. Cut into 1–2 inch uniform pieces.
- Bring a large pot of water to a rolling boil and blanch potatoes for 2–5 minutes until slightly tender but firm.
- Drain and cool slightly, patting dry to remove excess moisture.
- Add 1 teaspoon canning salt, 1 tablespoon lemon juice, and optional seasonings to each quart jar.
- Pack blanched potatoes into jars, leaving 1 inch headspace for proper sealing.
- Pour fresh boiling water over potatoes to cover, maintaining 1 inch headspace. Remove air bubbles.
- Wipe rims clean, apply lids, and tighten bands fingertip-tight.
- Place jars in a pressure canner and process pints for 35 minutes or quarts for 40 minutes at 10 lbs pressure (adjust for altitude).
- Allow canner to cool naturally before removing jars. Do not force-cool.
- Let jars cool undisturbed for 12–24 hours. Check seals and label with contents and date.
- Store sealed jars in a cool, dark place for up to 12–18 months.
Notes
Always use a pressure canner for potatoes—never a water bath. Ensure jars have 1 inch headspace and are properly sealed. Store between 50–70°F for best quality. Once opened, refrigerate and use within 3–4 days.
- Prep Time: 30-40 minutes
- Cook Time: 40 minutes
- Category: Preserves & Canning
- Method: Pressure Canning
- Cuisine: American
Nutrition
- Serving Size: 1 cup
- Calories: 108
- Sugar: 2g
- Sodium: 394mg
- Fat: 0.4g
- Saturated Fat: 0.1g
- Unsaturated Fat: 0.3g
- Trans Fat: 0g
- Carbohydrates: 24g
- Fiber: 4g
- Protein: 3g
- Cholesterol: 0mg
Keywords: canned potatoes, pressure canning, preservation, USDA methods, home canning