Did you know that brioche bread, one of the most luxurious and indulgent baked goods in French cuisine, was originally considered a peasant’s staple? Today, brioche bread has transformed into a coveted delicacy gracing bakery windows and gourmet tables worldwide. The journey of brioche bread from humble Norman farmhouses to Parisian patisseries is a testament to how culinary craftsmanship evolves across centuries.
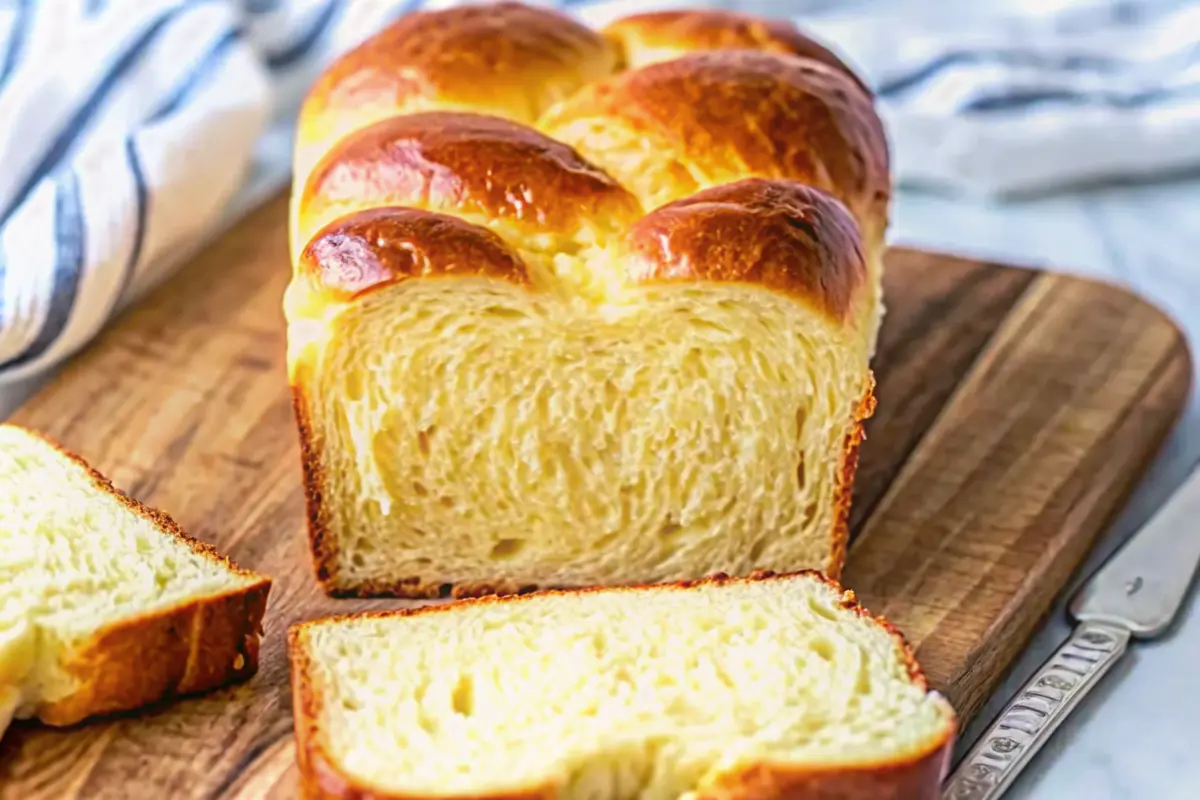
Brioche bread is a French enriched dough that combines butter, milk, eggs, and flour to create an extraordinarily soft, tender, and flaky texture. Unlike standard bread, brioche bread owes its luxurious mouthfeel and rich flavor profile to its exceptionally high butter-to-flour ratio. The first recorded use of the word brioche dates back to 1404, and the term is believed to be derived from the Old French words “bris” and “hocher,” meaning “to knead” and “to stir.”
Whether you’re a seasoned baker or a curious home cook, learning how to make brioche bread from scratch is an achievable goal that yields restaurant-quality results. This comprehensive guide walks you through every aspect of creating authentic brioche bread, from understanding its storied past to mastering the techniques that transform simple ingredients into golden, pillowy perfection.
The Rich History of Brioche Bread
Understanding the background of brioche bread enriches your appreciation for this iconic pastry. According to historical records, the first brioche was likely created by Norman Vikings who settled in Northern France during the 9th century and brought their butter-making expertise with them. These Norman settlers introduced superior dairy farming techniques, particularly the renowned Normandy cows, which produced high-quality cream and butter—essential ingredients for brioche bread creation.
The earliest documentation of brioche bread appears in 1404, and by 1611, the word was officially recognized in Cotgrave’s A Dictionarie of the French and English Tongues, where it was described as “a rowle, or bunne, of spiced bread” with Norman origins. During the 17th century, brioche bread evolved significantly as pastry-makers experimented with varying ratios of butter, eggs, and flour. By the reign of Louis XIV, bakers began producing brioche bread with a greater butter-to-flour ratio, making it richer and more indulgent—a reflection of rising aristocratic demand for gourmet baked goods.
The iconic “brioche parisienne” (Parisian brioche) emerged in the 18th century, with the first recorded recipe appearing around 1742. This version featured a lighter, fluffier texture thanks to the substitution of yeast for traditional sourdough starter. It wasn’t until the 19th century, with the professionalization of bakers (boulanger) and the opening of numerous bakeries throughout France, that brioche bread spread across the entire country and became available in diverse flavors and shapes.
Ingredients List
Creating authentic brioche bread requires quality ingredients and precise measurements. Here’s everything you’ll need:
For the Dough:
- 4 cups all-purpose flour or bread flour (for extra chewiness and superior gluten development)
- 1/4 cup granulated sugar (feeds the yeast and adds subtle sweetness)
- 1 packet (2 1/4 teaspoons) active dry yeast (use instant or bread machine yeast for faster rise times)
- 1 teaspoon salt (enhances flavor and strengthens gluten structure)
- 1/2 cup whole milk, warmed to approximately 110°F (promotes yeast activation)
- 4 large eggs at room temperature (creates richness and structure)
- 1/2 cup unsalted butter, softened and cut into chunks (the signature ingredient that defines brioche bread)
For the Egg Wash:
- 1 large egg
- 1 tablespoon milk
Ingredient Substitutions & Alternatives:
- Flour: Substitute half the all-purpose flour with bread flour for a chewier texture
- Sugar: Honey or agave nectar can replace granulated sugar (reduce quantity by 15%)
- Butter: European-style butter with higher fat content yields richer brioche bread
- Eggs: For dairy-free versions, aquafaba (chickpea brine) can partially replace eggs
- Milk: Almond milk or oat milk work as alternatives for lactose-free brioche bread
Timing
Understanding the time investment for brioche bread helps you plan your baking schedule effectively:
- Prep Time: 15 minutes (mixing and measuring ingredients)
- Yeast Activation: 5-10 minutes
- Kneading Time: 10-15 minutes (mixer) or 15-20 minutes (hand-kneading)
- First Rise: 90-120 minutes (until doubled in size)
- Shaping & Second Rise: 60 minutes
- Baking Time: 30 minutes
- Cooling Time: 10-15 minutes (in pan) + additional time on wire rack
- Total Time: Approximately 3.5 to 4 hours (about 20% less than average enriched dough recipes)
Pro Tip: The total active time is only 30-35 minutes; the remainder is hands-off rising time, making brioche bread more manageable than many assume.
Step-by-Step Instructions for Perfect Brioche Bread
Step 1: Activate the Yeast for Maximum Rise
Begin by creating the perfect environment for yeast activation. In a small bowl, combine the warm milk (110°F is ideal—too hot kills yeast, too cold slows activation), yeast, and a pinch of sugar. Let this mixture sit undisturbed for 5-10 minutes. You should observe a foamy layer developing on the surface, indicating active, healthy yeast. This frothy appearance is crucial; if your mixture remains flat after 10 minutes, your yeast is likely expired, and you’ll need to start fresh with new yeast to ensure your brioche bread rises properly.
Actionable Tip: Use an instant-read thermometer to verify milk temperature—precision yields better results.
Step 2: Mix the Dough Components
Pour the yeast mixture into your stand mixer bowl containing the combined flour, sugar, and salt. Add the room-temperature eggs, ensuring they integrate smoothly with the dry ingredients. Mix on low speed (speed setting 1-2) until the dough begins cohesively forming—approximately 2-3 minutes. This initial mixing stage prevents dry pockets and ensures even hydration throughout your brioche bread.
Sensory Guide: The dough should look shaggy and slightly rough at this stage; this is perfectly normal.
Step 3: Incorporate Butter Gradually for Optimal Texture
This step distinguishes excellent brioche bread from mediocre versions. Increase your mixer to medium speed and begin adding butter one chunk at a time. Before adding each subsequent piece, ensure the previous butter portion has been completely incorporated into the dough. This gradual integration (typically requiring 3-5 minutes per butter addition) prevents the dough from becoming greasy and ensures emulsification. Continue this process until all butter is fully incorporated, resulting in a dough that appears silky, elastic, and slightly sticky.
Expert Insight: If your dough seems overly wet during butter addition, reduce mixer speed momentarily and let the gluten network catch up.
Step 4: Knead to Develop Gluten Structure
Increase mixer speed to medium (setting 3-4) and knead for approximately 10 minutes. The dough should transform into a smooth, elastic, and supple mass with a slight sheen. It will remain slightly tacky to the touch—this is characteristic of properly developed brioche bread dough. If hand-kneading, work the dough for 15 minutes on a lightly floured surface using the heel-push, fold, and turn technique.
Quality Indicator: Perform the windowpane test by stretching a small dough piece; it should stretch thin without tearing, indicating adequate gluten development.
Step 5: First Rise – Building Flavor and Structure
Transfer your mixed dough to a generously greased bowl, coating all surfaces to prevent crust formation. Cover tightly with plastic wrap or a damp kitchen towel, creating a humid environment that promotes yeast activity. Place in a warm location (75-80°F is ideal) and allow the dough to rise for 1.5 to 2 hours until visibly doubled in volume. Warmer environments accelerate rising; cooler kitchens require extended time.
Temperature Hack: Preheat your oven to its lowest setting (usually 200°F), turn it off, then place your covered dough inside for consistent warmth.
Step 6: Shape Your Brioche Bread Loaf
Gently punch down the risen dough to release excess gas—don’t deflate it completely. Transfer to a lightly floured work surface and divide into six equal portions (approximately 3-4 ounces each). Roll each portion into a smooth, tight ball using cupping motions. Arrange all six balls side by side in a greased loaf pan, fitting snugly but not compressing them. Cover loosely with plastic wrap and allow a second rise for approximately 60 minutes until the dough rises above the pan edges.
Shaping Excellence: Smooth, well-shaped balls ensure uniform baking and create the characteristic brioche bread appearance.
Step 7: Apply Egg Wash and Bake to Golden Perfection
Preheat your oven to 350°F (175°C). In a small bowl, whisk together one egg and one tablespoon of milk until fully blended. Gently brush this egg wash over the entire surface of your shaped brioche bread, creating an even coating that promotes golden-brown color development. Bake for exactly 30 minutes (check at 25 minutes if your oven runs hot) until the brioche bread achieves a deep golden-brown crust and sounds hollow when tapped on the bottom with a wooden spoon.
Baking Observation: If the top browns too quickly before the center cooks through, tent loosely with aluminum foil for the final 10 minutes.
Step 8: Cool and Prepare for Serving
Remove your brioche bread from the oven and let it rest in the pan for 10 minutes—this allows the crumb structure to set. Gently turn out onto a wire cooling rack and allow complete cooling (at least 30 minutes) before slicing. Cutting warm bread disrupts the crumb structure; patience yields superior texture and presentation.
Final Touch: Once completely cooled, slice with a serrated bread knife using a gentle sawing motion rather than pressing down forcefully.

Nutritional Information
Understanding the nutritional profile of brioche bread helps informed consumption decisions:
| Nutrient | Per 100g Serving | Per Slice (approximately 60g) |
|---|---|---|
| Calories | 350-380 | 210-228 |
| Protein | 6-7g | 3.6-4.2g |
| Carbohydrates | 42-45g | 25-27g |
| Dietary Fiber | 1-2g | 0.6-1.2g |
| Fat | 15-18g | 9-10.8g |
| Saturated Fat | 8-10g | 4.8-6g |
| Sodium | 300-350mg | 180-210mg |
| Sugars | 8-10g | 4.8-6g |
Key Insights: Brioche bread’s caloric density stems from its high butter and egg content. A typical slice contains approximately 210 calories, making it an indulgent treat rather than an everyday staple. The enriched formula provides substantial protein (3.6g per slice) compared to standard bread, supporting satiety and muscle maintenance.
Healthier Alternatives for Brioche Bread
Creating nutritionally balanced versions of brioche bread without sacrificing flavor is entirely achievable:
Whole Grain Brioche Bread: Replace 50% of all-purpose flour with whole wheat flour or spelt flour, adding 2-3 minutes to kneading time and increasing liquid by 2 tablespoons. This modification increases fiber content by 40% and provides superior micronutrient density while maintaining the characteristic tender crumb.
Reduced-Fat Brioche Bread: Decrease butter to 1/4 cup and substitute the remaining quarter-cup with Greek yogurt or applesauce. This adjustment reduces fat content by 35% while preserving moisture through yogurt’s protein content. The resulting brioche bread contains fewer calories but delivers comparable satisfaction.
Refined Sugar Reduction: Replace granulated sugar with coconut sugar or monk fruit sweetener (use 3 tablespoons of monk fruit powder). This modification reduces refined sugars by 50% while maintaining yeast activation through the small sugar quantity remaining.
Protein-Enhanced Brioche Bread: Add 2 tablespoons of nutritional yeast and substitute one egg with an additional egg white, increasing protein content by 25% without significantly altering flavor profile.
Serving Suggestions
Brioche bread’s versatility extends far beyond enjoying it plain:
Breakfast Innovations:
- Brioche French Toast: Slice thick brioche bread pieces, dip in an egg-custard mixture infused with vanilla and cinnamon, then pan-fry until golden for an indulgent breakfast centerpiece
- Brioche Breakfast Sandwich: Layer brioche bread with scrambled eggs, crispy bacon, and melted cheddar for an elevated morning meal
- Brioche Bread Pudding: Cube leftover brioche bread and combine with a custard mixture of cream, eggs, and vanilla, then bake until set—a sophisticated dessert option
Sweet Treats:
- Brioche French Toast Casserole: Prepare the day before by layering brioche bread cubes with custard in a baking dish; bake fresh for morning service
- Brioche Bread with Chocolate & Berries: Serve toasted brioche slices with Nutella, fresh strawberries, and whipped cream for an elegant dessert
Savory Applications:
- Gourmet Burger Buns: Slice brioche bread horizontally and toast lightly; use as superior burger buns that won’t disintegrate under toppings
- Brioche Bread Bruschetta: Toast thin slices and top with olive tapenade, ricotta, and fresh basil for sophisticated appetizers
- Bread Salad Base: Cube brioche bread and toss with seasonal vegetables and vinaigrette for a unique twist on traditional panzanella
Pairing Recommendations:
- Serve warm with salted butter and French jam for an authentic Parisian breakfast experience
- Pair with hot chocolate, espresso, or Earl Grey tea for refined afternoon enjoyment
- Accompany charcuterie boards alongside aged cheeses and cured meats
Common Mistakes to Avoid When Making Brioche Bread
Preventing pitfalls ensures consistent success:
Mistake 1: Using Butter That’s Too Cold
The Problem: Cold butter won’t incorporate smoothly, creating greasy pockets rather than an emulsified dough.
The Solution: Always soften butter to 65-70°F before beginning. It should yield slightly to pressure without being melted.
Mistake 2: Inadequate Kneading Time
The Problem: Insufficient kneading (less than 8 minutes) prevents proper gluten development, resulting in dense, crumbly brioche bread.
The Solution: Knead for the full 10 minutes in a mixer or 15 minutes by hand; the dough should be silky and elastic.
Mistake 3: Incorrect Yeast Activation Temperature
The Problem: Milk exceeding 120°F kills yeast; temperatures below 105°F slow activation unnecessarily.
The Solution: Use an instant-read thermometer to maintain 110°F precisely.
Mistake 4: Skipping the Second Rise
The Problem: Rushing to bake without a proper second rise produces dense, underproofed brioche bread.
The Solution: Allow the shaped dough the full 60 minutes for adequate oven spring and texture development.
Mistake 5: Overbaking
The Problem: Baking longer than 30 minutes dries out the brioche bread’s interior despite the butter content.
The Solution: Check doneness at 25 minutes if your oven runs hot; internal temperature should reach 190°F.
Mistake 6: Slicing While Warm
The Problem: Warm brioche bread compresses when cut, creating a dense texture and poor presentation.
The Solution: Cool completely (minimum 30 minutes) before slicing for optimal crumb structure visibility.
Storing Tips for Your Brioche Bread
Proper storage maintains freshness and maximizes shelf life:
Room Temperature Storage (1-2 Days):
Store cooled brioche bread in an airtight container or wrapped in plastic wrap at room temperature. The butter content preserves moisture naturally, maintaining a soft crumb longer than standard bread. Place in a cool, dry location away from direct sunlight and heat sources.
Refrigeration (3-5 Days):
Place brioche bread in an airtight container or zip-lock bag in the refrigerator, where cool temperatures slow mold growth. Before consuming, bring to room temperature or briefly toast to restore the pleasant crumb structure. Refrigeration is ideal if you’ve made multiple loaves and want to extend enjoyment throughout the week.
Freezing (Up to 3 Months):
Slice cooled brioche bread and layer parchment paper between each slice before placing in a freezer-safe container or bag. Label with the freezing date. Thaw at room temperature for 1-2 hours or toast directly from frozen for a quick breakfast option. Freezing preserves the butter-enriched flavor profile perfectly, making it an excellent long-term storage method for batch baking.
Ingredient Prep Ahead:
Prepare your dry ingredients (flour, sugar, salt, yeast) in a sealed container up to one week in advance. Mix room-temperature eggs and milk in a separate container and refrigerate until ready to combine—this streamlines the baking process on busy mornings.
Conclusion
Mastering homemade brioche bread connects you to centuries of French culinary tradition while producing a product far superior to commercial alternatives. By understanding brioche bread’s historical significance and following precise technique-driven instructions, you’ll create a luxurious, golden-brown loaf with an impossibly tender crumb. The 3.5-4 hour process requires minimal active involvement, making it accessible to bakers of all skill levels. We encourage you to try this authentic brioche bread recipe, experiment with serving suggestions mentioned above, and share your baking success in the comments section below. Subscribe to our blog for weekly recipes, expert baking tips, and exclusive content delivered directly to your inbox. Your feedback and photos inspire our community and help us create increasingly valuable content!

Frequently Asked Questions About Brioche Bread
Q: Can I make brioche bread without a stand mixer?
A: Absolutely! Hand-kneading requires approximately 15-20 minutes but yields identical results. Use the push-fold-turn technique on a lightly floured surface until the dough becomes smooth and elastic.
Q: Why is my brioche bread dense instead of light and fluffy?
A: Dense brioche bread typically results from insufficient kneading, inadequate rising time, or expired yeast. Ensure you knead for the full 10 minutes and allow proper rising times. Test yeast viability before mixing by confirming foaming during activation.
Q: Can I substitute all-purpose flour with bread flour entirely?
A: Yes! Bread flour’s higher protein content creates chewier brioche bread with more developed gluten. Increase hydration slightly by adding an additional tablespoon of milk since bread flour absorbs more liquid.
Q: How do I prevent my brioche bread from browning too quickly on top?
A: If the top browns excessively before the interior cooks through, tent loosely with aluminum foil for the final 10-15 minutes of baking. This simple technique redirects heat downward without interrupting the baking process.
Q: Is brioche bread suitable for a dairy-free diet?
A: Create dairy-free brioche bread by substituting butter with coconut oil or vegan butter and replacing milk with unsweetened almond or oat milk. Use aquafaba (chickpea brine) as an egg substitute—use 3 tablespoons per egg. The texture differs slightly but remains delightfully soft.
Q: Can I prepare brioche bread dough the night before?
A: Yes! Complete steps 1-4, then refrigerate the mixed dough overnight. The cold temperature slows yeast activity, allowing the dough to rise slowly in the refrigerator, actually developing superior flavor through extended fermentation. Remove from the refrigerator and proceed with the first rise the next morning.
Q: What’s the ideal room temperature for rising brioche bread?
A: Ideally 75-80°F. Warmer environments (80-85°F) accelerate rising to 1-1.5 hours, while cooler kitchens (65-70°F) may require 2-3 hours. Consistent temperature yields predictable results.
Q: Can I use instant yeast instead of active dry yeast?
A: Yes! Instant yeast and bread machine yeast are interchangeable with active dry yeast in equal quantities. Instant varieties ferment slightly faster, reducing rising times by approximately 10-15 minutes.

Brioche Bread Recipe: How to Make Authentic French Brioche Bread at Home
- Total Time: 3 hours 45 minutes
- Yield: 1 loaf (8–10 servings) 1x
- Diet: Vegetarian
Description
Discover the rich history and expert techniques behind classic French brioche bread. Learn how to make this golden, buttery loaf from scratch with professional guidance, ingredient tips, and troubleshooting advice for bakery-quality results every time.
Ingredients
- For the Dough:
- 4 cups all-purpose flour or bread flour
- 1/4 cup granulated sugar
- 1 packet (2 1/4 tsp) active dry yeast
- 1 teaspoon salt
- 1/2 cup whole milk (110°F)
- 4 large eggs, room temperature
- 1/2 cup unsalted butter, softened and cubed
- For the Egg Wash:
- 1 large egg
- 1 tablespoon milk
Substitutions: Use honey instead of sugar (reduce by 15%), oat or almond milk for dairy-free, and European butter for richer flavor.
Instructions
- Activate Yeast: Combine warm milk (110°F), yeast, and a pinch of sugar. Let sit for 5–10 minutes until foamy.
- Mix Dough: In a mixer bowl, add flour, sugar, and salt. Pour in yeast mixture and eggs. Mix on low until combined.
- Add Butter: Gradually add softened butter one piece at a time, ensuring each is fully absorbed before adding the next.
- Knead: Mix on medium speed for 10 minutes (or knead by hand for 15–20 minutes) until smooth and elastic.
- First Rise: Place dough in a greased bowl, cover, and let rise 1.5–2 hours in a warm area until doubled in size.
- Shape: Punch down dough gently, divide into 6 equal portions, and roll into smooth balls. Arrange in a greased 9×5” loaf pan.
- Second Rise: Cover and let rise for 1 hour until dough puffs above the pan edges.
- Egg Wash: Mix egg and milk, then brush gently over the surface for a glossy finish.
- Bake: Bake at 350°F for 30 minutes until golden brown and internal temp reaches 190°F.
- Cool: Let cool 10 minutes in the pan, then transfer to a rack. Cool completely before slicing.
Notes
For overnight flavor development, refrigerate the dough after kneading and continue with shaping the next day. Slightly stale brioche makes excellent French toast or bread pudding. Tent with foil during baking if the crust browns too quickly.
- Prep Time: 15 minutes
- Cook Time: 30 minutes
- Category: Breads
- Method: Baking
- Cuisine: French
Nutrition
- Serving Size: 1 slice (60g)
- Calories: 220
- Sugar: 6g
- Sodium: 200mg
- Fat: 9g
- Saturated Fat: 5g
- Carbohydrates: 26g
- Fiber: 1g
- Protein: 4g
- Cholesterol: 45mg
Keywords: brioche bread, homemade brioche, French bread recipe, enriched dough, baking guide