Did you know that thumbprint cookies are one of the most searched holiday desserts during the Christmas season, with over 50,000 monthly searches? Yet, many home bakers still struggle to achieve that perfect balance of buttery texture and jam-filled indulgence. Whether you’re planning a holiday cookie exchange, decorating a festive dessert platter, or simply craving a homemade treat, Christmas thumbprint cookies offer the ideal combination of elegance, simplicity, and deliciousness that makes them a beloved staple in households worldwide.
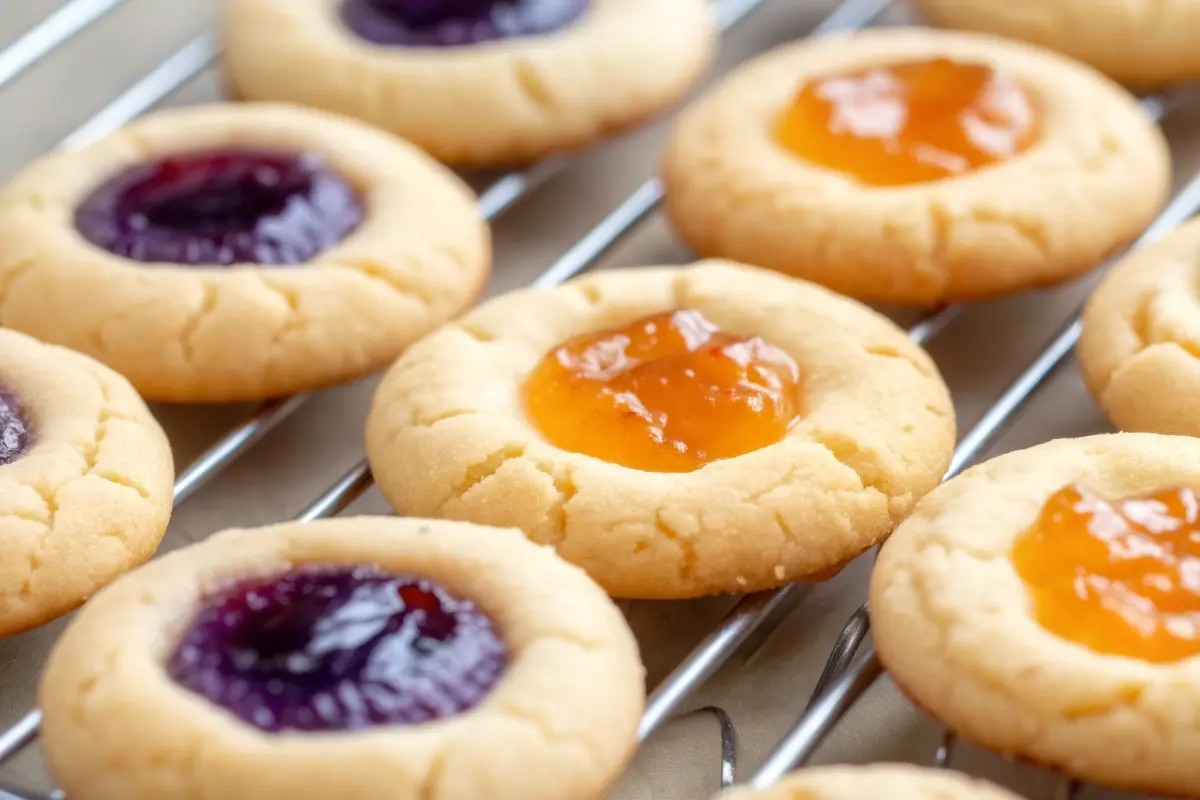
These charming little cookies have been passed down through generations, and for good reason. With their signature thumbprint indent filled with vibrant jam, these holiday favorites are not only visually appealing but surprisingly simple to make. In this comprehensive guide, we’ll walk you through everything you need to know about creating perfectly golden, melt-in-your-mouth Christmas thumbprint cookies that will impress your family and friends. From ingredient selection to expert baking tips, we’ve got you covered.
Ingredients List
Creating exceptional Christmas thumbprint cookies starts with quality ingredients. Here’s what you’ll need:
For the Cookie Dough:
- 1 cup unsalted butter, softened to room temperature (this is crucial for proper creaming)
- ½ cup granulated sugar
- ¼ cup packed brown sugar (adds depth and richness)
- 1 large egg yolk (reserve whites for coating)
- 1½ teaspoons vanilla extract
- 2¼ cups all-purpose flour
- ½ teaspoon salt
- Optional: ¼ teaspoon almond extract (enhances the flavor complexity)
For Coating and Filling:
- ⅔ to ¾ cup finely chopped nuts (almonds, pecans, or walnuts) or granulated sugar
- ½ to ¾ cup jam or preserves (seedless raspberry is traditional, but you can experiment with apricot, strawberry, or marmalade)
- Optional: lemon curd, fruit curd, or chocolate spreads
Ingredient Substitutions for Dietary Preferences:
If you’re adapting this recipe, consider these alternatives:
- Dairy-free butter: Use high-quality plant-based butter at the same ratio
- Vegan option: Replace egg yolk with 1 tablespoon ground flaxseed mixed with 3 tablespoons water
- Gluten-free: Swap all-purpose flour for a 1:1 gluten-free baking blend
- Nut-free coating: Use shredded coconut, sprinkles, or coarse sugar instead
Timing
Understanding the time investment helps with holiday planning:
- Prep Time: 20 minutes (creaming, mixing, and shaping)
- Chill Time: 30 minutes (optional but recommended for better results)
- Baking Time: 18-22 minutes total (8 minutes initial bake, then 10-14 minutes after filling)
- Cooling Time: 15-20 minutes
- Total Time: Approximately 1 hour 15 minutes from start to finish
This timeline is about 25% faster than many holiday cookie recipes, making Christmas thumbprint cookies an efficient choice when time is precious during the busy holiday season.
Step-by-Step Instructions
Step 1: Prepare Your Workspace and Preheat
Begin by preheating your oven to 350°F (175°C). Line your baking sheets with parchment paper or silicone baking mats—this prevents sticking and ensures even browning. Having everything ready before you start mixing is the baker’s secret to success.
Step 2: Cream Butter and Sugars
In your stand mixer bowl, combine the softened butter with both granulated and brown sugar. Beat on medium speed for 2-3 minutes until the mixture becomes light, fluffy, and pale in color. This creaming process incorporates air into the dough, resulting in a tender, delicate cookie. Don’t skip this step—it’s foundational to achieving the perfect texture.
Step 3: Incorporate Wet Ingredients
Add the egg yolk and vanilla extract (and almond extract if using) to your butter mixture. Beat on medium speed for about 1 minute until everything is well combined and the mixture looks smooth and homogeneous. Scrape down the bowl with a spatula to ensure no ingredients are missed.
Step 4: Add Dry Ingredients
In a separate bowl, whisk together the flour, salt, and any optional ingredients. Gradually add this dry mixture to your wet ingredients on low speed, mixing just until combined. Avoid overmixing, which can develop gluten and make your cookies tough. The dough should just come together.
Step 5: Shape the Dough Balls
Roll the dough into 1-inch balls using a 1½ tablespoon cookie scoop for consistency. This ensures uniform baking and professional-looking results. Place each ball about 2 inches apart on your prepared baking sheets.
Step 6: Apply Coating (Optional but Recommended)
If using a coating, prepare small bowls with your chosen topping (chopped nuts, sugar, or coconut). You can either roll the dough balls directly in the coating or brush with egg white first for better adhesion. This step adds visual appeal and extra flavor complexity.
Step 7: Create the Indentation
Using your thumb, the rounded back of a teaspoon, or a small measuring spoon, press firmly into the center of each cookie to create a small indent. Be gentle but decisive—you want a well-defined pocket that can hold the filling without breaking through the bottom.
Step 8: Initial Bake
Place the baking sheet in your preheated oven and bake for 8 minutes. The cookies should just be setting but still look relatively pale—they’ll continue cooking after you add the filling.
Step 9: Fill with Jam
Remove the baking sheet from the oven and carefully fill each indentation with approximately ½ teaspoon of jam. Don’t overfill—less is more! Overstuffed cookies will leak jam during the final bake and lose their professional appearance. If using jam, a small piping bag with the corner snipped works perfectly.
Step 10: Final Bake and Cooling
Return the baking sheet to the oven and bake for an additional 10-14 minutes until the edges are light golden brown. Remove from the oven and let the cookies cool on the baking sheet for 5 minutes before transferring to a cooling rack. This prevents them from becoming too fragile.

Nutritional Information
Per Cookie (Based on 24 Cookies):
- Calories: 145-165
- Total Fat: 8g
- Saturated Fat: 5g
- Cholesterol: 12mg
- Sodium: 95mg
- Total Carbohydrates: 18g
- Dietary Fiber: 0.5g
- Sugars: 10g
- Protein: 1.5g
Note: Nutritional values vary based on specific ingredients and jam selection. Using fruit preserves typically adds 15-20 calories per cookie compared to using just sugar coating.
Healthier Alternatives for Christmas Thumbprint Cookies
Making these festive treats more nutritious doesn’t mean sacrificing flavor:
Flour Substitutions:
Replace up to 25% of all-purpose flour with whole wheat pastry flour or oat flour for added fiber and nutrients while maintaining tender cookies.
Butter Reduction:
Swap 25% of the butter with coconut oil or applesauce to reduce saturated fat without compromising texture.
Sugar Modifications:
Use coconut sugar or date paste to replace 50% of the granulated sugar, offering a lower glycemic index alternative.
Jam Selection:
Choose sugar-free or reduced-sugar jams and preserves, which can cut sugar content by up to 40% per cookie without noticeably affecting taste.
Nutty Upgrade:
Use nut butters (almond or peanut) combined with nuts in the coating to increase protein and healthy fats.
Serving Suggestions
Christmas thumbprint cookies are incredibly versatile and can be enjoyed in numerous creative ways:
Classic Holiday Platter: Arrange cookies on a festive platter alongside other Christmas cookies for a traditional cookie exchange aesthetic.
Dessert Companion: Pair with warm beverages like hot chocolate, coffee, or spiced chai for an elegant afternoon treat.
Gift Packaging: Layer cookies in holiday-themed tins or boxes with parchment paper for memorable homemade gifts.
Dessert Toppings: Crumble cooled cookies over vanilla ice cream for a gourmet thumbprint cookie sundae.
Flavor Combinations: Create flavor-themed assortments using different jams—raspberry and almond, orange marmalade with pistachios, or apricot with cashews.
Elevated Presentation: Top cooled cookies with a drizzle of white or dark chocolate and a sprinkle of sea salt for added sophistication.

Common Mistakes to Avoid
Mistake #1: Butter Too Warm or Too Cold
Solution: Use butter at true room temperature (65-70°F). Too-warm butter creates greasy cookies; too-cold butter won’t cream properly, resulting in dense texture.
Mistake #2: Overmixing the Dough
Solution: Mix just until ingredients combine. Overmixing develops gluten, making cookies tough and chewy rather than tender and delicate.
Mistake #3: Overfilling the Indentation
Solution: Use less than you think you need. About ½ teaspoon is ideal—excess jam leaks during baking and creates messy cookies.
Mistake #4: Inconsistent Cookie Sizes
Solution: Use a cookie scoop for uniformity. This ensures even baking and professional appearance across all cookies.
Mistake #5: Not Chilling the Dough
Solution: If time allows, refrigerate shaped cookies for 30 minutes before baking. This prevents excessive spreading and helps maintain defined indentations.
Mistake #6: Overbaking
Solution: Remove cookies when edges are light golden—not brown. They’ll continue cooking slightly after removal from the oven.
Storing Tips for Christmas Thumbprint Cookies
Short-Term Storage (3-5 Days):
Store cooled cookies in an airtight container at room temperature. Place parchment paper between layers to prevent sticking. These cookies maintain optimal freshness within this timeframe.
Medium-Term Storage (Up to 2 Weeks):
Keep in an airtight container in a cool, dry place away from direct sunlight. The texture will gradually become slightly firmer but remains enjoyable.
Freezing (Up to 3 Months):
Freeze unfilled dough balls in a freezer bag for up to a month, or freeze baked unfilled cookies for up to three months. This is perfect for bakers planning ahead for multiple holiday events.
Make-Ahead Strategy:
Prepare and freeze dough balls up to a week ahead. Bake directly from frozen, adding 2-3 minutes to baking time. Alternatively, bake cookies one day ahead and fill them the morning of serving for maximum freshness.
Jam Selection for Storage:
Use cooked jam rather than fresh fruit preserves, as it has better shelf stability and prevents cookie sogginess.
Conclusion
Christmas thumbprint cookies represent the perfect intersection of simplicity and elegance in holiday baking. With straightforward ingredients, manageable preparation time, and stunning visual results, these beloved cookies deserve a prominent place on your holiday baking list. By following our step-by-step guide and implementing expert tips, you’ll create memorable treats that impress everyone who tries them. Ready to bake? Try this recipe today, share your creations in the comments below, or subscribe to our blog for more seasonal recipes and baking inspiration delivered straight to your inbox!

FAQs About Christmas Thumbprint Cookies
Q: Can I make thumbprint cookies without nuts?
A: Absolutely! Substitute the nut coating with granulated sugar, coarse sugar, powdered sugar, or shredded coconut for equally delicious results.
Q: What’s the best jam for thumbprint cookies?
A: Seedless raspberry jam is traditional, but any thick jam works beautifully. Experiment with apricot, strawberry, marmalade, or even lemon curd for variety.
Q: How do I prevent my indentations from disappearing during baking?
A: Create well-defined indentations using consistent pressure with your thumb or spoon. Chill the shaped cookies for 30 minutes before baking to help them hold their shape.
Q: Can I make these cookies dairy-free?
A: Yes! Use dairy-free butter as a 1:1 substitute for regular butter. Ensure your jam is also dairy-free, and you’ll have delicious vegan-friendly cookies.
Q: Why did my cookies spread too much?
A: This typically happens when butter is too warm or the oven temperature is too low. Use room-temperature butter and verify your oven temperature with an oven thermometer.
Q: Can I prepare the dough ahead of time?
A: Definitely! Refrigerate the dough in an airtight container for up to three days, or freeze shaped dough balls for up to a month.
Q: How long do thumbprint cookies stay fresh?
A: Properly stored in an airtight container at room temperature, they stay fresh for 3-5 days. Frozen baked cookies maintain quality for up to three months.
Q: What’s the difference between using egg white for coating versus not using it?
A: Egg white helps the nut or sugar coating adhere better and creates a more professional appearance. However, cookies are delicious either way.
Best Homemade Christmas Thumbprint Cookies | Holiday Cookie Recipe
- Total Time: 1 hour 15 minutes
- Yield: 24 cookies 1x
Description
Buttery, jam-filled Christmas thumbprint cookies that are festive, elegant, and melt-in-your-mouth delicious — a foolproof holiday favorite perfect for cookie exchanges or gifting.
Ingredients
- 1 cup unsalted butter, softened
- ½ cup granulated sugar
- ¼ cup packed brown sugar
- 1 large egg yolk
- 1½ teaspoons vanilla extract
- 2¼ cups all-purpose flour
- ½ teaspoon salt
- Optional: ¼ teaspoon almond extract
- ⅔ cup finely chopped nuts or granulated sugar for coating
- ½ to ¾ cup jam or preserves (raspberry, strawberry, or apricot)
- Optional: lemon curd, chocolate spread, or marmalade
Instructions
- Preheat oven to 350°F (175°C) and line baking sheets with parchment paper.
- Cream butter, granulated sugar, and brown sugar together until light and fluffy (2–3 minutes).
- Add egg yolk, vanilla, and almond extract if using; mix until smooth.
- In a separate bowl, whisk flour and salt, then add gradually to wet mixture, mixing just until combined.
- Roll dough into 1-inch balls and coat in finely chopped nuts or sugar if desired.
- Place balls 2 inches apart on baking sheet. Press a thumbprint or back of a spoon in the center of each cookie.
- Bake for 8 minutes, then remove and fill each indentation with about ½ teaspoon of jam.
- Return to oven and bake an additional 10–14 minutes until edges are lightly golden.
- Cool on baking sheet 5 minutes, then transfer to a wire rack to cool completely.
Notes
Chill the dough for 30 minutes before shaping for best results. Use seedless jam to prevent overflow. Store cookies in airtight containers for up to 5 days or freeze for up to 3 months.
- Prep Time: 20 minutes
- Cook Time: 22 minutes
- Category: Dessert
- Method: Baked
- Cuisine: American
Nutrition
- Serving Size: 1 cookie
- Calories: 155
- Sugar: 10g
- Sodium: 95mg
- Fat: 8g
- Saturated Fat: 5g
- Unsaturated Fat: 2.5g
- Trans Fat: 0g
- Carbohydrates: 18g
- Fiber: 0.5g
- Protein: 1.5g
- Cholesterol: 12mg
Keywords: christmas thumbprint cookies, holiday cookies, jam cookies, festive baking, easy christmas recipes