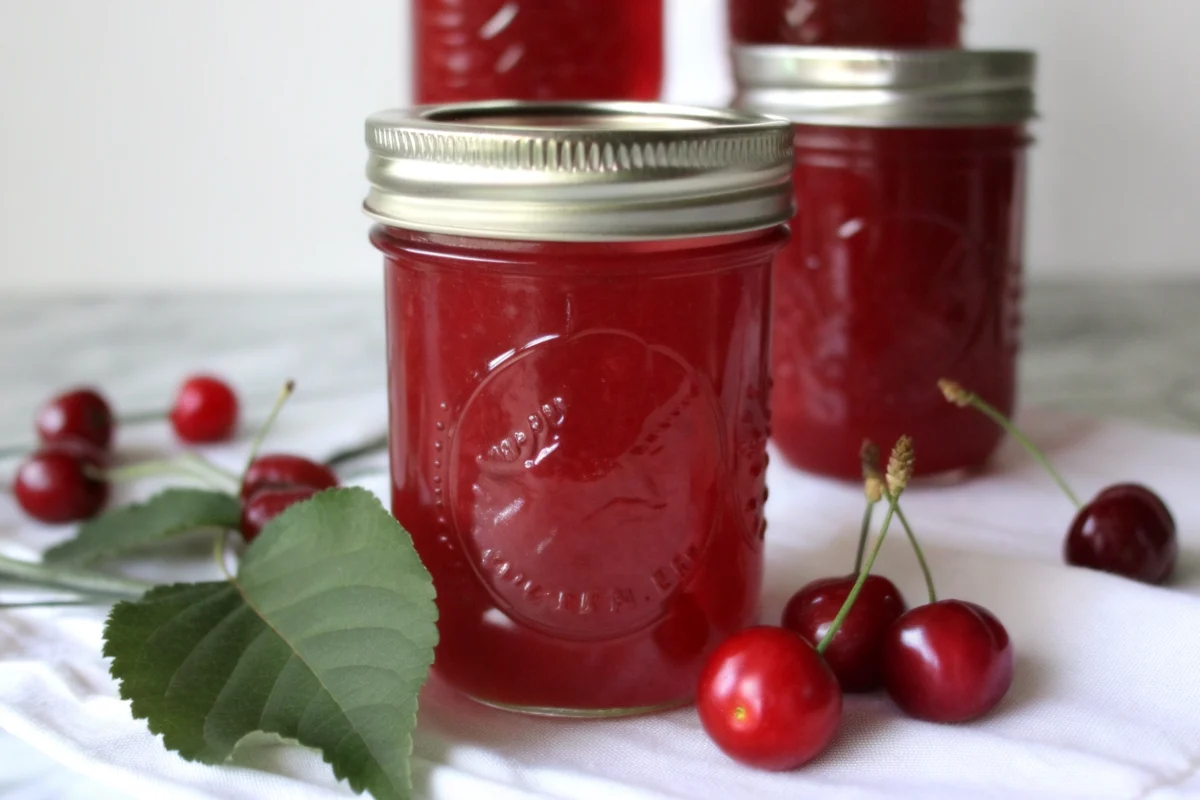
Cherry Jelly represents one of the most rewarding canning projects you can undertake in your kitchen. Unlike thick preserves loaded with fruit chunks, jelly offers a smooth, translucent texture that spreads effortlessly and showcases the pure essence of cherry flavor. The process of transforming fresh tart cherries into sparkling jelly involves extracting their natural juices, combining them with pectin and sugar, and heating the mixture to achieve that perfect gel consistency.
Tart cherries contain high levels of polyphenols and antioxidants that may help reduce inflammation and support heart health. When preserved as jelly, these beneficial compounds remain largely intact, making your homemade spread not just delicious but nutritionally valuable. The key to exceptional Cherry Jelly lies in using quality ingredients, following precise timing, and understanding the science behind pectin activation and sugar ratios.
Ingredients
Creating the perfect batch of Cherry Jelly requires just a handful of simple ingredients, but each plays a crucial role in achieving that ideal texture and flavor profile:
Primary Ingredients:
- 4 cups tart cherry juice (extracted from 3 lbs of fresh sour cherries) – The foundation of your jelly, providing vibrant color and tangy-sweet flavor
- ½ cup water – Helps extract maximum juice from the cherries during the initial cooking phase
- 2 Tablespoons lemon juice (optional) – Enhances brightness and helps balance sweetness while ensuring proper acidity for safe canning
- 4 cups granulated sugar – Creates the gel structure and preserves the jelly (can be reduced with low-sugar pectin)
- 1 box (1.75 oz) powdered pectin – The gelling agent that transforms liquid juice into spreadable jelly
Substitution Options:
- Frozen tart cherries can replace fresh cherries when out of season
- Low-sugar pectin (like Sure-Jell or Pomona’s Universal Pectin) allows you to reduce sugar by 50% or more
- Honey or maple syrup can replace up to 25% of the sugar for a more natural sweetness profile
- Bottled tart cherry juice works in a pinch, though fresh extraction yields superior flavor
The quality of your cherries directly impacts your final product. Tart or sour cherries provide the best flavor balance for jelly, as sweet cherries can result in an overly saccharine spread that lacks complexity.
Timing
Understanding the time investment for Cherry Jelly helps you plan your canning session effectively:
Preparation Time: 30-40 minutes
- Washing and preparing cherries: 10 minutes
- Cooking and extracting juice: 20-30 minutes (including draining time)
Active Cooking Time: 15-20 minutes
- Boiling juice with pectin: 5 minutes
- Adding sugar and reaching gel point: 10-15 minutes
Processing Time: 10-15 minutes
- Water bath canning (10 minutes at sea level, 15 minutes above 6,000 feet elevation)
Setting Time: 24-48 hours
- Jelly needs this time to fully set and develop its characteristic texture
Total Time: Approximately 90 minutes of active work, plus setting time
This timeline represents about 20% less active cooking time than traditional jam recipes, making Cherry Jelly an efficient preservation project. The extended setting time is passive—simply let your jars rest undisturbed on the counter while pectin works its magic.
Preparing Your Cherries
Start by selecting 3 pounds of fresh, ripe tart cherries. Rinse them thoroughly under cold running water to remove any debris, stems, or potential pesticide residue. Since cherries are on the Environmental Working Group’s “Dirty Dozen” list, washing them well is crucial for food safety.
Place your clean cherries in a medium saucepan—no need to pit them at this stage, as you’ll be straining out all solids later. Add ½ cup of water to the pan. This water helps create steam and encourages the cherries to release their juices without scorching on the bottom.
Extracting the Cherry Juice
Set your burner to medium-high heat and begin cooking the cherries, stirring occasionally with a wooden spoon or heat-resistant spatula. As the temperature rises, you’ll hear satisfying popping sounds as the cherries burst and release their vibrant red juices. This process typically takes 5-7 minutes.
Once the mixture reaches a rolling boil, reduce the heat to medium-low, cover your saucepan, and let it simmer for 10 minutes. This gentle simmering extracts maximum flavor and color from the cherries while breaking down their cell walls. The cherries are rich in vitamin C and copper, with one cup providing 11% of your daily value for both nutrients.
Straining for Perfect Clarity
After the 10-minute simmer, remove your pan from the heat. Set up your straining system—ideally a jelly bag suspended over a large bowl, or alternatively, several layers of cheesecloth draped over a fine-mesh strainer positioned above a bowl.
Pour the hot cherry mixture into your straining setup and let it drip undisturbed for 2-4 hours, or until dripping stops completely. Resist the temptation to squeeze the bag or press on the solids, as this can force pulp through and create cloudy jelly. Patience during this step ensures crystal-clear, jewel-toned jelly.
Preparing for the Boil
Measure out your 4 cups of sugar and set it aside in a bowl within easy reach. Pre-measuring prevents scrambling during the critical boiling stage when timing matters most.
If you’re using lemon juice, add those 2 tablespoons to your strained cherry juice now. Lemon juice brightens the flavor while ensuring your jelly has the proper pH level for safe preservation. Tart cherries naturally contain good acidity, but the extra citrus provides insurance.
Cooking the Jelly Base
Pour your 4 cups of cherry juice into a medium saucepan or dedicated jam pot. Jam pots with wide openings promote faster evaporation and more efficient boiling. Place the pot over high heat and bring the juice to a full rolling boil—one that can’t be stirred down.
Adding the Pectin
With your juice at a vigorous boil, it’s time to add the pectin. Open your 1.75 oz box of powdered pectin and, while stirring continuously, sprinkle it slowly and steadily into the boiling juice. Continuous stirring prevents pectin clumps from forming and ensures even distribution throughout the liquid.
Keep the mixture at a full boil while stirring constantly for exactly one minute. This precise timing activates the pectin molecules, preparing them to form the gel network that will set your jelly.
Incorporating the Sugar
After the one-minute pectin boil, begin adding your pre-measured 4 cups of sugar in a slow, steady stream while stirring continuously. The stirring is crucial—it prevents sugar from settling on the bottom and scorching while ensuring complete dissolution.
As you stir, you’ll notice the mixture becoming more syrupy and taking on a glossy sheen. Continue stirring as you bring the jelly back to a hard rolling boil—one so vigorous that stirring doesn’t reduce the bubbling.
The Final Boil
Once you achieve that hard rolling boil with all the sugar incorporated, boil for 1-2 minutes while stirring constantly. This final boil completes the chemical reaction between pectin, sugar, and acid that creates the gel structure. Use a timer to ensure accuracy—under-boiling results in runny jelly, while over-boiling can break down pectin and prevent proper setting.
Filling and Processing Jars
Remove your pot from the heat immediately after the final boil. Working quickly while the jelly is hot, use a canning funnel to pour the jelly into prepared, sterilized jelly jars, leaving ¼ inch of headspace at the top. This specific headspace allows for expansion during processing while ensuring proper sealing.
Carefully wipe the jar rims with a clean, damp cloth to remove any jelly drips. Even tiny amounts of jelly on the rim can prevent proper sealing. Place sterilized lids on each jar and screw on the bands until fingertip-tight—snug but not over-tightened.
Water Bath Canning
If you’re canning for shelf-stable storage, process the jars in a boiling water bath canner for 10 minutes at sea level (or 15 minutes if you’re above 6,000 feet elevation). Ensure the water covers the jar tops by at least 1 inch. Start timing only after the water returns to a full boil.
After processing, carefully remove jars and place them on a towel-lined counter, spacing them apart for air circulation. You’ll likely hear the satisfying “ping” of lids sealing as they cool. Let jars sit undisturbed for 24-48 hours while the jelly sets.

Nutritional Information
Cherry Jelly made with this recipe provides a flavorful way to enjoy the nutritional benefits of tart cherries. Here’s the nutritional breakdown per tablespoon (approximately 19g) serving:
Per Tablespoon:
- Calories: 94 kcal
- Total Carbohydrates: 24g (8% DV)
- Sugar: 22g
- Dietary Fiber: 0.1g
- Protein: 0.1g
- Total Fat: 0.1g
- Sodium: 5mg (less than 1% DV)
- Potassium: 42mg (1% DV)
- Vitamin C: 0.3mg
- Calcium: 2mg
- Iron: 0.2mg
While most commercial jelly provides primarily simple carbohydrates, homemade Cherry Jelly retains trace amounts of the beneficial compounds found in fresh cherries. Tart cherries are naturally rich in polyphenol antioxidants that protect heart health by reducing inflammation and cell damage. Fresh cherries contain significant amounts of vitamin C (11% DV per cup), copper (11% DV), and potassium (7% DV), though some of these nutrients are reduced during the cooking process.
The primary nutritional consideration with any jelly is sugar content. Traditional recipes use a 1:1 ratio of juice to sugar, resulting in a sweet spread best enjoyed in moderation. For those monitoring sugar intake, low-sugar alternatives using modified pectin can reduce sugar content by up to 50% while maintaining spreadable consistency.
Healthier Alternatives for the Recipe
Transform your Cherry Jelly into a more nutritious spread without sacrificing flavor by implementing these modifications:
Reduce Sugar with Low-Sugar Pectin: The most impactful change involves using Sure-Jell Low-Sugar pectin or Pomona’s Universal Pectin. These specialized pectins gel effectively with just 2 cups of sugar for 4-5 cups of juice—a 50% reduction. The resulting jelly tastes less sweet, allowing the natural cherry tartness to shine through more prominently.
Natural Sweetener Substitutions: Replace up to 25% of the sugar with honey or pure maple syrup for additional flavor complexity and trace minerals. These natural sweeteners contribute antioxidants and nutrients absent in refined sugar, though they’ll slightly alter the final flavor profile.
Stevia or Monk Fruit Enhancement: When using low-sugar pectin, add stevia or monk fruit sweetener to boost sweetness without adding calories. Start with small amounts and taste as you go—these intense sweeteners require only tiny quantities.
Increased Lemon Juice: Boost the lemon juice to 3-4 tablespoons to enhance tartness and reduce perceived need for sugar. The additional citric acid also helps extract more of the cherries’ beneficial polyphenols.
Add Fresh Ginger: Grate 1 tablespoon of fresh ginger into your cherry juice before cooking for an anti-inflammatory boost. Ginger complements cherry’s tartness while adding its own health-promoting compounds.
Chia Seed Thickener: For a completely sugar-free option, combine cherry juice with 2-3 tablespoons of chia seeds and refrigerate. The seeds create a jam-like consistency naturally, though this version must be refrigerated and consumed within 2 weeks.
Increase Fruit Concentration: Use 5 cups of cherry juice instead of 4, reducing the water content. This creates a more intense cherry flavor that requires less sugar for satisfactory taste.
Serving Suggestions
Cherry Jelly’s versatility extends far beyond simple toast spreading. Elevate your culinary creations with these inspired serving ideas:
Breakfast Brilliance: Swirl Cherry Jelly into Greek yogurt parfaits with granola and fresh berries for a protein-packed morning meal. Spread it on warm croissants or scones alongside clotted cream for an elegant brunch. Mix a spoonful into overnight oats before refrigerating for subtle sweetness and beautiful color.
Savory Applications: Cherry Jelly creates stunning cheese board presentations when paired with aged cheddar, creamy brie, or tangy goat cheese. Whisk it into balsamic vinaigrette for salads with feta and walnuts. Use it as a glaze for roasted pork tenderloin or duck breast—the tart cherry flavor cuts through rich meats beautifully.
Dessert Enhancements: Layer Cherry Jelly between cake layers for a burst of fruity flavor without excess moisture. Dollop it over vanilla ice cream or panna cotta for an elegant finish. Pipe it into thumbprint cookies or linzer tarts for classic European-style pastries.
Beverage Innovation: Stir a spoonful into hot tea for naturally sweetened cherry tea. Mix with sparkling water and fresh lime for a sophisticated non-alcoholic spritzer. Add to cocktails as a replacement for simple syrup—particularly delicious in whiskey sours or champagne cocktails.
Gift Presentation: Package Cherry Jelly in attractive decorative jars with fabric toppers and handwritten labels for thoughtful homemade gifts. Create gift baskets combining Cherry Jelly with artisan bread, specialty cheeses, and a cheese knife.
Common Mistakes to Avoid
Even experienced canners can encounter pitfalls when making jelly. Sidestep these common errors for perfect results every time:
Squeezing the Jelly Bag: This tempting shortcut introduces cloudy pulp into your otherwise crystal-clear juice. Patience during straining yields professional-looking jelly—allow gravity to do the work naturally over several hours.
Incorrect Pectin Type: Regular and low-sugar pectins aren’t interchangeable. Using regular pectin with reduced sugar amounts results in runny jelly, while using low-sugar pectin with full sugar creates overly stiff, gummy results. Always match your pectin type to your sugar quantity.
Imprecise Timing: The one-minute pectin boil and 1-2 minute sugar boil aren’t approximations—they’re critical windows. Under-boiling prevents proper gel formation, while over-boiling can damage pectin molecules. Use a timer religiously.
Doubling Batches: Jelly recipes don’t scale well. Making double batches creates too much volume for even heat distribution, leading to inconsistent setting. Make multiple small batches instead for reliable results.
Testing Before Set Time: Jelly takes 24-48 hours to fully set. Testing consistency before this window leads to unnecessary worry when jelly appears too liquid. Exercise patience and trust the process.
Inadequate Headspace: Too much or too little headspace affects sealing. Too much allows excess oxygen that can degrade quality; too little doesn’t provide room for expansion, causing jelly to seep under lids and prevent sealing.
Overtightening Bands: Cranking down too hard on jar bands can actually prevent proper sealing by not allowing air to escape during processing. Fingertip-tight means comfortable but not strained tightness.
Ignoring Elevation Adjustments: Water boils at lower temperatures at high elevations, requiring longer processing times. If you live above 6,000 feet and don’t adjust to 15 minutes, your jars may not seal properly or remain safely preserved.
Storing Tips for the Recipe
Proper storage maximizes your Cherry Jelly’s quality and shelf life:
Uncanned Jelly Storage: If you skip the water bath canning process, your jelly remains perishable. Store it in the refrigerator for up to 1 month in clean jars with tight-fitting lids. For longer storage, freeze it in freezer-safe containers for up to 6 months. Leave 1 inch of headspace in freezer containers to accommodate expansion.
Properly Canned Jelly Storage: Successfully processed and sealed jars can sit in a cool, dark, dry location for up to 18 months while maintaining optimal quality. Ideal storage temperatures range from 50-70°F. Avoid temperature fluctuations, which can cause condensation and potential seal failure.
Storage Location Selection: Choose a basement, pantry, or interior closet away from exterior walls. Avoid storing near furnaces, water heaters, or in uninsulated garages where temperature swings occur. Keep jelly away from direct sunlight, which degrades color and nutrients over time.
Post-Opening Care: Once opened, refrigerate Cherry Jelly and use within 3-4 weeks. Always use clean utensils when scooping jelly to prevent introducing bacteria. If you notice any mold, off-odors, or signs of fermentation, discard the entire jar—jelly’s high sugar content usually prevents spoilage, but compromised seals can allow contamination.
Monitoring Sealed Jars: Before storing canned jelly, confirm each lid has sealed properly—the center should be concave and shouldn’t flex when pressed. Any jars that didn’t seal must be refrigerated immediately and used within a month. Check stored jars periodically for signs of seal failure, bulging lids, or cloudiness.
Pre-Prep Ingredient Storage: Fresh cherries stay freshest when stored unwashed in the refrigerator in their original container or a breathable bag for up to 1 week. Wash them just before use to prevent premature deterioration.
Conclusion
Cherry Jelly captures summer’s finest flavors in a versatile, shelf-stable spread. This homemade version delivers superior taste while preserving beneficial antioxidants from fresh cherries. By following precise timing, using quality ingredients, and employing proper canning techniques, you’ll create perfectly set jelly that enhances everything from morning toast to gourmet cheese boards. Ready to experience the satisfaction of homemade preserving? Try this Cherry Jelly recipe today and share your results in the comments below! Subscribe to our blog for more seasonal canning recipes and preservation tips.
FAQs
Can I use sweet cherries instead of tart cherries for jelly?
Yes, but sweet cherries produce a much sweeter, less complex jelly. The lack of natural tartness can make the result taste one-dimensional. If using sweet cherries, increase lemon juice to 4 tablespoons and consider reducing sugar by ¼ cup to maintain balance. Tart cherries provide the ideal flavor profile for jelly with their natural acidity and vibrant taste.
Why didn’t my jelly set properly?
Several factors affect gel formation: insufficient cooking time, incorrect pectin-to-sugar ratios, expired pectin, or not reaching a full rolling boil. If your jelly remains runny after 48 hours, you can reprocess it by pouring it back into a pot, bringing it to a boil with fresh pectin according to package directions, and re-canning. Alternatively, enjoy “failed” jelly as pancake syrup or ice cream topping.
Do I need special equipment for making jelly?
Basic jelly-making requires a large pot, jelly bag or cheesecloth, measuring cups, and jars. If canning for shelf-stable storage, you’ll need a water bath canner (or a very large pot with a rack), jar lifter, and canning funnel. These tools ensure safety and success but represent a modest investment for years of preserving enjoyment.
How can I tell when jelly has reached the gel point?
The traditional test involves placing a spoonful of hot jelly on a chilled plate and pushing it with your finger after 1 minute. If it wrinkles and holds its shape, it’s ready. Alternatively, use a candy thermometer—jelly sets at 220°F at sea level (adjust for elevation). Following recipe timing precisely with proper pectin usually eliminates guessing.
Can I reduce sugar even more than the low-sugar recipe suggests?
With standard pectin, reducing sugar below recommended amounts produces jelly that won’t set properly. However, Pomona’s Universal Pectin allows even greater sugar reduction or alternative sweeteners like honey, making jelly with as little as ½ cup sugar for 4 cups juice. Follow Pomona’s specific instructions carefully, as their two-part pectin system differs from conventional methods.
Best Cherry Jelly Recipe | Simple Homemade Jelly from Juice for Beginners
- Total Time: 90 minutes
- Yield: 6–7 jars 1x
- Diet: Vegetarian
Description
Cherry Jelly represents one of the most rewarding canning projects you can undertake in your kitchen — smooth, jewel-toned, and bursting with pure cherry flavor. This homemade jelly combines tart cherry juice, sugar, and pectin into a glossy spread packed with antioxidants and heart-healthy polyphenols.
Ingredients
- 4 cups tart cherry juice (from 3 lbs of fresh sour cherries)
- ½ cup water
- 2 tablespoons lemon juice (optional, enhances flavor and acidity)
- 4 cups granulated sugar
- 1 box (1.75 oz) powdered pectin
- Optional Substitutions:
- Frozen tart cherries for fresh
- Low-sugar pectin to reduce sugar by 50%
- Honey or maple syrup for natural sweetness
- Bottled tart cherry juice if fresh unavailable
Instructions
- Rinse 3 lbs fresh tart cherries thoroughly and place in a medium saucepan with ½ cup water.
- Cook over medium-high heat until cherries pop and release juice (5–7 minutes).
- Reduce heat, cover, and simmer for 10 minutes to extract maximum flavor.
- Pour mixture into a jelly bag or cheesecloth and let drip 2–4 hours without squeezing.
- Measure 4 cups of strained juice, add 2 tablespoons lemon juice if using.
- Bring juice to a full rolling boil in a saucepan over high heat.
- Slowly sprinkle in powdered pectin while stirring continuously; boil exactly 1 minute.
- Add 4 cups sugar gradually, stirring until fully dissolved.
- Return to a hard boil for 1–2 minutes, stirring constantly.
- Remove from heat and immediately ladle jelly into sterilized jars, leaving ¼ inch headspace.
- Wipe rims clean, apply lids, and process jars in a boiling water bath for 10 minutes (15 minutes above 6,000 ft).
- Cool jars undisturbed for 24–48 hours to allow jelly to set completely.
Notes
Yields about 6–7 jars. Properly canned jelly lasts up to 18 months in a cool, dark place. Once opened, refrigerate and use within 3–4 weeks. For low-sugar variations, use Pomona’s Universal or Sure-Jell Low-Sugar pectin. Avoid squeezing the jelly bag to maintain clarity.
- Prep Time: 30-40 minutes
- Cook Time: 20 minutes
- Category: Preserves & Canning
- Method: Stovetop
- Cuisine: American
Nutrition
- Serving Size: 1 tablespoon
- Calories: 94
- Sugar: 22g
- Sodium: 5mg
- Fat: 0.1g
- Saturated Fat: 0.001g
- Unsaturated Fat: 0g
- Trans Fat: 0g
- Carbohydrates: 24g
- Fiber: 0.1g
- Protein: 0.1g
- Cholesterol: 0mg
Keywords: cherry jelly, tart cherries, canning, preserves, fruit spread