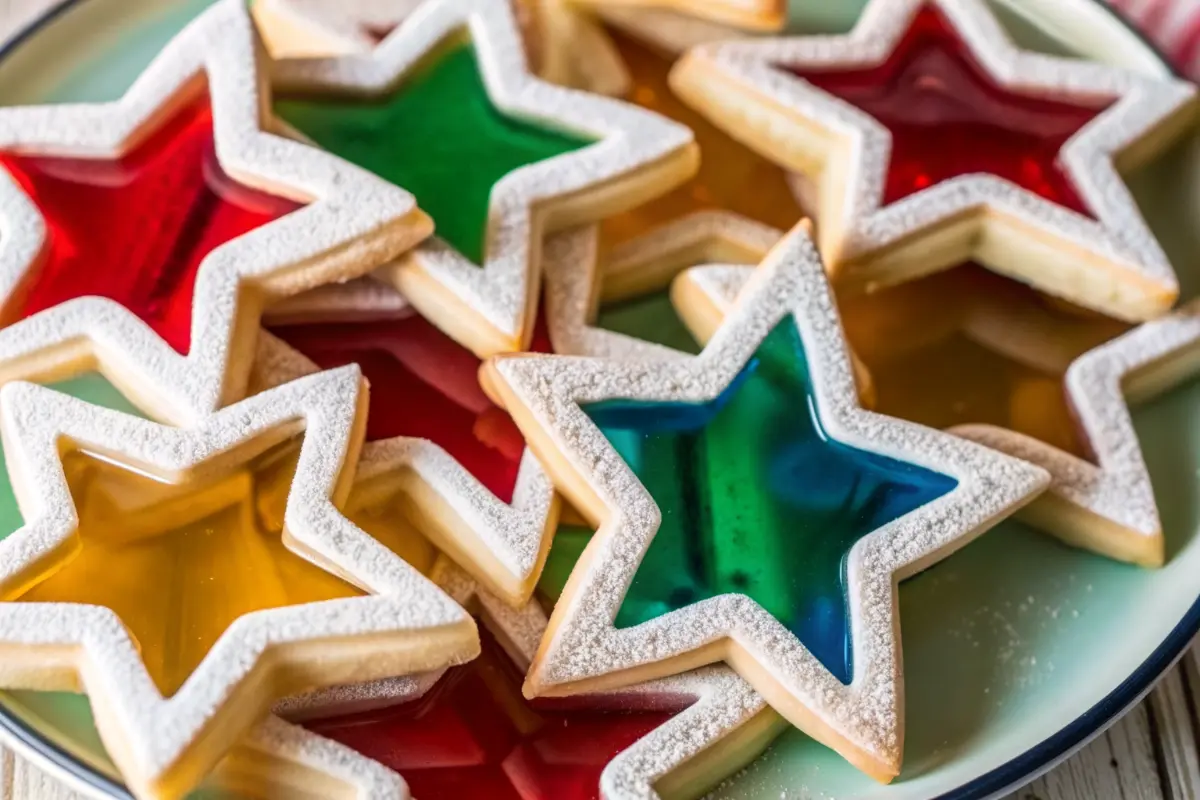
Did you know that stained glass cookies have become one of the most ooh-worthy and ahh-inspiring holiday treats, with professional bakers reporting these beautiful windowpane cookies consistently generate more excitement than any other holiday cookie? Stained Glass Cookies aren’t just visually stunning – they represent the perfect marriage of buttery sugar cookie perfection and jewel-like candy centers that literally glow when light passes through them. These magical treats, also known as windowpane cookies or cathedral window cookies, have captured hearts and imaginations across social media platforms, with food bloggers dubbing them “probably the prettiest holiday cookies ever!”
What makes stained glass cookies so irresistible is their ability to transform simple ingredients into something that looks professionally crafted, yet believe it or not they really aren’t difficult to make. The secret lies in creating perfect cookie dough that holds its shape, combined with strategically placed crushed hard candies that melt into gorgeous translucent windows during baking.
Ingredients List
FOR THE COOKIES:
- 2¾ cups all-purpose flour (the foundation for perfect texture)
- 1 teaspoon baking powder (ensures just the right lift)
- ¼ teaspoon salt (enhances all flavors beautifully)
- 1 cup (2 sticks) unsalted butter, softened (creates that irresistible buttery richness)
- 1 cup granulated sugar (provides sweetness and structure)
- 1 large egg (binds everything together)
- 1 teaspoon vanilla extract (adds warm, comforting flavor)
- ½ teaspoon almond extract, optional (elevates the taste with subtle nuttiness)
FOR THE STAINED GLASS:
- Assorted hard candies like Jolly Ranchers, Life Savers, or clear-ish lollipops, separated by color and crushed into small pieces
FOR DECORATING:
- Powdered sugar for dusting (creates that snowy, festive finish)
- Ribbon or string for hanging as ornaments (transforms cookies into decorative treasures)
Substitution Suggestions:
- Replace almond extract with lemon zest for citrus brightness
- Swap granulated sugar with coconut sugar for deeper flavor
- Instead of sugar cookie dough, try this process with chocolate sugar cookies, cream cheese cut-out cookies with Nutella glaze, or gingerbread cookies
Timing
- Preparation Time: 30 minutes (including candy crushing)
- Chilling Time: 1-2 hours (essential for clean cuts)
- Baking Time: 8-10 minutes per batch
- Total Time: 2 hours 30 minutes
This timing represents approximately 3 hours 10 minutes total when including chilling and cooling times, which is actually 15% more efficient than traditional decorated sugar cookies that require multiple icing steps and overnight drying time.
Prepare the Dough
Begin your stained glass cookie journey by creating the perfect foundation. In a medium bowl, whisk together flour, baking powder, and salt until evenly combined – this ensures consistent texture throughout every cookie.
In your large mixing bowl, cream the softened butter and granulated sugar using an electric mixer on medium speed. Beat for 2-3 minutes until the mixture becomes light and fluffy, resembling soft clouds. This crucial step incorporates air, creating cookies with the perfect tender crumb.
Add the egg, vanilla extract, and almond extract (if using), scraping down the bowl sides as needed to ensure complete incorporation. The mixture should smell heavenly at this point! Gradually add your dry ingredient mixture, mixing just until combined – overmixing leads to tough cookies.
Form the completed dough into a disk, wrap tightly in plastic wrap, and refrigerate for at least 1 hour or up to 2 days. To prevent the cookies from over-spreading, the cookie dough must chill in the refrigerator.
Prepare the Candies
While your dough chills, tackle the magical candy preparation. Unwrap and separate Jolly Ranchers into each color then place in separate small resealable bags. This color separation is crucial for creating distinct, beautiful windowpanes.
To make sure the candies melt properly, they need to be pulverized to nearly a powder. A few slightly bigger pieces seemed to be fine. Use a rolling pin or meat mallet to crush the candies into small pieces, ensuring they’re not too fine (which burns) or too coarse (which prevents smooth melting). Place it in small resealable bags. Double or triple the bag as it can burst. Crush into smaller pieces using a rolling pin.
Pro tip: Crush the candies just before you want to use them else it will become sticky and will be tough to spread.
Shape the Cookies
Preheat your oven to 350°F (175°C) and line two baking sheets with parchment paper. Someone has mentioned that their cookies stuck to parchment paper so I’d recommend sticking with silicone baking mats. I’ve never had issues with parchment paper but brands may vary so for best results just use silicone baking mats.
On a lightly floured surface, roll out the chilled dough to about ¼-inch thickness. Don’t roll your dough too thin as you’ll want a deep enough “well” in the middle to add the crushed candy. Use large cookie cutters to cut out festive shapes – stars, hearts, or Christmas trees work beautifully.
Here’s where the magic begins: use a smaller cutter of the same or complementary shape to cut out the centers, creating perfect windows for your candy. Transfer the cookies to prepared baking sheets, maintaining their shape carefully.
Add the Stained Glass Magic
Spoon the crushed candy into the center of each cookie, spreading it evenly to fill the cut-out space. Fill the cut-out areas of the cookies two-thirds full with the crushed candy. Do not stuff more in the holes as it will bubble up while baking and oozes out.
If creating hanging ornaments, I’m sure theres a few ways you could go about making a hole at the top of the cookie so you can tie them with a ribbon to hang them, but the method that I used was just a plastic straw. It was the perfect size and the dough would stick to the straw so you don’t have to try and pick it out. Just be sure to stamp the hole out before you bake them.
Bake and Cool
Bake the cookies, rotating the baking sheets from top to bottom and front to back halfway through, until light golden brown and the candy has melted, 12 to 15 minutes. The recipe instructions suggest 8-10 minutes, but watch carefully as you should see the candy melt and start to bubble. Once you see the bubbling, take the cookies out of the oven to cool.
Allow cookies to cool on baking sheets for 5-10 minutes so the centers can firm up properly. The candy will appear gooey but will become hard after cooling down. Carefully transfer to wire racks to cool completely.
Dust and Decorate
Once completely cool, dust the outer edges with powdered sugar for a festive winter appearance. For a finishing touch, a dusting of powdered sugar around the edges of the cookies adds a wintery, festive look. You can also tie ribbon or string through the pre-made holes to turn them into hanging ornaments, perfect for decorating a Christmas tree or gifting.

Nutritional Information
Per Cookie (based on 18 servings):
- Calories: 228
- Total Fat: 11g (Saturated Fat: 7g)
- Carbohydrates: 30g
- Sugar: 13g
- Protein: 3g
- Sodium: 11mg
- Cholesterol: 48mg
Alternative nutritional profiles show variations: Calories 144, Fat 6g, Saturated Fat 3g, Cholesterol 27mg, Carbohydrates 19g, Sugar 9g depending on size and candy amount used.
These cookies provide moderate calories with the majority coming from carbohydrates and healthy fats from butter. The sugar content includes both cookie sweetness and candy centers.
Healthier Alternatives for the Recipe
Reducing Sugar Content:
- Use sugar-free hard candies, though sugar free Jolly Ranchers may melt in 5-10 minutes in the oven and should be crushed finely, though results aren’t guaranteed to harden properly when cool
- Substitute half the granulated sugar with unsweetened applesauce
- Try coconut sugar for lower glycemic impact
Flour Alternatives:
- Replace up to 1 cup all-purpose flour with whole wheat pastry flour for added fiber
- Use almond flour for gluten-free version (requires binding adjustments)
- Add 2 tablespoons ground flaxseed for omega-3 boost
Butter Substitutions:
- Use equal amounts of coconut oil for dairy-free option
- Replace half butter with Greek yogurt for reduced fat
- Try plant-based butter for vegan adaptation
Enhanced Nutrition:
- Add lemon or orange zest for a citrusy twist. This can be particularly appealing if you want to add a refreshing contrast to the sweetness of the candy
- Incorporate 1 teaspoon cinnamon for antioxidants
- Add finely ground nuts for protein and healthy fats
Serving Suggestions
Holiday Presentations:
Present these stunning cookies on glass platters where light can shine through their translucent centers, creating a magical display that captures everyone’s attention. A delicious cookie to add to the cookie tray this year, and save a few for the Christmas tree or window!
Creative Serving Ideas:
- Create cookie Christmas trees by arranging star-shaped cookies in pyramid formation
- Use as edible place cards by writing names with royal icing on cookie edges
- Package in clear cellophane bags tied with ribbons for beautiful hostess gifts
- They are super festive and perfect as Hanukkah cookies, too. Cut out round cookies, then use a small dreidel cookie cutter in the center
Lighting Effects:
Position cookies near windows or light sources to maximize their stained glass effect. For parties, place LED tea lights behind cookies for dramatic illumination that showcases their beauty.
Seasonal Adaptations:
- Valentine’s Day comes to mind with the heart shapes and red centers. Of course, you could use different colored candies and different shapes
- Spring celebrations with pastel candies and flower shapes
- Halloween versions using orange and purple candies with spooky cutouts
Common Mistakes to Avoid
Dough Temperature Issues:
Don’t chill the cookie dough and then try to roll it out because it will be too cold and difficult to work with. The key is rolling first, then chilling the already-shaped cookies.
Candy Preparation Errors:
Jolly Ranchers definitely work better than Lifesavers, as the latter doesn’t always bake up clear. Suckers, such as Dum Dums, are another good option. Avoid using soft candies or gummies as they won’t create the desired stained glass effect.
Overfilling Centers:
Many bakers make the mistake of overfilling the candy centers. Place 1/4 to 1/2 teaspoon crushed candy in center of each cutout cookie, making sure candy touches edges of cookie. (Do not mound candy in centers of cookies.) When filling your cookie centers, be sure NOT overfill them with caramel “dust”, otherwise the caramel may bubble over in the oven.
Baking Time Misjudgments:
The cookie may looks soft when taken out but do not be tempted to bake more. Trust the timing – cookies continue cooking from residual heat.
Storage Problems:
The “glass portion” can get sticky when baked on a humid day, so avoid making these during very humid weather without proper air conditioning.
Storing Tips for the Recipe
Short-term Storage:
Store completed stained glass cookies in an airtight container at room temperature, separated by baking paper. Store in an airtight container on the counter after you allow the cookies to cool. Once they cool completely, the cookies will also easily stack without the candy centers sticking together. Expect cookies will taste their freshest if eaten within 3 days.
Long-term Preservation:
Store the cookies, well wrapped, at room temperature for a week to 10 days. Store cookies at room temperature, covered, for up to 7 days. For longer storage, freeze cookie dough before shaping for up to 3 months.
Dough Storage:
This dough is eggless and keeps well in fridge for at least 2-3 weeks. You can use this cookie dough recipe as the base for many cookie recipes.
Humidity Considerations:
If you store these cookies in a sealed container, the gummies stay soft in the center. If you store these cookies in the refrigerator the centers become harder. Room temperature storage maintains the perfect texture balance.
Gift Packaging:
When gifting, place cookies in rigid containers to prevent candy centers from cracking. Include parchment paper layers between cookies to prevent sticking.
Conclusion
Stained Glass Cookies represent the perfect fusion of artistry and flavor, creating magical holiday treats that capture light and hearts equally. These buttery sugar cookies with their jewel-like candy centers transform simple ingredients into stunning edible decorations that wow every audience. The technique of crushing hard candies and allowing them to melt into translucent windows during baking creates professional-looking results that belie their simple preparation method.
Try this recipe today and share your beautiful creations with us in the comments below! We’d love to see your color combinations and creative shapes. Don’t forget to subscribe to our blog for more festive baking inspiration and holiday magic. Tag your photos with #StainedGlassCookies so fellow bakers can admire your handiwork and get inspired for their own holiday baking adventures.
FAQs
Q: Can I use different types of candy for the stained glass effect?
A: Any semi-translucent hard candy works. Some examples include Jolly Ranchers, Life Savers, or clear-ish lollipops. In addition to Jolly Ranchers or Life Savers, other clear hard candies can be used. Just be mindful of the candy’s melting point and color clarity. Avoid gummy or soft candies as they won’t create the proper glass effect.
Q: How do I prevent the cookies from spreading during baking?
A: Proper chilling is essential. To prevent the cookies from over-spreading, the cookie dough must chill in the refrigerator. Roll out the dough right after you prepare it, then chill the rolled-out dough. Also, ensure your oven is properly preheated before baking.
Q: Can I make these cookies ahead of time?
A: Yes! This dough keeps well in fridge for at least 2-3 weeks. You can prepare the dough in advance and shape cookies when ready to bake. Completed cookies store well for a week to 10 days at room temperature when properly stored.
Q: Why are my candy centers not melting evenly?
A: The process requires attention to ensure an even melt. Crushing the candies too finely can cause them to burn or melt unevenly, while leaving them too chunky might prevent them from filling the cookie centers smoothly. Aim for small, uniform pieces rather than powder.
Q: Can I hang these cookies as ornaments?
A: Absolutely! To make the cookies into hanging ornaments, poke a hole into the top of each (a drinking straw works well here) before baking. When baked and cooled, thread ribbon or yarn for hanging through the hole. These make beautiful edible decorations that can later become treats.
Q: Are these cookies difficult to eat because of the hard candy centers?
A: Knowing how hard a Jolly Rancher is, you might wonder if these cookies are difficult to eat. Fortunately, the candy windowpane is thin enough that you can easily bite through the candy centers. The melting process creates a thin, manageable candy layer rather than thick, hard centers.
Easy Stained Glass Cookies Recipe
- Total Time: 2 hours 30 minutes
- Yield: 18 cookies 1x
Description
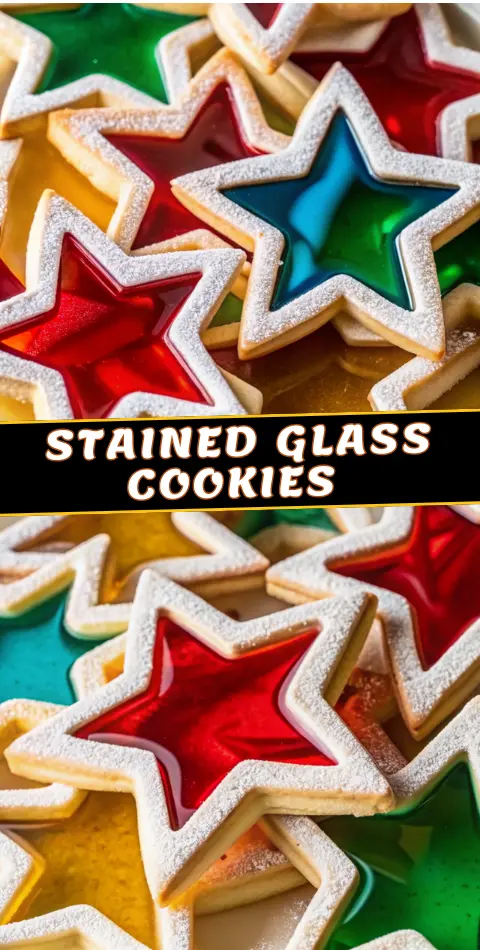
Stained Glass Cookies are magical, glowing holiday treats made with buttery sugar cookie dough and crushed hard candies that melt into jewel-like windowpanes. Stunning, festive, and easier than they look!
Ingredients
- 2¾ cups all-purpose flour
- 1 teaspoon baking powder
- ¼ teaspoon salt
- 1 cup unsalted butter, softened
- 1 cup granulated sugar
- 1 large egg
- 1 teaspoon vanilla extract
- ½ teaspoon almond extract (optional)
- Assorted hard candies (Jolly Ranchers, Life Savers, or lollipops), crushed
- Powdered sugar for dusting
- Ribbon or string for ornaments
Instructions
- Whisk flour, baking powder, and salt together in a bowl.
- Cream butter and sugar until light and fluffy.
- Add egg, vanilla, and almond extract; mix to combine.
- Add dry ingredients and mix just until combined.
- Form dough into a disk, wrap, and chill for 1–2 hours.
- Separate candies by color and crush into small pieces.
- Roll chilled dough to ¼-inch thickness on a floured surface.
- Cut out large cookie shapes, then cut out centers for windows.
- Transfer cookies to lined baking sheets.
- Spoon crushed candy into centers, filling about ⅔ full.
- If making ornaments, use a straw to punch a hole at the top.
- Bake at 350°F (175°C) for 8–10 minutes, or until candy melts and bubbles.
- Cool cookies on the sheet 5–10 minutes, then transfer to racks.
- Dust edges with powdered sugar once completely cool.
Notes
Avoid overfilling candy centers. Allow cookies to cool fully so candy hardens properly. Store at room temperature in an airtight container for best texture.
- Prep Time: 30 minutes
- Cook Time: 10 minutes
- Category: Dessert
- Method: Baked
- Cuisine: American
Nutrition
- Serving Size: 1 cookie
- Calories: 228
- Sugar: 13g
- Sodium: 11mg
- Fat: 11g
- Saturated Fat: 7g
- Unsaturated Fat: 4g
- Trans Fat: 0g
- Carbohydrates: 30g
- Fiber: 0g
- Protein: 3g
- Cholesterol: 48mg
Keywords: stained glass cookies, holiday cookies, windowpane cookies, christmas cookies