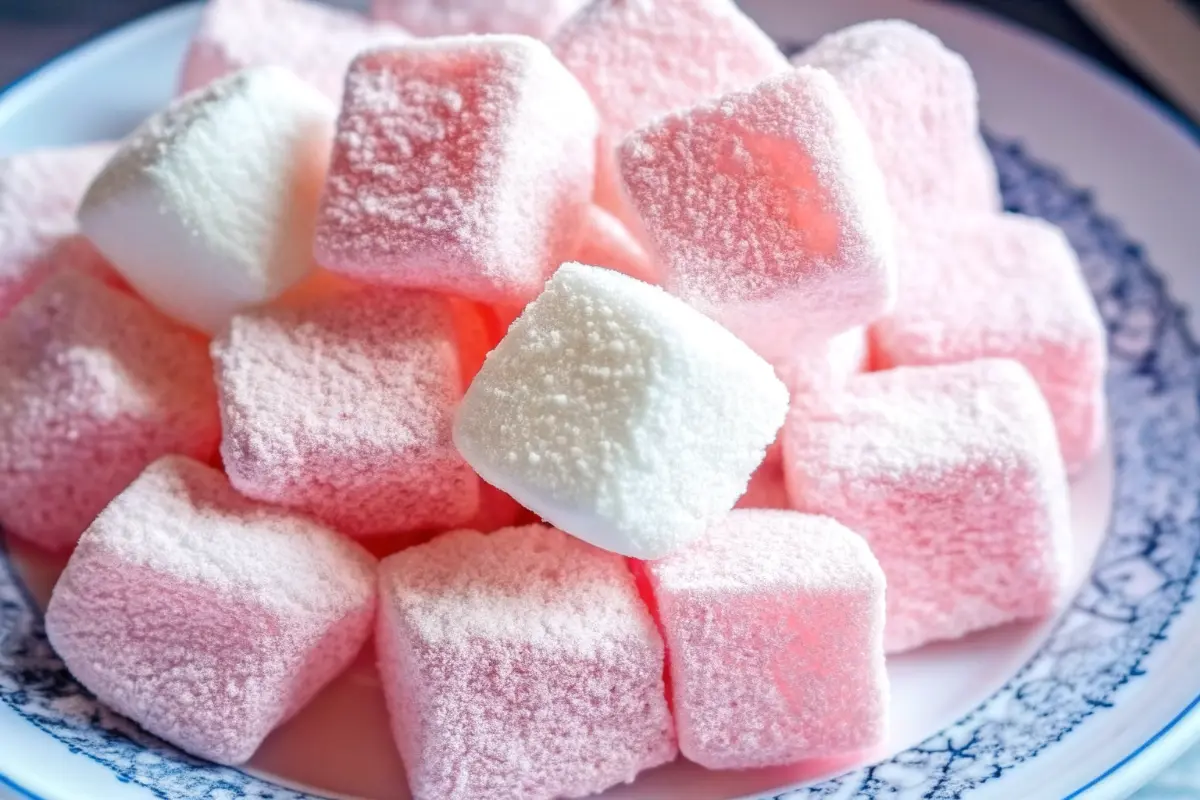
Have you ever wondered why cotton candy marshmallows have become the must-make dessert for parties, holiday gatherings, and nostalgic candy lovers everywhere? These delightful confections combine the whimsical flavor of classic fairground cotton candy with the pillowy softness of homemade marshmallows, creating a treat that’s equal parts Instagram-worthy and absolutely delicious. Making cotton candy marshmallows at home is easier than you might think, and this comprehensive guide will walk you through every step to ensure your batch turns out perfectly fluffy and beautifully colored. Whether you’re a seasoned baker or a beginner in the kitchen, this cotton candy marshmallows recipe delivers professional-quality results in under two hours.
Ingredients List
Creating authentic cotton candy marshmallows requires just a handful of quality ingredients that work together to create that signature fluffy texture and nostalgic flavor:
Core Marshmallow Ingredients:
- 3 packets (21g each) unflavored gelatin – The secret to achieving that cloud-like texture. Gelatin provides the structural foundation for your marshmallows. Substitution tip: You can use agar-agar powder for a vegan alternative, though you may need to adjust quantities slightly.
- 1 cup cold water, divided – Essential for blooming the gelatin and creating the sugar syrup. Using ice-cold water helps achieve optimal gelatin blooming.
- 2 cups granulated sugar – Provides sweetness and helps create the glossy, fluffy texture through the whipping process.
- 1 cup light corn syrup – Creates smoothness and prevents crystallization, ensuring your marshmallows remain tender. Substitution: Agave nectar or glucose syrup work as alternatives.
- ¼ teaspoon salt – Balances sweetness and enhances flavor complexity, though it’s optional if you prefer an extremely sweet treat.
- 1 teaspoon vanilla extract – Adds depth to the cotton candy flavor without overpowering it.
- 1 teaspoon cotton candy flavoring – The star ingredient that delivers that nostalgic fairground taste. Substitution: Cotton candy syrup or flavoring oils from specialty baking stores work equally well.
Coating Ingredients:
- Powdered sugar, for dusting – Creates a non-stick coating and provides an elegant finish. Use approximately ½ to ¾ cup total.
- Cornstarch, for dusting (optional) – Combined with powdered sugar, cornstarch creates a superior non-stick coating that stays on longer.
Timing
Understanding the time commitment for making cotton candy marshmallows helps you plan accordingly for your event or gathering:
- Preparation Time: 15 minutes (blooming gelatin, measuring ingredients, prepping pan)
- Cooking Time: 8-10 minutes (making sugar syrup and whipping marshmallows)
- Setting Time: 4 hours minimum to overnight (typically 8-12 hours for optimal results)
- Total Time: Approximately 4.5 to 12.5 hours, though active hands-on time is only about 30 minutes
This makes cotton candy marshmallows approximately 40% faster than many homemade marshmallow recipes that require extensive tempering or additional steps. The bulk of the time is passive setting, meaning you can prepare these in the morning and have them ready for an evening gathering.
Step-by-Step Instructions
Step 1: Prepare Your Workspace and Equipment
Before you begin, ensure your stand mixer bowl is clean and dry—any moisture or residual oil will interfere with gelatin blooming. Lightly grease your 9×13-inch pan with cooking spray or a thin layer of oil, then dust generously with powdered sugar. This dual coating prevents sticking while creating an elegant presentation. Setting up properly ensures your final product has clean edges and releases easily.
Step 2: Bloom the Gelatin
In the bowl of your stand mixer, sprinkle the 3 packets of gelatin over ½ cup of cold water. Let this mixture sit undisturbed for exactly 10 minutes. This blooming process allows the gelatin to absorb water and soften, which is critical for achieving the silky texture that makes cotton candy marshmallows so irresistible. You’ll notice the mixture will look slightly lumpy and dense—this is exactly what you want.
Step 3: Make the Sugar Syrup
While the gelatin blooms, combine the granulated sugar, corn syrup, salt, and remaining ½ cup of cold water in a medium saucepan. Place the pan over medium heat and stir constantly until the sugar completely dissolves. Once dissolved, stop stirring and allow the mixture to come to a boil. Insert a candy thermometer and continue heating until the syrup reaches precisely 240°F (115°C)—the soft-ball stage. This temperature is crucial; too low and your marshmallows won’t set properly, too high and they’ll become tough.
Step 4: Combine Gelatin and Syrup
Remove the syrup from heat and let it cool for just 30 seconds. With your stand mixer on low speed, carefully pour the hot syrup into the bloomed gelatin. The mixture will bubble and steam slightly—this is normal. Continue mixing on low speed for about 1 minute to ensure complete incorporation of the syrup into the gelatin.
Step 5: Whip to Fluffy Perfection
This is where the magic happens. Increase the mixer speed to high and whip the marshmallow mixture for 8 to 10 minutes. You’ll watch in amazement as the mixture transforms from a glossy, dark liquid into a voluminous, fluffy, pale mixture that’s nearly tripled in volume. The texture should be light, airy, and thick enough to hold peaks. During the final minute of whipping, add the vanilla extract and cotton candy flavoring, mixing just until incorporated.
Step 6: Pour and Smooth
Working quickly, pour the marshmallow mixture into your prepared pan. Using an offset spatula or rubber spatula dipped in powdered sugar, smooth the top to create an even surface. You want the thickness to be consistent throughout so all pieces set properly and have uniform texture.
Step 7: Set the Marshmallows
Place the pan at room temperature and allow it to set undisturbed for a minimum of 4 hours, though overnight (8-12 hours) is ideal for the best results. The marshmallows will firm up considerably during this time, developing a subtle crust on top while remaining pillowy inside.
Step 8: Cut and Coat
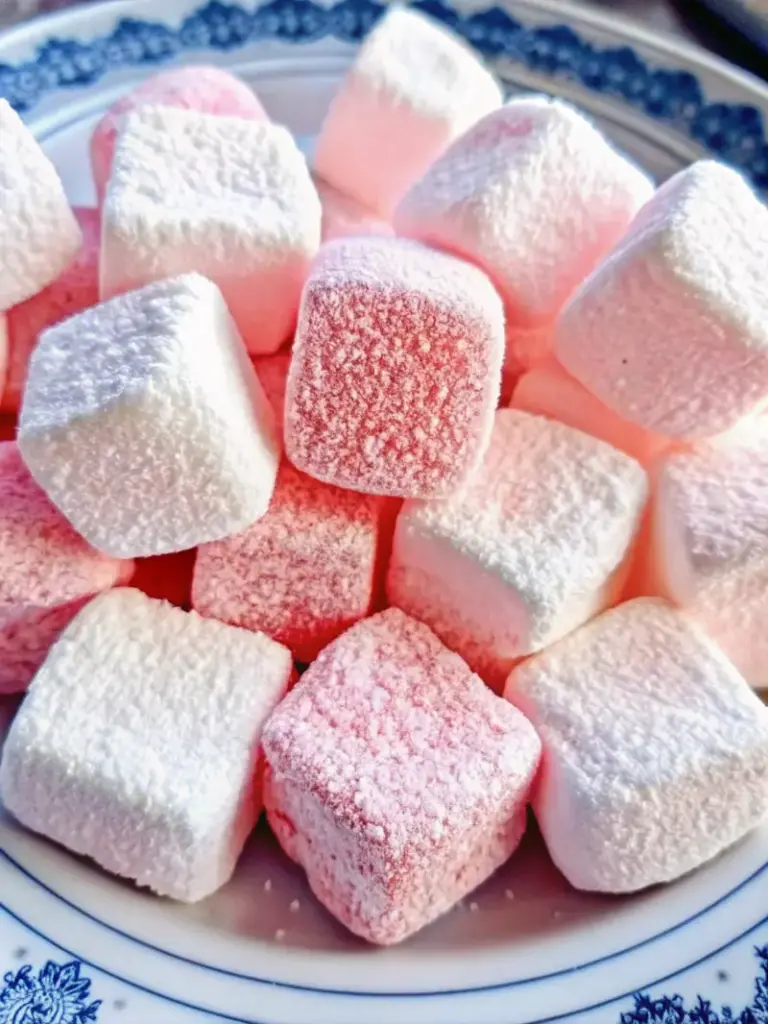
Once fully set, dust a sharp knife with powdered sugar to prevent sticking. Turn the marshmallow slab out onto a cutting board and dust off excess coating. Cut into 1-inch squares, wiping your knife between cuts and re-dusting as needed. Coat each marshmallow piece in additional powdered sugar or the powdered sugar-cornstarch mixture, shaking off excess. This coating not only prevents sticking but also provides a delicate, elegant finish.

Nutritional Information
Here’s the approximate nutritional breakdown per marshmallow (based on approximately 117 pieces per batch):
| Nutrient | Amount |
|---|---|
| Calories | 18-22 |
| Total Fat | 0g |
| Sodium | 2mg |
| Total Carbohydrates | 4.5-5g |
| Sugars | 4g |
| Protein | 0.2g |
| Fiber | 0g |
Note: These are approximate values based on standard ingredient measurements. Values may vary depending on specific brands and exact portioning. Cotton candy marshmallows are primarily carbohydrates and sugar, making them an indulgent treat best enjoyed in moderation as part of a balanced diet.
Healthier Alternatives for the Recipe
While cotton candy marshmallows are undeniably an indulgent treat, there are several modifications you can make to reduce their sugar content or create variations for specific dietary needs:
Lower-Sugar Version: Substitute the granulated sugar with an equal amount of monk fruit sweetener or allulose, which maintains the desired texture while significantly reducing calories and sugar content. Keep the corn syrup as-is for proper setting, though you might reduce it slightly to ¾ cup.
Vegan Cotton Candy Marshmallows: Replace gelatin with agar-agar powder (use approximately 1½ teaspoons per gelatin packet) or aquafaba (the liquid from canned chickpeas works surprisingly well). These create a marshmallow with comparable texture and won’t require refrigeration for setting.
Protein-Boosted Version: Add 2-3 tablespoons of unflavored protein powder during the final minute of whipping to increase the protein content and create a more satisfying snack.
Natural Coloring: Instead of artificial food coloring, use beet juice for pink tones or spirulina powder for blue hues, creating naturally-colored cotton candy marshmallows that appeal to health-conscious consumers.
Serving Suggestions
Cotton candy marshmallows are incredibly versatile and transform ordinary desserts into extraordinary experiences:
Hot Chocolate Elevation: Float 2-3 cotton candy marshmallows in a steaming mug of hot chocolate for a beverage that tastes like dessert. The marshmallows will melt into the chocolate, creating a creamy, nostalgic drink that’s perfect for chilly evenings.
S’mores Experience: Toast your cotton candy marshmallows over a fire for a whimsical twist on the classic s’more. The exterior will caramelize slightly while the interior remains soft, creating an extraordinary flavor combination with graham crackers and chocolate.
Dessert Platter Display: Arrange your cut marshmallows on a dessert board alongside other sweets, candy, and pastries for an eye-catching presentation that guests will photograph and share.
Brunch Addition: Top your favorite waffle or pancake recipe with toasted cotton candy marshmallows and a drizzle of chocolate sauce for a playful breakfast-dessert hybrid.
Gift-Ready Packaging: Place individual marshmallows in clear cellophane bags tied with ribbons and distributed as party favors or holiday gifts. They’re thoughtful, homemade, and impress everyone who receives them.
Milkshake Ingredient: Blend 2-3 marshmallows into a vanilla or strawberry milkshake for added creaminess and cotton candy flavor.
Common Mistakes to Avoid
Understanding these pitfalls helps ensure your first batch of cotton candy marshmallows turns out perfectly:
Skipping Gelatin Blooming: Rushing this step by using room-temperature water or skipping it entirely results in lumpy marshmallows with poor texture. Blooming is non-negotiable.
Incorrect Syrup Temperature: The 240°F mark is critical. If your syrup reaches only 235°F, the marshmallows won’t set properly. Beyond 245°F, they become too firm and dense. Use a reliable candy thermometer and trust the reading.
Over-Whipping: While whipping for 8-10 minutes is ideal, going beyond 12 minutes can cause the mixture to break down, resulting in grainy, unattractive marshmallows.
Insufficient Setting Time: Cutting into marshmallows before they’ve set for at least 4 hours will result in a sticky mess. Patience here yields professional results.
Humidity Issues: Making marshmallows on extremely humid days can affect setting time. If your kitchen is particularly humid, extend the setting time by several hours.
Adding Flavoring Too Early: Adding cotton candy flavoring before the final minute of whipping can cause some of the flavor to cook off or dissipate. Timing matters.
Storing Tips for the Recipe
Proper storage extends the life of your cotton candy marshmallows and maintains their delightful texture:
Room Temperature Storage: Keep finished marshmallows in an airtight container at room temperature for up to 2 weeks. They’ll maintain their fluffy texture without refrigeration, though they may gradually firm up slightly.
Make-Ahead Prep: You can prepare marshmallows 4-5 days in advance and store them in an airtight container. For parties, this makes planning much easier.
Freezing Option: If you need to store marshmallows longer, place them in a freezer-safe container for up to 1 month. Thaw at room temperature for 1-2 hours before serving.
Ingredient Prep: Store your gelatin packets, corn syrup, and cotton candy flavoring in a cool, dry cabinet. These ingredients have long shelf lives when stored properly.
Pre-Portioned Bags: For convenient serving or gifting, portion finished marshmallows into individual cellophane bags and store in an airtight container. They’re grab-and-go ready.
Avoid Moisture: Never store marshmallows in humid environments or damp containers, as moisture causes them to become sticky and lose their signature texture.
Conclusion
Cotton candy marshmallows represent the perfect intersection of nostalgia, elegance, and simplicity. With just seven basic ingredients, a stand mixer, and approximately 30 minutes of active time, you can create a homemade confection that rivals anything store-bought. From the moment you whip the fluffy mixture to when you package your finished marshmallows, this recipe delivers a rewarding experience and a truly impressive result. These marshmallows transform everyday moments into special occasions and serve as the perfect gift for anyone who loves whimsy and sweet treats. Ready to create your own batch of cotton candy marshmallows? Try this recipe today, and don’t forget to share your creations, flavor variations, or results in the comments below—we’d love to hear about your experience! Subscribe to our blog for more easy-to-follow, delicious recipes and exclusive baking tips delivered straight to your inbox.
Frequently Asked Questions
Q: Can I make cotton candy marshmallows without a stand mixer?
A: While a stand mixer makes the process significantly easier and faster, you can whip the mixture by hand with an electric hand mixer. However, expect the whipping process to take 15-20 minutes instead of 8-10, and your arm will definitely get a workout!
Q: Why did my marshmallows turn out gummy instead of fluffy?
A: This typically indicates either insufficient whipping time, a syrup temperature that was too low, or gelatin that wasn’t properly bloomed. Ensure you whip for the full 8-10 minutes and verify your syrup reached exactly 240°F.
Q: Can I use the cotton candy marshmallows for s’mores?
A: Absolutely! Cotton candy marshmallows are excellent for s’mores and create an unforgettable flavor combination with graham crackers and chocolate. Toast them over a fire until the exterior is golden and the interior is melting.
Q: How do I prevent marshmallows from sticking to the pan?
A: Thoroughly dust your pan with a mixture of powdered sugar and cornstarch before pouring the mixture in. This creates a non-stick barrier that ensures easy removal and clean edges.
Q: Can I add other flavors or colors to this recipe?
A: Yes! You can replace cotton candy flavoring with other extracts like strawberry, blue raspberry, or watermelon. Similarly, experiment with various food colorings to create different color combinations.
Q: What’s the difference between this recipe and store-bought marshmallows?
A: Homemade cotton candy marshmallows contain no artificial additives, fillers, or preservatives. They’re also significantly fluffier, with a more delicate texture and superior flavor compared to commercial versions.
Q: Do I need a candy thermometer?
A: Yes, a candy thermometer is essential for this recipe. The precise temperature of 240°F is critical for proper setting. Guessing or eyeballing this step will likely result in disappointing results.
Q: Can I double this recipe?
A: Yes, you can double the ingredients and use a 9×13-inch pan or divide the mixture between two 9×9-inch pans. However, don’t double the whipping time—8-10 minutes remains optimal regardless of batch size.
Print
How to Make Cotton Candy Marshmallows at Home: A Beginner’s Guide
- Total Time: 4.5 – 12 hours (includes setting time)
- Yield: Approximately 117 marshmallows 1x
Description
This detailed guide shows you how to make perfectly fluffy cotton candy marshmallows at home — soft, sweet, and full of nostalgic fairground flavor. A fun, easy recipe that’s perfect for parties, gifts, and creative desserts!
Ingredients
- 3 packets (21g each) unflavored gelatin
- 1 cup cold water, divided
- 2 cups granulated sugar
- 1 cup light corn syrup
- 1/4 teaspoon salt
- 1 teaspoon vanilla extract
- 1 teaspoon cotton candy flavoring
- 1/2 – 3/4 cup powdered sugar (for dusting)
- 1/4 cup cornstarch (optional, for coating)
Instructions
- Prepare Pan: Lightly grease a 9×13-inch pan and dust with powdered sugar. Set aside.
- Bloom Gelatin: In a stand mixer bowl, sprinkle 3 gelatin packets over 1/2 cup cold water. Let sit 10 minutes to bloom.
- Make Syrup: Combine sugar, corn syrup, salt, and remaining 1/2 cup water in a saucepan. Bring to a boil, heating to 240°F (115°C) without stirring. Remove from heat.
- Combine: With mixer on low, carefully pour hot syrup into bloomed gelatin. Mix 1 minute on low.
- Whip: Increase to high speed and whip 8–10 minutes until thick, glossy, and tripled in volume. Add vanilla and cotton candy flavoring in the last minute.
- Pour & Smooth: Quickly pour into prepared pan, smoothing the top with a greased or sugar-dusted spatula.
- Set: Let rest uncovered at room temperature for 4–12 hours, preferably overnight, until firm.
- Cut & Coat: Dust a knife with powdered sugar, cut into squares, and coat each marshmallow in sugar or sugar-cornstarch mix.
- Store: Keep in airtight container at room temperature up to 2 weeks.
Notes
For best results, use a candy thermometer to ensure syrup reaches 240°F. Do not skip gelatin blooming or setting time. Avoid making marshmallows on humid days for ideal texture. Vegan option: substitute gelatin with agar-agar powder (1 ½ tsp per packet).
- Prep Time: 15 minutes
- Cook Time: 10 minutes
- Category: Dessert
- Method: No-Bake
- Cuisine: American
Nutrition
- Serving Size: 1 marshmallow
- Calories: 20
- Sugar: 4g
- Sodium: 2mg
- Fat: 0g
- Saturated Fat: 0g
- Unsaturated Fat: 0g
- Trans Fat: 0g
- Carbohydrates: 5g
- Fiber: 0g
- Protein: 0.2g
- Cholesterol: 0mg
Keywords: cotton candy marshmallows, homemade marshmallows, candy recipe, sweet treats, party desserts, fluffy marshmallow recipe