Did you know that there are 117 calories in 1 cup of Apple Cider, making your homemade apple cider significantly more nutritious than most store-bought alternatives? This warming autumn beverage isn’t just a seasonal treat—it’s a powerhouse of antioxidants and essential nutrients that can support your health throughout the cooler months.
While commercial versions often lack the rich flavor and beneficial compounds found in fresh-pressed varieties, making your own apple cider at home allows you to capture all the natural goodness of fresh apples. As apple cider isn’t filtered, it has more polyphenols than apple juice, giving you more antioxidant benefits with every sip.
This traditional beverage combines the comfort of home cooking with science-backed health benefits, making it the perfect addition to your fall routine.
Table of Contents
Ingredients List
Transform your kitchen into an artisanal cidery with these carefully selected ingredients:
Essential Ingredients:
- 10-12 medium apples (mixed sweet and tart varieties like Honeycrisp, Granny Smith, and Gala), quartered for optimal flavor extraction
- 2 fresh oranges, quartered (peeling optional—keeping the peel adds natural oils and zesty brightness)
- 4 aromatic cinnamon sticks for warm spice notes
- 1 tablespoon whole cloves for deep, warming flavor
- 16 cups filtered water
Optional Flavor Enhancers:
- 1 teaspoon whole allspice berries for complexity
- 1 whole nutmeg for subtle warmth
- 1-inch piece fresh ginger for a gentle kick
- 1/2 cup natural sweetener (brown sugar or pure maple syrup, adjusted to taste)
Smart Substitutions:
- Apple varieties: Substitute with any combination of your local favorites—just ensure a mix of sweet and tart for balanced flavor
- Oranges: Replace with 2 lemons for a more tart profile, or try 1 large grapefruit for unique citrus notes
- Sweeteners: Honey, coconut sugar, or even dates work beautifully as natural alternatives
Timing
Preparation Time: 15 minutes for washing, quartering, and assembling ingredients
Active Cooking Time:
- Stovetop: 2 hours (20% faster than traditional slow-cooking methods)
- Slow Cooker: 6-8 hours on low, 3-4 hours on high
- Instant Pot: 25 minutes plus natural pressure release
Total Time: Ranges from 45 minutes (Instant Pot) to 8.5 hours (slow cooker method), making this recipe adaptable to any schedule. The beauty lies in the hands-off cooking approach—perfect for busy weekends when you want your home filled with autumn aromas.
Step-by-Step Instructions
Step 1: Prepare Your Foundation
Wash all apples and oranges thoroughly under cold running water. Quarter the apples without removing cores or peels—these contain valuable pectin and nutrients that enhance both flavor and health benefits. Quarter the oranges, keeping the peels on for natural oils that add depth to your cider.
Pro tip: Choose apples with varying textures and flavors. The combination creates a more complex, well-rounded cider that commercial versions can’t match.
Step 2: Create Your Spice Blend
Add your quartered fruit to your chosen cooking vessel. Nestle the cinnamon sticks, whole cloves, and optional spices throughout the fruit mixture. This ensures even distribution of flavors during the long cooking process.
Flavor secret: Lightly crush the whole spices with the back of a spoon to release more essential oils without creating sediment.
Step 3: Add Water and Begin Cooking
Pour 16 cups of filtered water over the fruit and spices, leaving 1-2 inches of space at the top to prevent overflow. The water should just cover the fruit mixture.
Cooking Method Options:
- Stovetop: Bring to a vigorous simmer over high heat, then reduce to medium-low and simmer covered for 2 hours
- Slow Cooker: Set to low for 6-8 hours or high for 3-4 hours
- Instant Pot: Use Manual setting for 25 minutes, followed by quick pressure release
Step 4: Extract Maximum Flavor
After cooking, use a large wooden spoon or potato masher to gently mash the softened apples and oranges against the sides of your pot. This releases additional flavors, natural sugars, and beneficial compounds that have been concentrated during cooking.
Expert technique: The more thoroughly you mash, the richer and more complex your cider will become.
Step 5: Perfect Your Sweetness
Taste your cider and add sweetener gradually, starting with 1/4 cup and adjusting to preference. Remember, the natural fruit sugars have concentrated during cooking, so you may need less sweetener than expected.
Step 6: Strain and Serve
Pour the mixture through a fine-mesh strainer or cheesecloth-lined colander into a clean pot or pitcher. Press the solids gently to extract every drop of flavorful liquid. Your homemade apple cider is now ready to serve hot or can be cooled and refrigerated for later enjoyment.

Nutritional Information
Your homemade apple cider delivers impressive nutritional value in every warming cup:
Per 8-ounce serving:
- Calories: 117-120 calories
- Carbohydrates: 30 grams of carbs, which includes 1 gram of fiber and 24 grams of sugar
- Fat: 0 grams of total fat
- Protein: 0 grams of protein
- Vitamin C: an essential nutrient and antioxidant that boosts the immune system
- Potassium: significant amounts of potassium for heart health
- Iron: iron for energy metabolism
- Calcium: calcium for bone health
Powerful Antioxidants: Apple cider contains polyphenols, which are compounds in plants that act as antioxidants. They can help the body to fight against free radicals and cell damage, lowering your risk of certain types of cancer, diabetes, and heart disease. Compared to apple juice, apple cider has significantly more polyphenols, specifically cholinergic acid, making your homemade version a superior choice for antioxidant benefits.
Healthier Alternatives for the Recipe
Transform your cider to meet specific dietary needs without sacrificing flavor:
Lower Sugar Options:
- Replace traditional sweeteners with stevia, monk fruit, or erythritol
- Reduce sweetener by half and add extra cinnamon for perceived sweetness
- Use naturally sweet apple varieties like Fuji or Red Delicious to minimize added sugars
Enhanced Nutrition Modifications:
- Add 1 tablespoon fresh turmeric root for anti-inflammatory compounds
- Include 2-3 cardamom pods for digestive benefits
- Incorporate 1 teaspoon vanilla extract for natural sweetness without calories
Dietary-Specific Adaptations:
- Keto-friendly: Use sugar-free sweeteners and limit to 4-6 ounces per serving
- Diabetic-friendly: Diluting the cider with water helps to cut down on the amount of sugar you take in
- Immune-boosting: Add fresh ginger and a pinch of cayenne pepper for vitamin C and circulation benefits
Serving Suggestions
Elevate your homemade apple cider experience with these creative serving ideas:
Traditional Warmth:
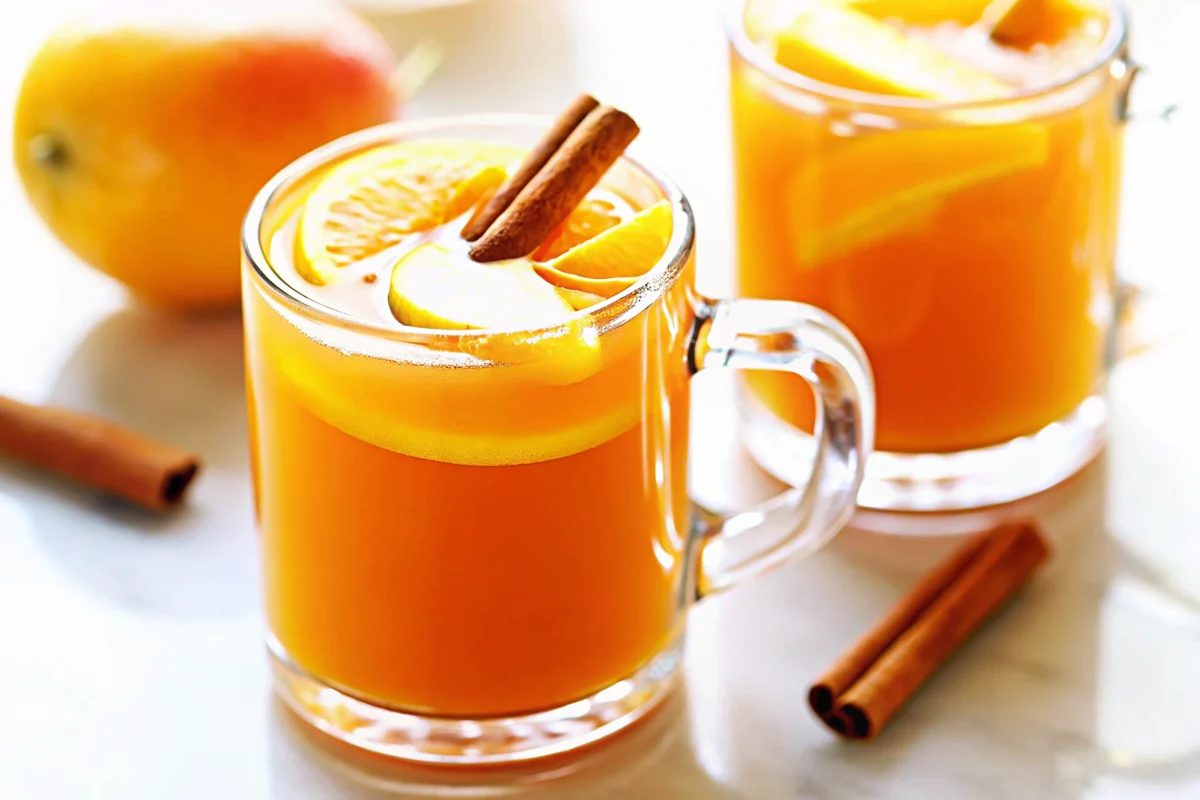
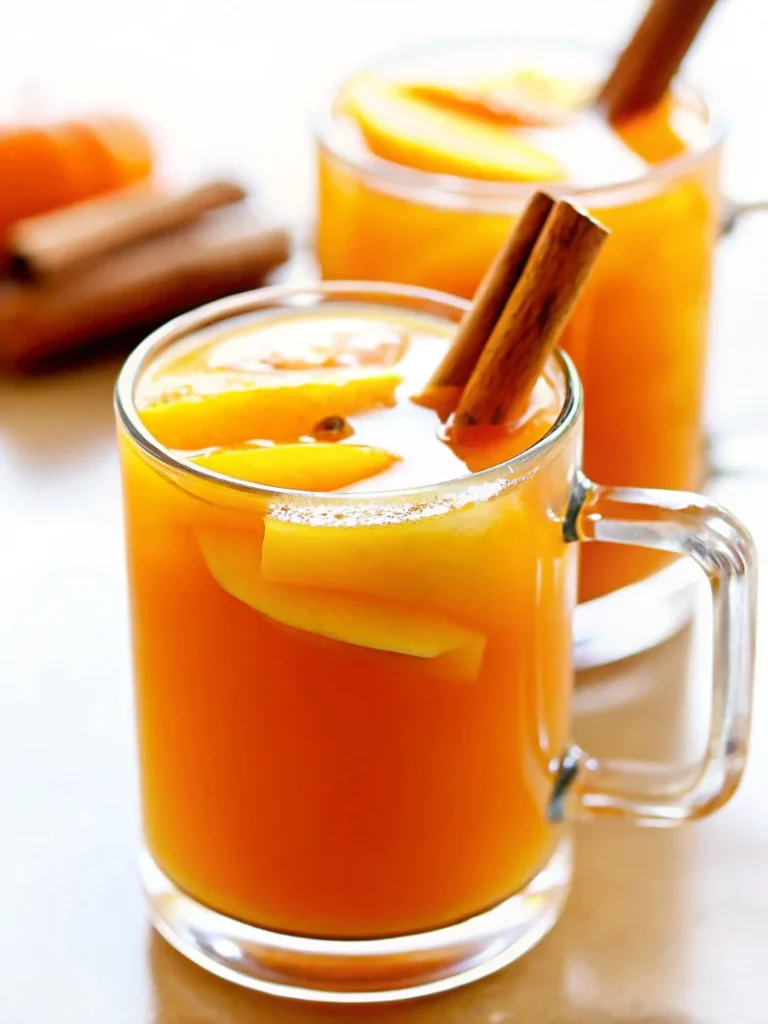
Serve steaming hot in large mugs with a cinnamon stick stirrer and a thin apple slice garnish. The aromatic steam enhances the sensory experience while the garnish adds visual appeal.
Festive Presentations:
- Float orange slices studded with whole cloves for elegant entertaining
- Rim mugs with cinnamon sugar for special occasions
- Serve in mason jars with brown paper labels for rustic charm
Creative Variations:
Transform your base cider into sophisticated beverages by adding a splash of vanilla extract, a dollop of whipped cream, or even a cinnamon sugar rim. For adults, a small amount of rum or bourbon creates a warming cocktail perfect for chilly evenings.
Seasonal Pairings:
Your homemade cider pairs beautifully with autumn treats like pumpkin bread, apple crisp, or cinnamon donuts. Apple cider goes down easy and is mostly water. This makes it a great way to hydrate… Getting your water in a tasty form that has so many health benefits is a great option.
Common Mistakes to Avoid
Sidestep these frequent pitfalls to ensure perfect cider every time:
Fruit Selection Errors:
Avoid using only sweet or only tart apples—the magic happens in the combination. Using pre-packaged apple juice instead of fresh apples eliminates the beneficial compounds and complex flavors that make homemade cider superior.
Cooking Temperature Mishaps:
Boiling too vigorously breaks down delicate flavors and can create a bitter taste. Maintain a gentle simmer to preserve the fruit’s natural sweetness and beneficial compounds.
Straining Shortcuts:
Rushing the straining process leaves you with cloudy, gritty cider. Take time to strain thoroughly through fine mesh or cheesecloth for the smoothest result.
Storage Safety Oversights:
If your apple cider is not pasteurized, there’s a chance that you could take in some harmful bacteria, such as Salmonella or E.coli. This is particularly possible if any of the apples used to make the cider were “drops” (apples that were picked off the ground). Always use fresh, clean apples and proper food safety practices.
Storing Tips for the Recipe
Maximize freshness and extend your cider’s life with these expert storage strategies:
Refrigeration Guidelines:
Store your finished cider in glass containers or BPA-free plastic in the refrigerator for up to one week. The natural sugars and lack of preservatives make homemade cider more perishable than commercial versions.
Freezing for Long-term Storage:
Pour cooled cider into ice cube trays for portion-controlled servings, or freeze in larger containers leaving 1-inch headspace for expansion. Frozen cider maintains quality for up to 6 months.
Make-Ahead Preparation:
Prepare your fruit and spice mixture up to 24 hours in advance, storing covered in the refrigerator. This actually enhances flavors as the spices begin to infuse the fruit before cooking begins.
Food Safety Best Practices:
Always cool cider completely before refrigerating, and never leave it at room temperature for more than 2 hours. You can always boil any cider before drinking it if you’re unsure of its safety. Make sure to stir it while you boil it to make sure it heats evenly.
Conclusion
This homemade apple cider recipe delivers more than just seasonal comfort—it provides a nutritious, antioxidant-rich beverage that supports your health while satisfying your taste buds. The combination of fresh apples, warming spices, and simple preparation creates a superior alternative to store-bought versions, offering enhanced polyphenol content and customizable flavors to suit any preference.
Ready to create your perfect autumn beverage? Try this recipe this weekend and share your results in the comments below—we’d love to hear about your favorite spice combinations or creative serving suggestions! Don’t forget to subscribe to our blog for more seasonal recipes and healthy cooking inspiration delivered straight to your inbox.

FAQs
Q: Can I use any type of apples for this recipe?
A: Absolutely! While the recipe suggests mixing sweet and tart varieties for optimal flavor complexity, you can use whatever apples are available. Granny Smith, Honeycrisp, Gala, and Fuji all work wonderfully. The key is using fresh, quality fruit for the best results.
Q: How long does homemade apple cider last?
A: Properly stored in the refrigerator, your homemade cider stays fresh for 5-7 days. Unlike commercial versions with preservatives, homemade cider has a shorter shelf life but superior taste and nutritional value.
Q: Is homemade apple cider safe to drink without pasteurization?
A: When made with clean, fresh apples and proper food safety practices, homemade cider is generally safe. However, you can always boil any cider before drinking it if you’re unsure of its safety. Pregnant women, young children, and immunocompromised individuals should exercise extra caution with unpasteurized beverages.
Q: Can I make this recipe sugar-free?
A: Yes! The natural fruit sugars provide sweetness, and you can enhance this with sugar-free alternatives like stevia, monk fruit, or by adding extra warming spices like cinnamon which enhance perceived sweetness.
Q: What’s the difference between apple cider and apple juice?
A: Apple cider is juiced apples. It still has some pulp, as well as more vitamins and minerals… Apple juice, on the other hand, is filtered juice that’s been heated to 190 F during processing. Cider retains more beneficial compounds and has a richer, more complex flavor profile.
Easy Homemade Apple Cider Recipe – Better Than Store-Bought!
- Total Time: 2 hours 15 minutes
- Yield: 8–10 cups 1x
Description
This homemade apple cider recipe is the perfect fall comfort drink—warm, spiced, and packed with antioxidants. Made with fresh apples, oranges, and aromatic spices, this cider delivers more polyphenols and health benefits than apple juice, making it a nourishing seasonal favorite.
Ingredients
- 10–12 medium apples (mix of sweet and tart varieties: Honeycrisp, Granny Smith, Gala)
- 2 fresh oranges, quartered (peeling optional)
- 4 cinnamon sticks
- 1 tablespoon whole cloves
- 16 cups filtered water
- Optional: 1 teaspoon whole allspice berries
- Optional: 1 whole nutmeg
- Optional: 1-inch piece fresh ginger
- Optional: 1/2 cup sweetener (brown sugar, maple syrup, or honey)
Instructions
- Wash and quarter apples and oranges. Leave peels and cores for added nutrients.
- Place fruit and spices in a large pot, slow cooker, or Instant Pot.
- Add water until fruit is covered by 1–2 inches.
- Cook according to method: stovetop simmer 2 hours, slow cooker 6-8 hours low/3-4 hours high, Instant Pot 25 minutes with natural release.
- After cooking, mash fruit with wooden spoon or potato masher to release flavors.
- Taste and add sweetener gradually, adjusting to preference.
- Strain through fine-mesh sieve or cheesecloth. Press solids to extract liquid.
- Serve hot in mugs, garnish with cinnamon stick or orange slice.
Notes
Use a mix of sweet and tart apples for best balance. Lightly crush spices before adding to release more flavor. Always sweeten after cooking and straining to prevent bitterness.
- Prep Time: 15 minutes
- Cook Time: 2 hours (stovetop)
- Category: Beverage
- Method: Simmered
- Cuisine: American
Nutrition
- Serving Size: 1 cup (8 oz)
- Calories: 117
- Sugar: 24g
- Sodium: 5mg
- Fat: 0g
- Saturated Fat: 0g
- Unsaturated Fat: 0g
- Trans Fat: 0g
- Carbohydrates: 30g
- Fiber: 1g
- Protein: 0g
- Cholesterol: 0mg
Keywords: homemade apple cider, spiced apple cider, fall drink, autumn beverage, healthy cider