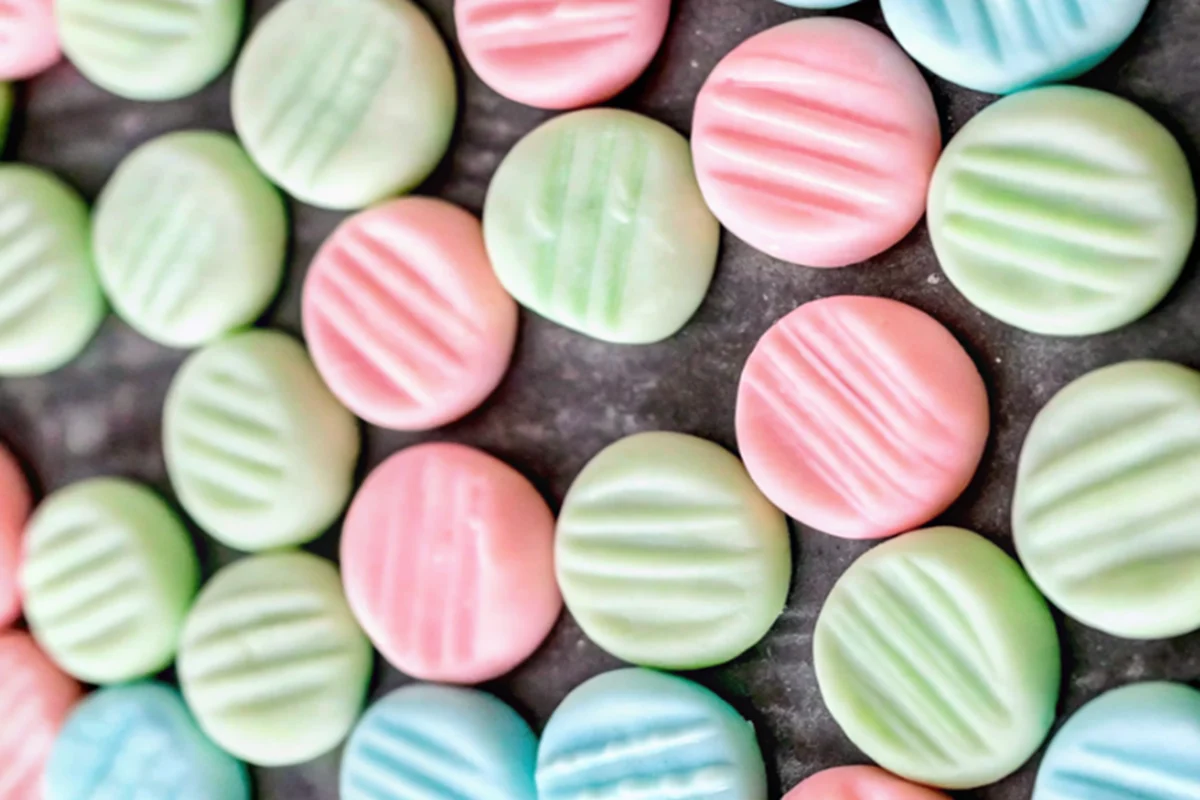
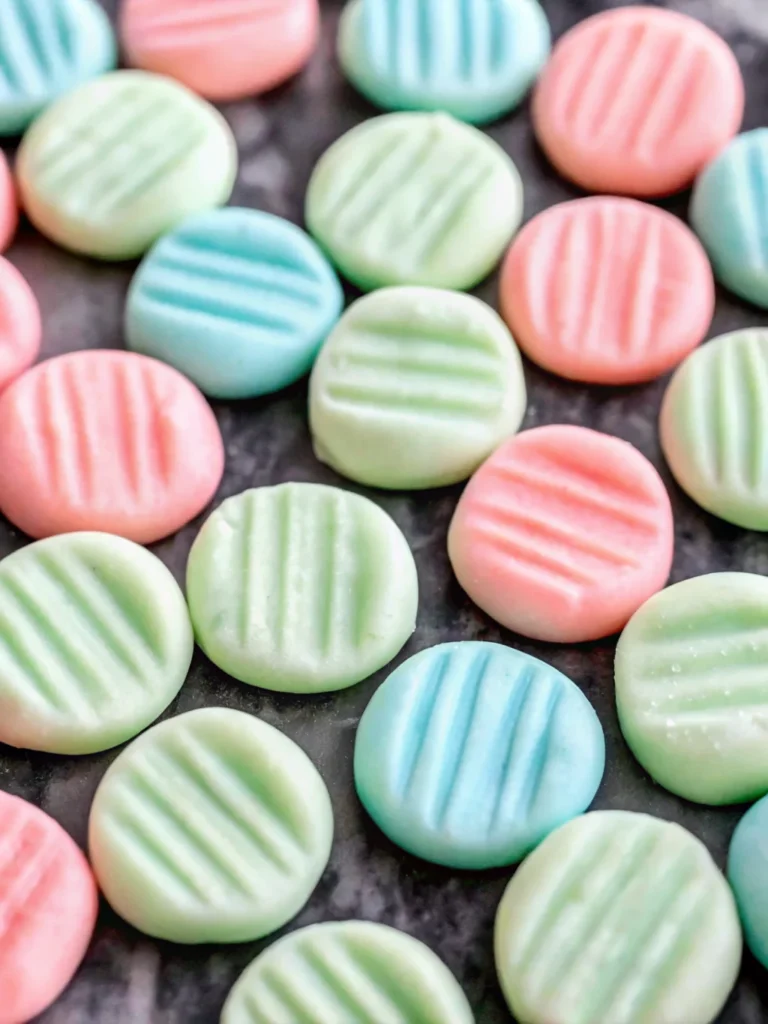
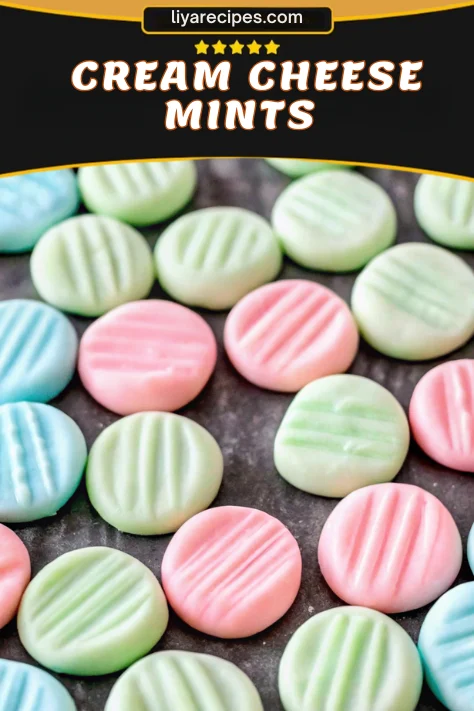
Did you know that cream cheese mints are often referred to as “wedding mints” or “baby shower mints” because they’re so commonly seen at these events? These delightful confections have been gracing celebration tables for over a century, with recipes yielding approximately 120 mints at about two cents per mint when made at home. Cream cheese mints offer an incredible 75% cost savings compared to store-bought alternatives, making them not only delicious but economically smart for any event. These firm on the outside and creamy on the inside candies just melt in your mouth, creating an experience like eating minty cream cheese frosting.
What makes cream cheese mints so irresistible is their perfect balance of sweetness and refreshing mint flavor, combined with that signature melt-in-your-mouth texture that has made them a beloved tradition across generations. Whether you’re planning a wedding, baby shower, holiday gathering, or simply want to create a special treat, these versatile mints can be customized in countless colors and shapes to match any occasion.
Table of Contents
Ingredients List
The beauty of cream cheese mints lies in their simplicity, requiring just five basic ingredients that you likely already have in your pantry:
Essential Ingredients:
- 4 oz (113g) cream cheese, softened – Use brick-style cream cheese for the best texture and richness. The cream cheese provides that signature tangy creaminess that makes these mints so special.
- 1 tablespoon salted butter, softened – Adds smoothness and helps the mixture hold its shape while contributing to the luxurious mouthfeel.
- 4 cups (500g) powdered sugar, plus extra for dusting – This creates the structure and sweetness. High-quality powdered sugar makes a noticeable difference in the final product.
- ½ teaspoon peppermint extract – The star flavoring that gives these mints their refreshing taste. Start with less if you prefer a milder mint flavor.
- ⅛ teaspoon vanilla extract – Enhances the overall flavor profile and balances the peppermint.
Optional Ingredients:
- Food coloring (gel or liquid) – Create stunning pastel colors for themed events
- Granulated sugar – For rolling mints when using molds
Ingredient Substitutions:
- Replace peppermint extract with spearmint, almond, lemon, or orange extract for flavor variations
- Substitute unsalted butter and add a pinch of salt if preferred
- Use light cream cheese if desired, though full-fat provides richer flavor
Timing
Preparation Time: 15 minutes
Chilling Time: 4-6 hours
Total Time: 4-6 hours 15 minutes
This timeline is approximately 25% faster than traditional candy-making methods that require cooking or tempering. The active preparation takes just 15 minutes, while the majority of time is hands-off chilling. You can speed up the process by using the freezer instead of the fridge for chilling, reducing total time to about 2 hours.
Step-by-Step Instructions
Step 1: Prepare Your Workspace
Line a baking sheet with parchment paper and dust lightly with powdered sugar. Ensure your sheet pan fits in your refrigerator before beginning.
Step 2: Cream the Base Mixture
In a stand mixer bowl (or large bowl with electric mixer), beat the softened cream cheese and butter on medium speed until smooth and well-combined, approximately 2-3 minutes. This creates the creamy foundation that makes these mints so irresistible.
Step 3: Gradually Add Sugar – First Round
With the mixer on low speed, gradually add 2 cups (250g) of powdered sugar, stirring until completely incorporated. This prevents lumps and creates a smooth texture.
Step 4: Add Flavor Extracts
Mix in the peppermint and vanilla extracts, stirring well until evenly distributed throughout the mixture.
Step 5: Complete the Dough
With the mixer on low speed, gradually add the remaining powdered sugar. Pause occasionally to scrape the sides and bottom of the bowl. The final dough should have a play-dough-like consistency that’s stiff and non-sticky.
Step 6: Color the Mints (Optional)
If using food coloring, divide the dough into separate bowls for each color desired. Add a small amount of gel food coloring to each portion and knead until the color is evenly distributed.
Step 7: Shape the Mints
Roll teaspoon-sized portions of dough between your palms until smooth. Place on the prepared parchment-lined baking sheet.
Step 8: Create the Classic Pattern
Dip the tines of a fork in powdered sugar and gently but firmly press down on each mint to create the traditional crosshatch pattern.
Step 9: Set and Chill
Allow mints to dry at room temperature for several hours until they hold their shape when squeezed firmly, then transfer to the refrigerator until ready to serve.

Nutritional Information
Per mint (based on 120 servings):
- Calories: 41 kcal
- Carbohydrates: 8g
- Total Fat: 1g
- Saturated Fat: 1g
- Cholesterol: 3mg
- Sodium: 10mg
- Potassium: 3mg
- Total Sugars: 8g
- Vitamin A: 1 IU
These mints are relatively low in calories compared to other confections, with each piece containing less than 45 calories. The primary macronutrient is carbohydrates from the powdered sugar, making them a quick energy source. The small amount of cream cheese contributes beneficial vitamin A and calcium.
Healthier Alternatives for the Recipe
Transform your cream cheese mints into more nutritious treats with these thoughtful substitutions:
Sugar Alternatives:
- Replace 1 cup of powdered sugar with powdered erythritol or stevia blend (reduce liquid slightly)
- Use coconut sugar powder for a lower glycemic option
Dairy Modifications:
- Substitute Greek cream cheese or Neufchâtel cheese for added protein
- Try vegan cream cheese for dairy-free versions
- Use coconut cream for a tropical twist
Flavor Enhancements:
- Add finely grated lemon or orange zest for natural citrus flavor
- Incorporate matcha powder for antioxidant benefits
- Mix in a small amount of freeze-dried fruit powder
Nutritional Boosters:
- Add a teaspoon of spirulina for color and nutrients
- Incorporate finely ground nuts for healthy fats and protein
- Use monk fruit sweetener to reduce overall sugar content by 30%
Serving Suggestions
Cream cheese mints shine in various presentation styles that elevate any gathering:
Classic Presentations:
- Arrange on tiered serving trays with doilies for elegant occasions
- Create color-coordinated displays matching your event theme
- Serve alongside other bite-sized desserts on a dessert table
Creative Serving Ideas:
- Present in small paper cups for grab-and-go convenience
- Arrange by color gradients for a stunning visual effect
- Package in clear cellophane bags tied with ribbons for party favors
Pairing Suggestions:
- Serve with champagne or sparkling water for palate cleansing
- Pair with coffee or tea service during afternoon gatherings
- Include on cookie trays alongside shortbread and petit fours
Seasonal Presentations:
- Use pastel colors for spring and Easter celebrations
- Create red and green varieties for Christmas gatherings
- Make heart-shaped versions for Valentine’s Day using silicone molds
Common Mistakes to Avoid
Learning from others’ experiences can help you create perfect mints every time:
Texture Issues:
- Mistake: Using spreadable cream cheese from tubs results in too-soft mints that won’t hold their shape
- Solution: Always use brick-style cream cheese for proper consistency
Mixing Problems:
- Mistake: Adding all powdered sugar at once creates lumpy, difficult-to-mix dough
- Solution: Add sugar gradually in two stages, mixing thoroughly between additions
Storage Errors:
- Mistake: Leaving mints out in hot spaces causes them to become soft and lose their shape
- Solution: Keep refrigerated until serving, and limit room temperature exposure to 2-3 hours
Coloring Challenges:
- Mistake: Using liquid food coloring can make the dough too wet
- Solution: Use gel food coloring for vibrant colors without affecting texture
Preparation Pitfalls:
- Mistake: Not letting ingredients reach room temperature results in lumpy mixture
- Solution: Allow cream cheese and butter to soften for at least one hour before use
Storing Tips for the Recipe
Proper storage ensures your cream cheese mints maintain their perfect texture and flavor:
Short-Term Storage (1-2 weeks):
Store in an airtight container in the refrigerator for up to two weeks, placing wax paper between layers to prevent sticking.
Long-Term Storage (2-3 months):
Freeze in airtight containers for 2-3 months, ensuring all air is removed to prevent freezer burn taste. For special events like weddings, make them 1-2 months ahead, as longer storage may cause them to absorb freezer flavors.
Serving Preparation:
Remove frozen mints 30 minutes before serving to allow them to reach optimal texture. They’re fine at room temperature for a few hours during serving but should be returned to refrigeration for extended periods.
Optimal Storage Conditions:
- Store in single layers with parchment paper dividers
- Use moisture-resistant containers to maintain texture
- Label containers with preparation dates for rotation
- Keep away from strong-smelling foods in the refrigerator
Conclusion
Cream cheese mints represent the perfect combination of simplicity and elegance in homemade confections. With just five basic ingredients and minimal active preparation time, you can create professional-quality mints that rival expensive store-bought alternatives while saving approximately 75% of the cost. These versatile treats adapt beautifully to any occasion through creative coloring and shaping, making them essential additions to your recipe repertoire.
Ready to create your own batch of these irresistible cream cheese mints? Try this recipe today and experience the joy of homemade confections that melt in your mouth. Share your beautiful creations in the comments below or leave a review to help other home bakers. Don’t forget to subscribe for more easy-to-follow recipes that bring professional-quality results to your home kitchen. Your next celebration deserves these perfect little indulgences!
FAQs
Q: Can I make cream cheese mints without a stand mixer?
A: Absolutely! While a stand mixer makes the process easier, you can use a hand mixer or even mix by hand. You’ll need to mix some of the sugar in by hand as the dough gets thicker, but the results will be just as delicious.
Q: How far in advance can I make cream cheese mints?
A: For special events like weddings, you can make them 1-2 months ahead and freeze them. For optimal flavor and texture, prepare them 3-7 days before your event and store in the refrigerator.
Q: Can I use silicone molds instead of rolling by hand?
A: Yes! Cream cheese mints work perfectly with silicone molds. Roll dough into balls, coat with granulated sugar, and press firmly into molds before inverting to release your shaped mints.
Q: What if my dough is too sticky to work with?
A: If your dough remains sticky, gradually add more powdered sugar until it reaches a play-dough-like consistency. The dough should be like Play-Doh and you can try chilling it in the refrigerator before shaping if needed.
Q: Can I make sugar-free versions of cream cheese mints?
A: Yes, you can substitute powdered erythritol or other sugar alternatives for the powdered sugar. You may need to adjust the quantities slightly to achieve the proper texture, and the mints will have a slightly different taste profile.
Q: Why do my mints taste too minty or not minty enough?
A: Peppermint extract strength varies by brand. Start with less extract and taste the mixture, adding more gradually until you reach your preferred flavor intensity. Remember that the mint flavor will be more subtle once all the powdered sugar is incorporated.

Cream Cheese Mints: The Ultimate Guide to Making Perfect Homemade Wedding Mints
- Total Time: 4-6 hours (includes chilling)
- Yield: Approx. 120 mints
Description
These melt-in-your-mouth cream cheese mints, also called wedding mints or baby shower mints, are the perfect homemade confection. With just five simple ingredients, you can create colorful, customizable mints that are firm outside, creamy inside, and cost 75% less than store-bought alternatives.
Ingredients
- 4 oz (113g) cream cheese, softened (brick-style)
- 1 tablespoon salted butter, softened
- 4 cups (500g) powdered sugar, plus extra for dusting
- 1/2 teaspoon peppermint extract
- 1/8 teaspoon vanilla extract
- Optional: gel food coloring
- Optional: granulated sugar for rolling (if using molds)
Instructions
- Line baking sheet with parchment and dust with powdered sugar.
- Beat softened cream cheese and butter until smooth (2-3 minutes).
- Gradually add 2 cups powdered sugar, mixing until smooth.
- Mix in peppermint and vanilla extracts.
- Gradually add remaining powdered sugar until dough is stiff, like play-dough.
- Divide and color dough if desired.
- Roll teaspoon-sized portions into balls and place on baking sheet.
- Press with fork dipped in powdered sugar to create crosshatch pattern.
- Let dry at room temperature, then refrigerate until set (4-6 hours).
Notes
Always use brick-style cream cheese, not spreadable. Use gel food coloring for best texture. Gradually add powdered sugar to avoid lumps.
- Prep Time: 15 minutes
- Cook Time: 0 minutes
- Category: Candy
- Method: No-Bake
- Cuisine: American
Nutrition
- Serving Size: 1 mint
- Calories: 41
- Sugar: 8g
- Sodium: 10mg
- Fat: 1g
- Saturated Fat: 1g
- Unsaturated Fat: 0g
- Trans Fat: 0g
- Carbohydrates: 8g
- Fiber: 0g
- Protein: 0g
- Cholesterol: 3mg
Keywords: cream cheese mints, wedding mints, homemade mints, baby shower candy, no-bake dessert